Brightlink 595Wi Projector Review - Interactive Features Setup, Calibration and Use
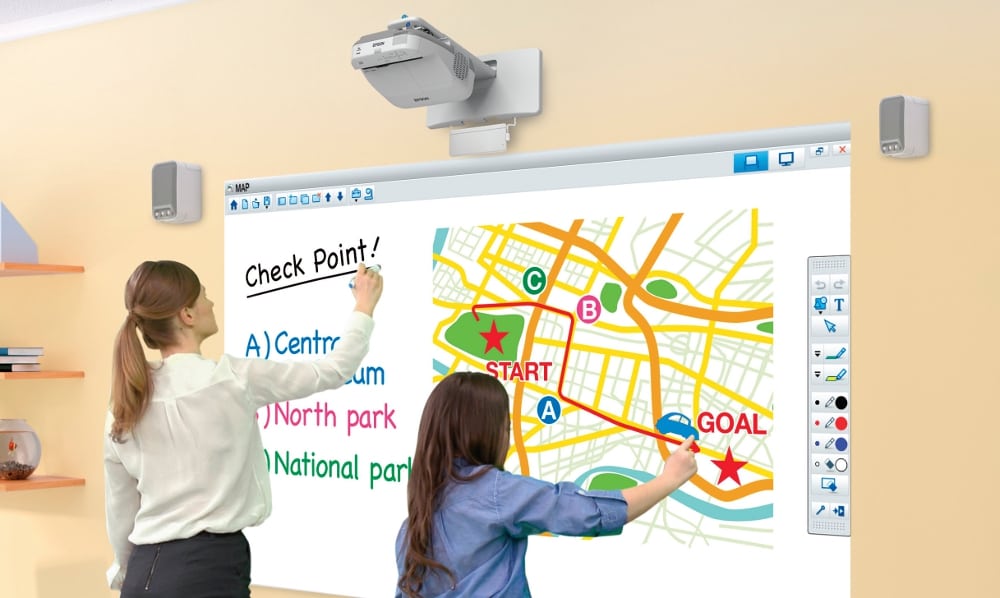
Epson Photo of Interactive Whiteboard
Epson has a short video on their web site
(HERE) that demonstrates some the BrightLink 595Wi's interactive features in action using a combination of pens and fingers.
Installation
The BrightLink 595Wi will normally be wall mounted in the inverted position, as shown in the photo below, for use of the interactive features. The Touch Unit is shown mounted just below the projector.
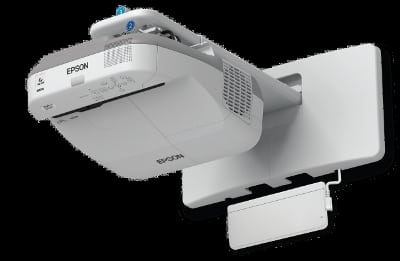
Wall Mounted Projector and Touch Unit
In fact, the setup menu for the Touch Unit is only accessible when the projector is mounted in either the inverted position (i.e., wall mounted) or in a vertical position, as would be used to create an interactive table top. Note that the menus for the touch function are not available when the projector is simply placed on a table. Since I was only testing the 595Wi for a few days, I really didn't want go to the trouble of wall mounting the projector (let alone having to later repair the holes that would be created in my wall by the mounting hardware). After consulting with Epson I was able to find a work around for the testing of the interactive features, but the approach I used would not be practical for a "real" installation. So using the using the supplied wall mount to install the projector just a few inches above a whiteboard/screen it the way to go for vast majority of installations. The other will be mounting the projector vertically at the back of a (large enought) white table to created an interactive table top. Also as mentioned earlier in this review, the projection surface needs to be rigid, such as a whiteboard or table top, and not a flexible fabric projection screen. This is necessary since the interactive pens have a pressure sensitive tip that must be pressed against a hard surface for drawing or selecting menu items. Even with finger touch, a lot of touching is sure to soil the screen and potentially cause damage over time. The Touch Unit is easy to install if you are using a magnetic whiteboard, as the touch unit has mounting magnets on its back side - just stick it at the top-center of the whiteboard about an inch above the top of the image. Lacking a magnetic surface for mounting the Touch Unit, it will need to be attached with screws.
Setup and Calibration
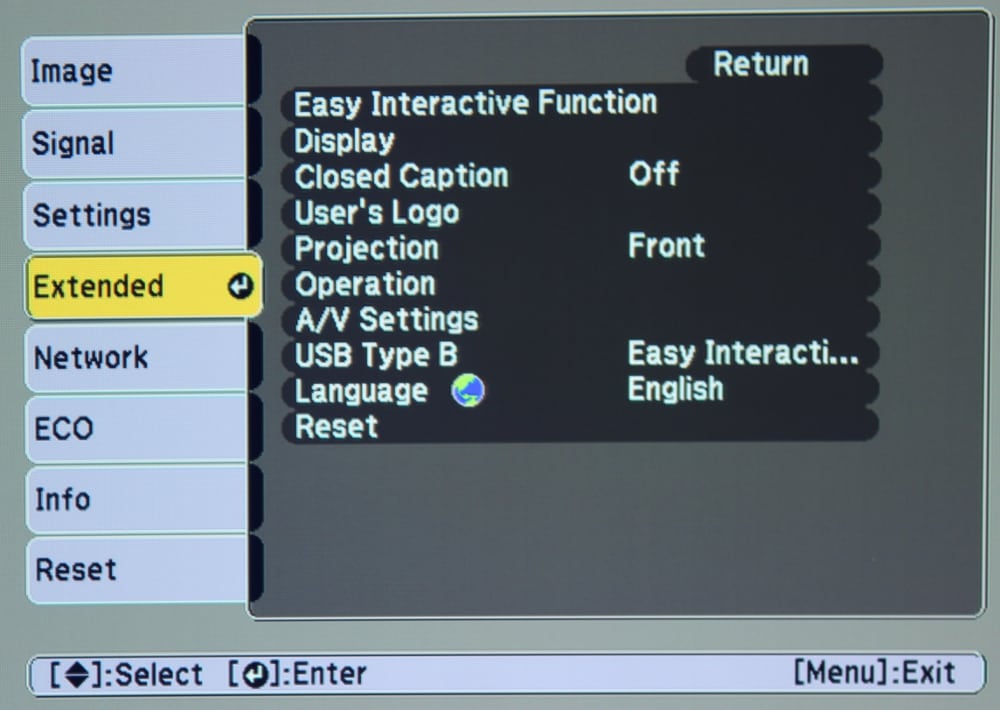
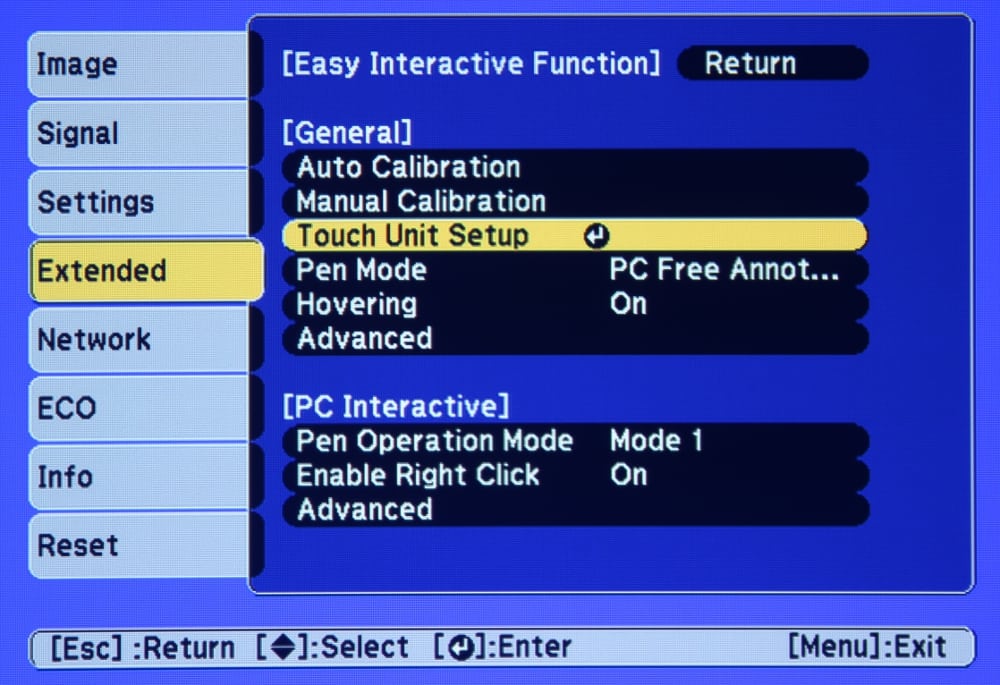
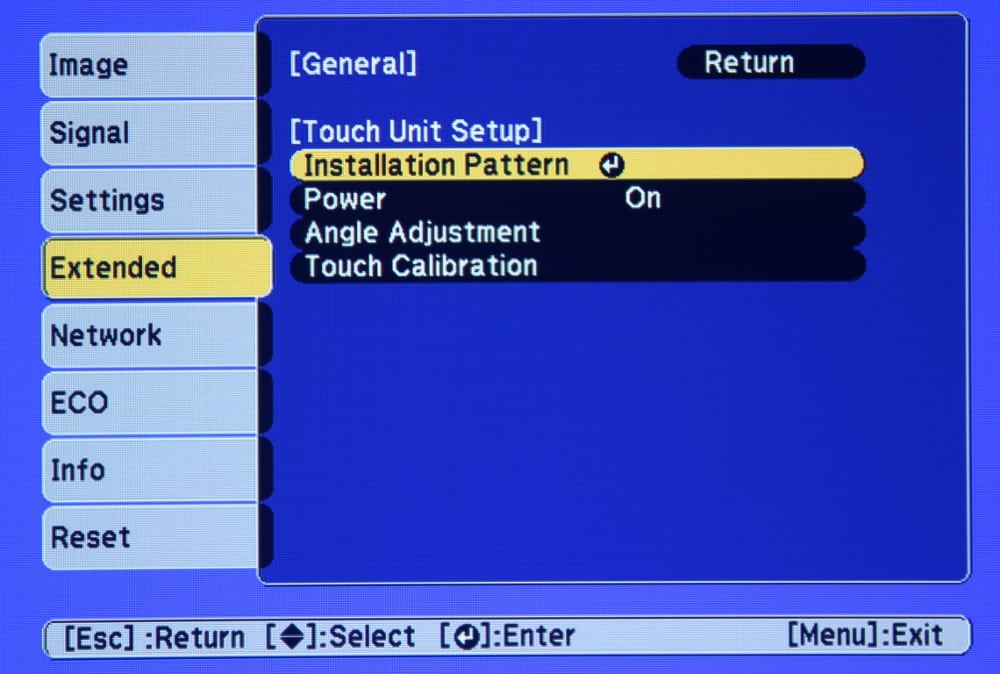
The "Extended" settings menu (photo 1 in the above gallery) provides access to several functions for setting up the 595Wi, including the "Easy Interactive Function". Selecting that function brings up the submenu, (photo 2 in the above gallery) for setting up the light pen and finger touch interactive features. The 3rd photo in the gallery above shows the Touch setup menu. From the Easy Interactive Functions menu, the first step is to perform the auto calibration, which does a initial calibration for the interactive pens. This will display a series of test patterns starting with the screen shown in the photo below. 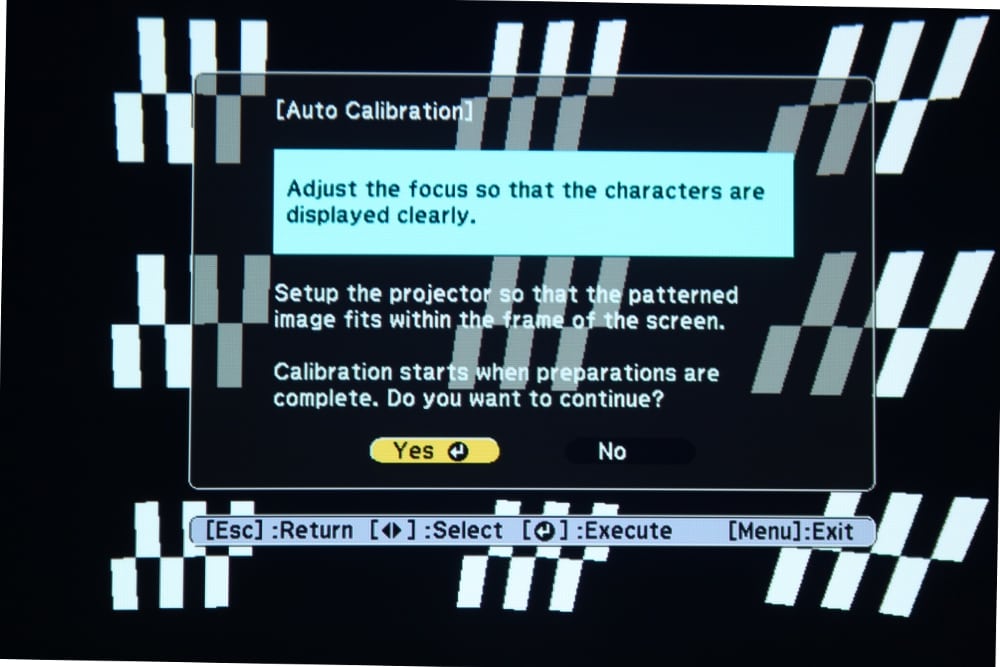 Next the manual calibration needs to be performed to get a more precise calibration for the pens. A series of screen are displayed with each have a single spot (target location) where the pen must be touched against. This completes the pen calibration and the next step it to calibrated the finger touch function. The Touch Unit must be turned on via the projector's touch setup menu. The Touch Unit, when mounted just above the top center of the screen, should be horizontally centered with the projected image using the following test screen.
 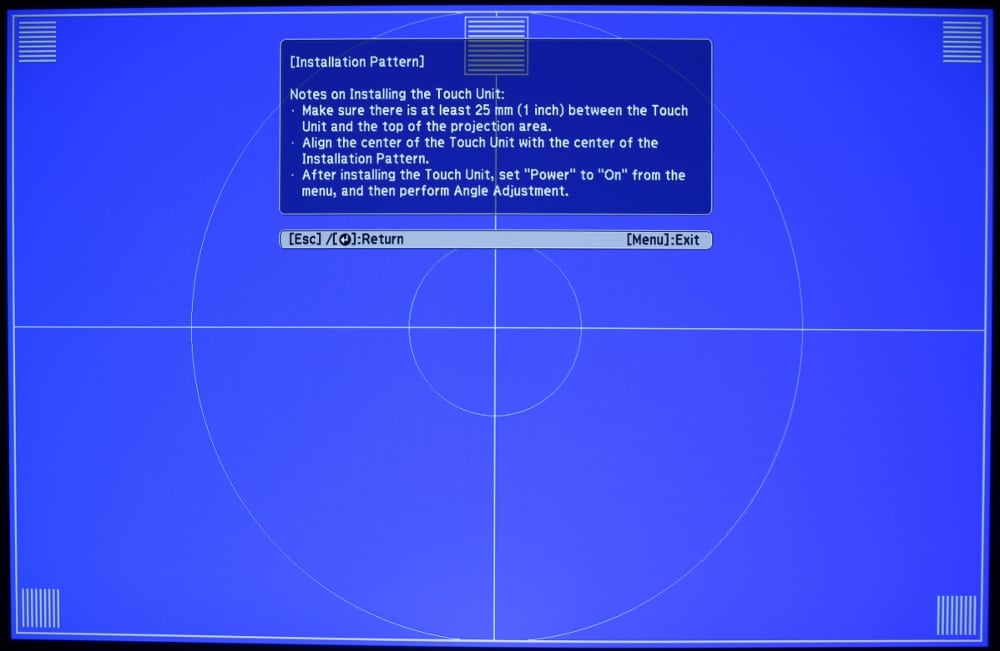 The next screen shot shows the first screen that is used to adjust/calibrate the Touch Unit.
 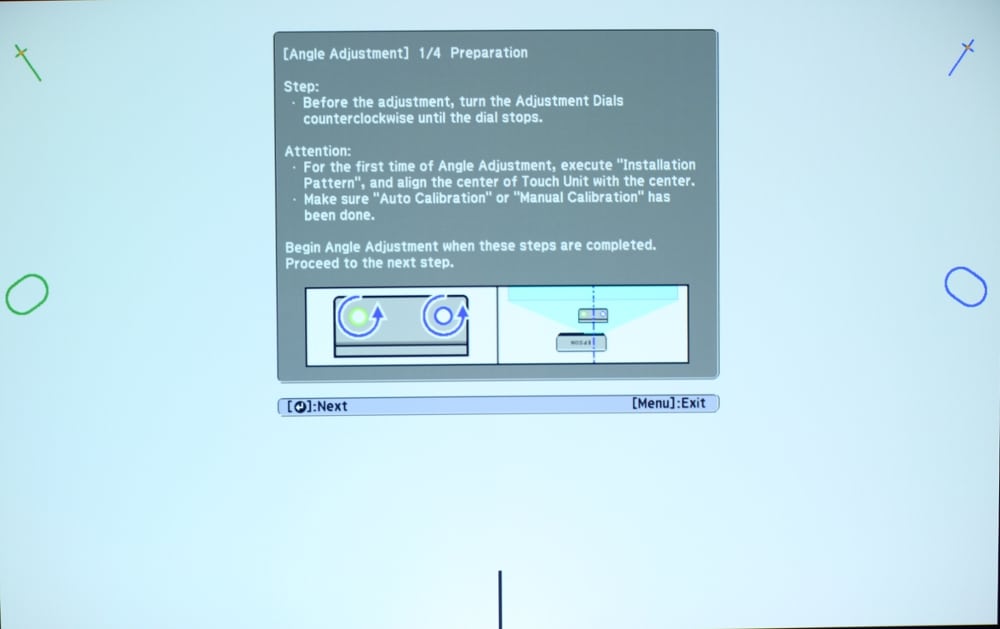 The Touch Unit comes with a pair of "Markers", what are small plastic calibration aids (shown in the photo below) that must be affixed to the whiteboard/screen at the two locations marked on the calibration screen shown above.
 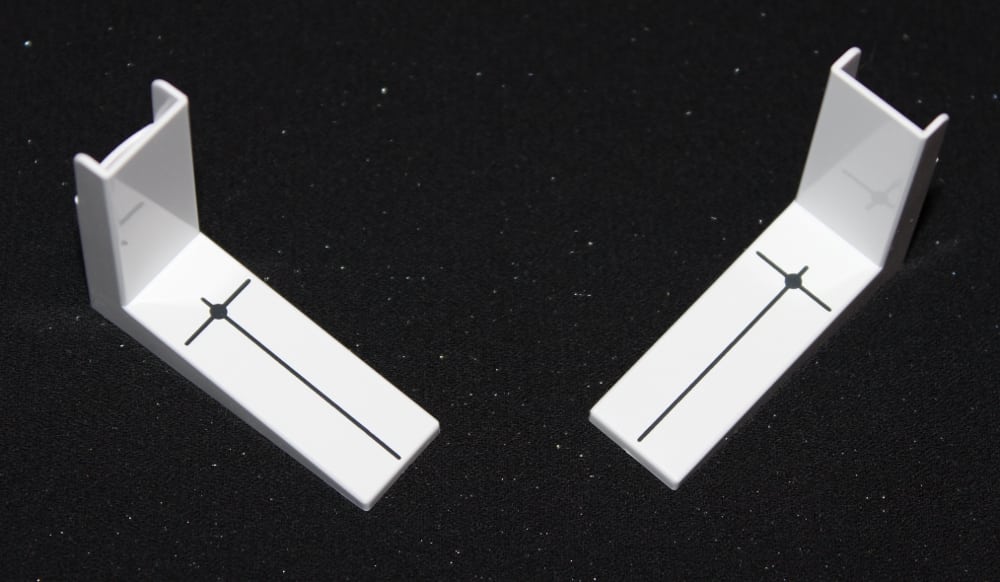 These markers have magnets on the back side so if a magnetic whiteboard is being used as the projection surface they can simply be placed at the correct locations. However, if the projection surface is not magnetic then they can be held in place with tape (that's what I did for my test setup). The projected cross lines are to be aligned with the cross lines printed on the marker, as shown in the photo below.
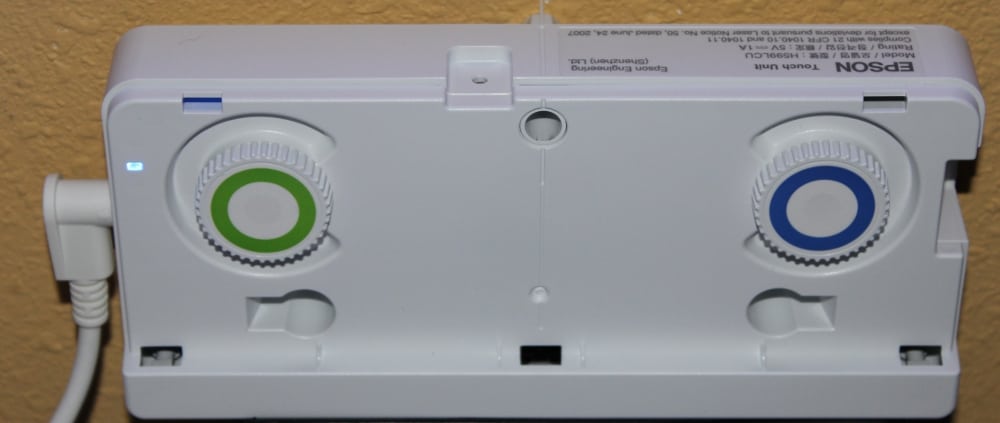
 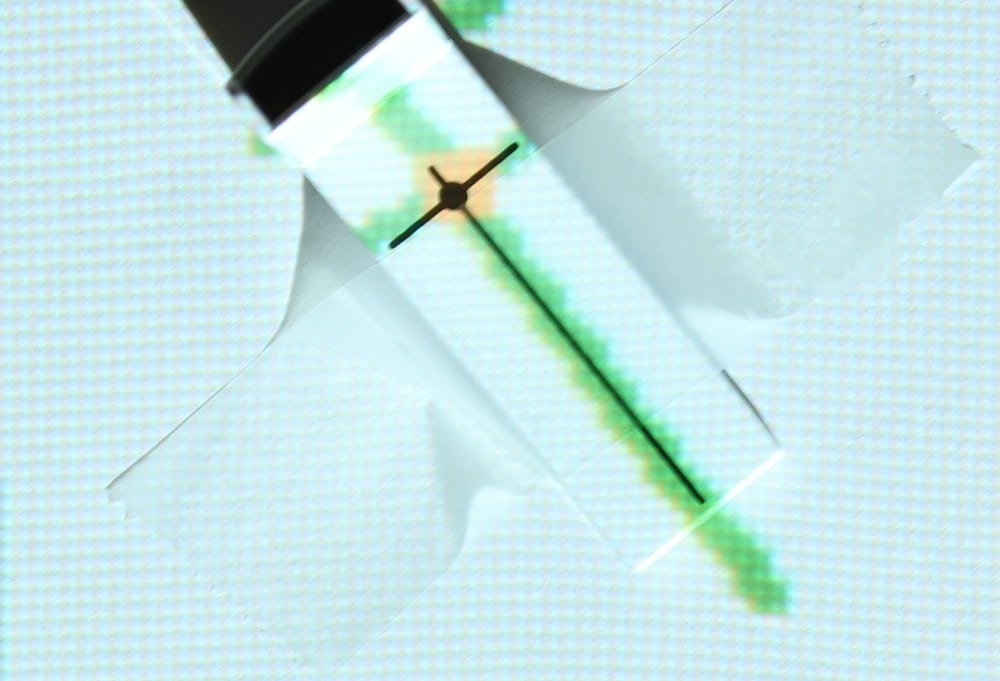 Next each of the two knobs on the Touch Unit is turned until the displayed circle moves into the oval, as shown below. The left knob adjusts for the calibration position on the left side of the screen and the knob on the right adjust for the position on the right side.
 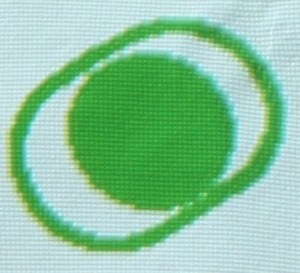 Once this is accomplished for the two calibration points the next calibration screen has four more calibration points with two closely spaced points labeled #1 and #2 on each side of the projected image. A marker is placed first at the point labeled #1 and the adjacent circle should become filled in (as shown in the photo below). Then the marked is moved to the point labeled #2 and the circle adjacent to that point should become solid. No adjustment of the touch unit is necessary in this step as it is just a check to verify that the previous step was done correctly.
 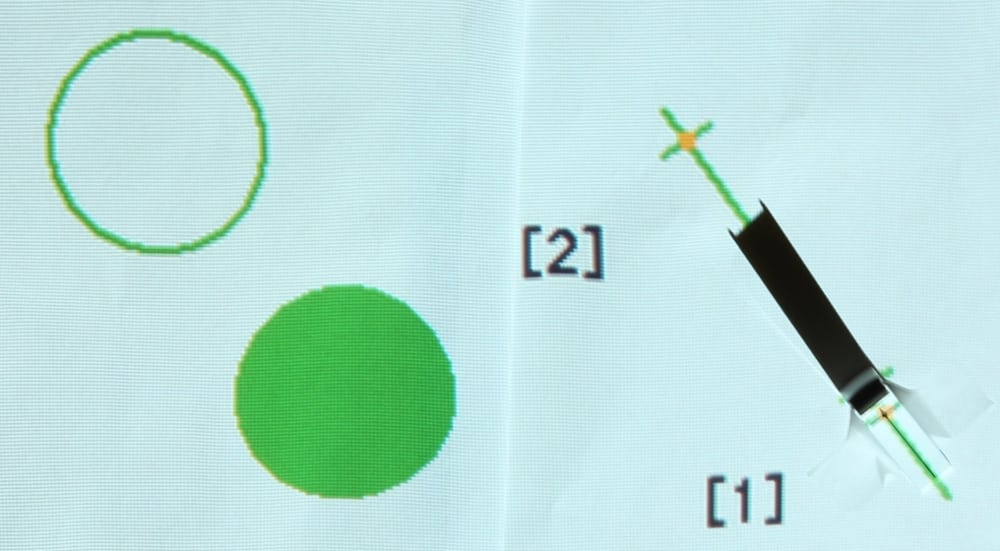 The final step uses the following test pattern.
 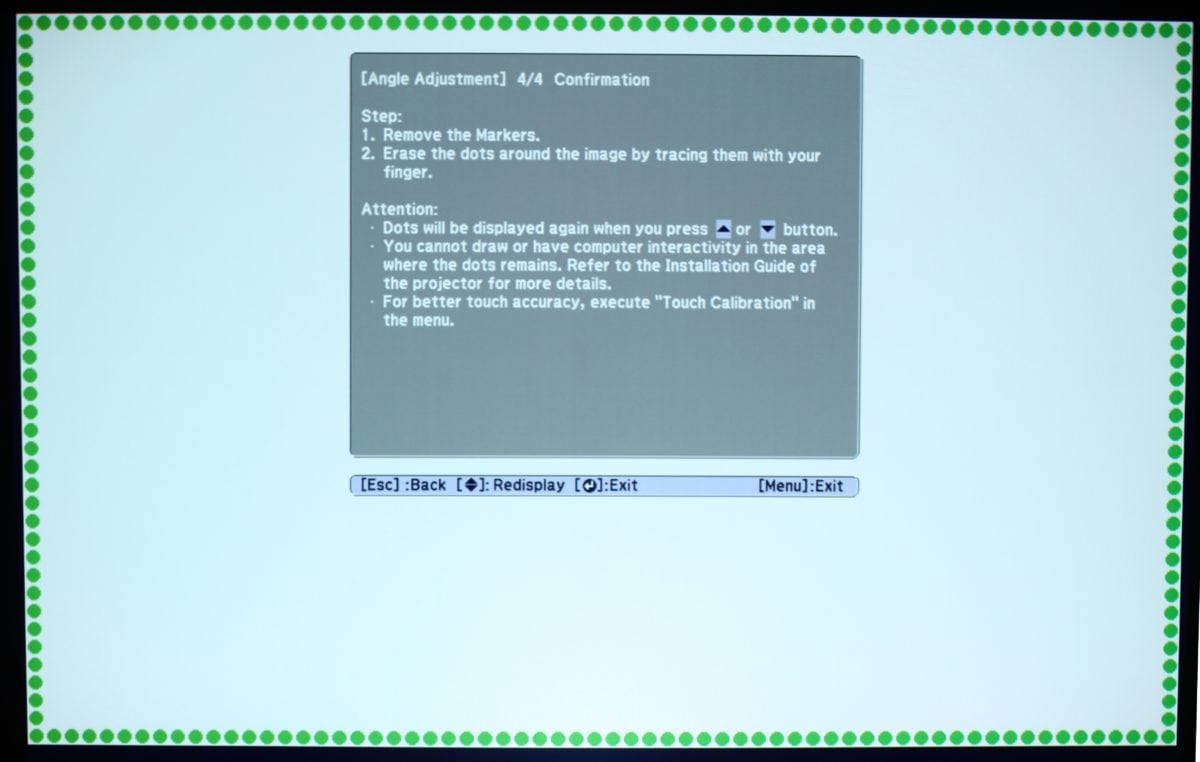 Using the above calibration screen you move a finger along the green dotted line surrounding the outside edge of the image and the dots are erased as you touch their position. This completes the calibration of the touch interactive function and the 595Wi is then ready to use in fully interactive mode.
Using the Interactive Features
I did some testing of the basic interactive features of the 595Wi. First I used one of the light pens (shown in the first photo below) to verified that actual vs. detected point that I touch the tip of the pen to the screen was offset less than 1/2 at any of the several locations across the screen surface that I tested.  I used the pen for drawing (see the following photo) and also for selecting items from on-screen menus. I found the pen worked reliably for both of these functions. A single tap of the pen on the whiteboard acts as a left mouse button click, two quick taps act as a double click, the button on the side of the pen acts as a right mouse click, and you can also tap and drag objects.
 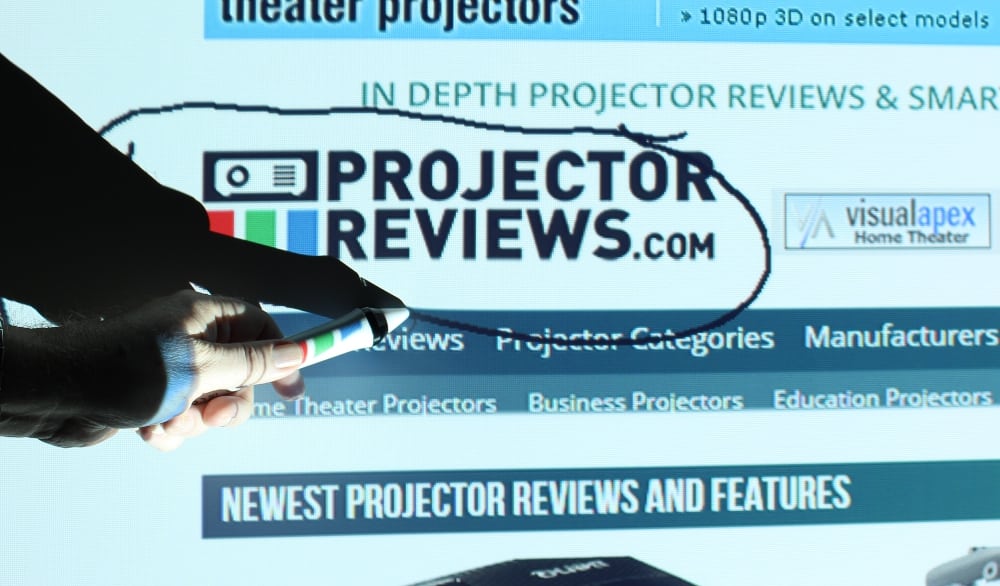 Using the Finger Touch Function
I tested the using finger touch for both drawing and for selecting menu items. The projector has a built-in function for using the finger touch inputs for annotating projected images. With my laptop connected to the 595Wi via an HDMI cable I displayed the Projector Reviews home page. First I tapped the screen to bring up the display of the toolbar, shown below (a vertical bar displayed along the left edge of the image).
The Bottom Line on Interactivity
The bottom line is the Epson BrightLink 595wi does a great job at supporting remote, pen and finger touch interactive capabilities for the classroom or boardroom. Great job Epson!
