Projector Reviews Images

Epson Powerlite 96W Projector - Physical Tour

Posted on July 31, 2013 by Phil Jones

Appearance

Starting at the front of the projector, the 96W has its lens slightly right of the center of the projector when facing it.  There is the usual manual, sliding lens cover, adjustable from the top of the projector, that protects the lens when not in use and also provides video and audio mute (A/V Mute) when the projector is in operation.  As is the case with other Epson models, A/V Mute can also be accessed from the remote, allowing for display of a blue screen or alternate screen (such as company logo).  A/V Mute is used to allow for a pause for questions during a presentation while helping to save lamp life.  Right behind the A/V Mute lens cover switch are recessed, tabbed rings for adjusting lens zoom and focus.  To the left of the lens, on the front panel, is an IR receiving eye followed by an exhaust vent.  Height adjustment is obtained via a push button adjustable foot in the center front of the 96W.  Both rear corner feet are adjustable as well.


On top of the projector, right in the middle of the projector, is a control panel with the most of the  important controls.  There are buttons for Power, Source Search, Menu, Navigation, Escape, and Enter.  The menu navigation buttons double as adjustment buttons for vertical and horizontal keystone adjustment.  Following those are buttons for adjusting the volume of the built-in speaker.  Lastly, there is a Help button (also on the remote) which Epson has offered on previous models as way to solve simple problems that may occur in use, without having to stop and consult the manual.  Pushing this button brings up some questions designed to narrow down the problem.  The Help function then takes you directly to the appropriate section of the menu to address that problem.

Indicators for Power, lamp status and temperature (if overheating) are along the left (facing the front) top edge of the projector.  In the rear left corner, behind the control panel, is the cover for access to the lamp.  Having the cover on top of the 96W allows for easy access even if the projector is ceiling mounted.  The screw to release the cover is on the left side of the projector.  Moving to the right (again facing the front) side of the projector, there is an intake vent and air filter near the front.  Like the lamp compartment, the air filter can be easily accessed even if the projector is ceiling mounted.  The door to access the air filter also covers the slot for the optional wireless LAN module.

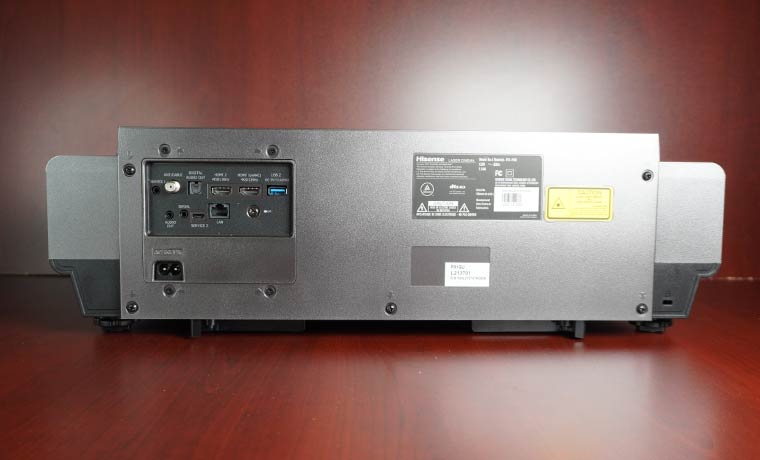
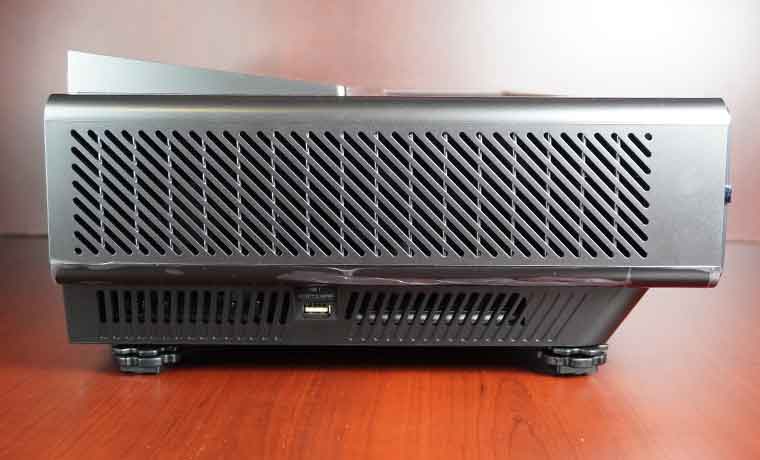
Moving to the rear panel, there are a plethora of connections for video and audio.  Starting with the power cord connector on the bottom, moving from left to right, there is an HDMI input, followed by an S-video and a composite video input, with stereo audio inputs.  Next are two standard VGA computer inputs with accompanying audio inputs.  These are followed by two USB connectors, a standard Type A for a USB thumb drive and a Type B that is used for connection to a computer to output video over USB to the 96W.  Following those is a wired LAN jack, a second IR receiving eye, a Kensington lock port and the built-in speaker.  Along the bottom of the rear panel are computer monitor and audio outputs, a microphone jack and an RS-232 control port.

Epson Powerlite 96W Setup

The Epson Powerlite 96W’s startup time is typical for projectors in this class, projecting a readable image on the screen in about ten seconds.  The 96W also has instant shut down as well, so the the projector can be moved immediately after shutdown.  As is typical of projectors in this class, placement is critical as the short-range 1.2X zoom and lack of lens shift doesn’t give you much flexibility in the vertical and horizontal location of the projector.  Fortunately, the bottom of the projected image is right at the center of the lens when table mounted, so keystone correction can be avoided by placement on a table that’s equal in height or lower (thanks to the front and rear height adjustment capability) than the bottom of the screen.   If you do need some keystone correction, the 96W has both vertical and horizontal keystone adjustment, as well as an advanced keystone adjustment feature called “Quick Corner”.  Unlike using regular keystone adjustment (which affects entire sides of the image), Quick Corner allows you to adjust each corner of the projected image independently.  This can come in handy if the projector is not going to be permanently mounted and is tilted up (as much as 30 degrees) or placed at an angle.  As with any digital manipulation of the image, the sharpness and precision of the image can suffer with overuse, but by affecting a smaller area, using Quick Corner has less of a negative effect as compared to traditional keystone adjustment.

Menus

As we noted with the recently reviewed 1775W, Epson has kept its menu system pretty much the same over the years, with the only differences relating to the feature set of the particular projector.  Menus are well organized, and easy to navigate.  Once set up and connected to an image source, you simply bring up the menu; select the Image menu and the Color Mode (Dynamic, Presentation, Photo etc.) that’s appropriate for your presentation.  From there you can also make the usual adjustments for Contrast, Brightness, Color Saturation, Tint and Sharpness.  Additional adjustments can also be made to Red, Breen and Blue intensity, as well as selecting other color temperatures and turning the auto iris (for increased contrast in darker scenes) on or off.

As evidenced by its built-in 16-watt speaker, the Epson 96W’s is specifically designed for presentations with sound.  As such it has multiple audio inputs, including one for a microphone.  In the unlikely event that you would need an external audio system, there is an audio output jack whose level can be controlled by the remote.

Menus Slideshow

Image Menu

Quick Corner Menu

Epson Powerlite 96W Remote Control

Much like the menu system, the 96W’s remote is consistent with other models in the Epson lineup.  With a few exceptions, it is virtually identical to the recently reviewed 1775W’s remote.  It is well laid out, allowing easy access to the most used functions.  An on-screen pointer can be brought up by a button push on the remote and then moved around with the arrow keys.  Similarly, other buttons search for or directly access inputs, access the Help function, control the electronic zoom, presentation pages and speaker volume.  If external speakers are connected to the audio out, the remote’s volume control will control them as well.

The buttons are not backlit, but that can be distracting during a presentation where the remote may be in constant use.  As was the case with the 1775W we previously reviewed, the buttons for the most of the functions are all the same size and color, making it difficult to locate them in anything but a fairly well-lit room.  Fortunately, the Menu and menu navigation buttons are separated from the rest on the bottom third of the remote, making them easy to access in a darkened room.

Click Image to Enlarge

Latest Reviews

February 25, 2024

Introducing the Hisense C1: A cube-shaped 4K UHD lifestyle projector with an RGB triple laser light source and integrated JBL ...

February 19, 2024

The BenQ X3100i is a 4LED, 4K UHD (3,840 x 2,160p) 0.65" DLP short-throw gaming projector that offers a BenQ-rated ...

© 2024 Projector Reviews

crossmenu linkedin facebook pinterest youtube rss twitter instagram facebook-blank rss-blank linkedin-blank pinterest youtube twitter instagram