Menu
Image
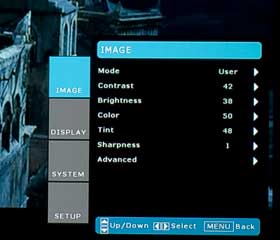
Classic Optoma menus, and they are well laid out. The Optoma HD8200's Image Menu is the first main menu. It handles just about everything image related except lamp settings, and things more setup oriented.
There are layers of menus. Selecting Advanced, from the Image menu brings up options such as access to the individual RGB settings, dynamic iris settings, color temperature and gamma choices.
The Display menu offers overscan and edge masking options along with digital vertical image shift and keystone adjustment (avoid using keystone correction).
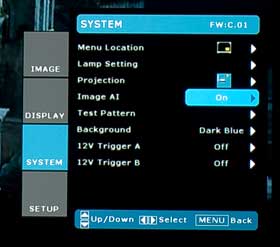
The System menu, shown here, handles lamp controls, their Image AI, setup of the 12 volt screen triggers, background color, and even a couple of test screens.
Finally, there is the Setup menu, it includes, among other items, menu language choices, selection of the high altitude fan mode, and an auto power off feature (if no source signal). In addition there is a Reset for that screen, or the entire projector (be careful!)
Image
System
 Overall, the HD8200's main remote is nicely laid out. Strangely, if I have one complaint, it is almost blindingly bright in a dark room. It can actually be bright enough, when trying to make minor adjustments, to make it hard to see subtle changes. I have to settle for holding the remote so that the lighting faces away from me, using the light to find the appropriate button, but then working from touch.
Since the Optoma remote lights up, with the touch of any key, you can't use it with the blue LED lighting off, as you can on some other remotes.
In fairness, as a reviewer, I'm constantly playing with settings, so I'm sure I use the remote control quite a bit more than the average owner.
A typical user primarily gets things set up, and uses the remote very little except for powering up/down, and changing the picture modes.
The HD8200's remote has separate buttons at the top, for Power on, and Power off. There are direct access buttons for common image settings like brightness and contrast, as well as buttons for iris control, and lamp mode. In addition, still above the navigation section are a pair of buttons for digitally moving the image up or down on the screen. An example of using that might be to lower the projected image of a letterboxed movie, so the bottom of the actual movies is flush with the bottom of the screen surface.
Next comes the navigation area, with four arrow keys in a round configuration, with Enter button in the center, and the menu button to the lower left. The picture mode button is across from it in the lower right. There are two buttons one for each 12 volt screen trigger. You might use one of them for a motorized screen, the other for controlling a masking system or the motorized sled for an anamorphic lens.
Below all that are buttons for different aspect rations, and finally, six direct source buttons.
Overall, it's a really well laid out remote, and has very good range. Just don't forget your sunglasses!
Introducing the Hisense C1: A cube-shaped 4K UHD lifestyle projector with an RGB triple laser light source and integrated JBL ...
The BenQ X3100i is a 4LED, 4K UHD (3,840 x 2,160p) 0.65" DLP short-throw gaming projector that offers a BenQ-rated ...