Projector Reviews Images

Sanyo PLC-XL50 Home Theater Projector Review: General Performance

Posted on October 3, 2013 by Art Feierman

PLC-XL50 Projector: Menus

Although I've never been enthused about Sanyo's menu layout and structure, they do get the job done, and Sanyo provides an extensive set of controls.

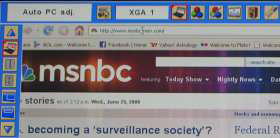
Upon pressing the menu button, a small, horizontally long menu bar appears at the top left of the screen. When you select any of the main menus shown, a drop down menu appears as well. All are done with very small graphic icons, but as you use the arrow keys to point to different icons, a one or two word text description appears at the top left. A number of the menus are more than one page, with up and down arrows (triangles) to select the additional "page" of options. To move back up a level in the menus, you normally scroll down to the Exit icon (an open door) on the left column, and press the Select (enter) button to move up to the higher menu levels. (You can see the "next page" down arrow in the image above, as the last item (green) on the left pulldown menu).

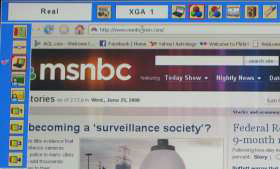
The main menus consist of (from left to right): Input, System (resolution related), PC (manual image adjustments for position, clock rate, etc.) Auto features normally make manual control unncessary. Continuing to the right: Image Select (shown on the right) offers choice of modes such as Dynamic, Standard, Real, Blackboard, Greenboard, plus 4 user settings.

Autopcadj

Colortemp

Gamma

Input

Real

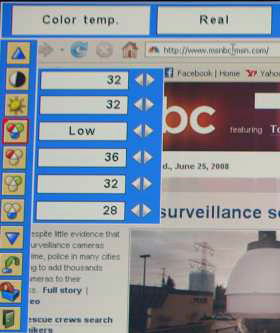
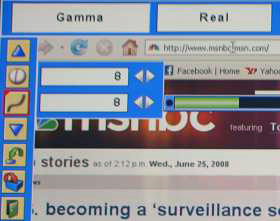
Next in line is the Image Adjust menu, with extensive controls over the image, in terms of the usual contrast, brightness, Color Temp, RGB white balance control, Sharpness and Gamma. As you can see from the image on the right, there are also separate color controls for each primary color (red, green, blue). The 6th item in the top menu is the Screen Menu, and controls aspect ratio.

The 7th is the Sound Menu - which does just that - control volume, and mute.

Last is the Settings menu, which controls operational aspects, a wide range of choices including language choice (for the menus), digital zoom, keystone correction, uniformity control (of the background), menu display options, the ability to add a custom logo for display, and projector orientation (front/rear/table/ceiling). There is also an extensive Power Management set of controls.

In addition, lamp control is on this menu, offering full brightness, economy mode, and an auto mode that varies it with the input signal.

Bottom Line: As noted earlier, the Sanyo is extremely well endowed, in terms of offering a wide range of controls, rivaling or exceeding most other projectors. Icons are hard to figure out, but the text box description does tend to solve that problem.

I should note that the XL50 has two sets of remote codes, which essentially allow you to use one remote to control two different XL50's in the same room. This can be very handy is specialty situations, such as edge blending, as well as just making life simple in general, when two of the projectors are in one room.

PLC-XL50 Projector: User Memory Settings

Sanyo provides four user savable settings, which is very nice considering many business projectors don't have any ability to have more than one setup stored.

PLC-XL50 Projector: Remote Control

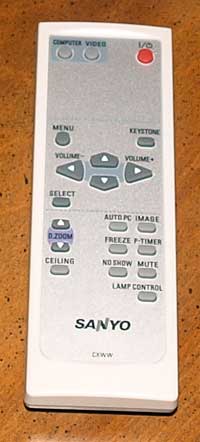
The remote control is a medium small affair. It doesn't have a whole lot of buttons, yet the buttons themselves are very small. There's plenty of blank areas on the remote control, yet the buttons are often clustered tight together. The power button is at the top right.

Top left are two buttons for selecting video, or computer sources. Since the projector has multiples of both, it means you may not be able to jump directly from one source you want to display, to another, but have to toggle through unused inputs. At least having two buttons (one computer, one video) is better than just one input button, and at least offers the probability that you can jump directly from one source to another, in some circumstances This pairs with the ability to define which sources are on each of the two inputs (video and computer).

Moving down to the second section you'll find a Menu button on the left, Keystone on the right, and four arrow keys in a somewhat "flat" layout. The Arrow keys control menu functions. The Select (enter) button is just below, on the left. The left and right arrow keys double as a volume control, when the menus aren't engaged.

That leaves us with the third and "busiest" section, in terms of number of buttons: On the top left of this section are up and down arrows for controlling the digital zoom. Below that is a button labeled Ceiling - which toggles you through the ceiling/table/rear/front options for the projector.

On the right size, is an Auto PC adjust button, which should do the trick in almost all setups with analog computers. Next is the Image button, which lets you toggle between the four user savable settings. Below those two are the Freeze image button and the P-Timer button which is short for Presentation Timer, and puts a timer up on the screen to help presenter's rehearse their timing, or to keep presenters on schedule in a live presentation.

Next come No Show, and Mute. No Show mutes the image, Mute, mutes the audio.

And finally, that leaves Lamp control which lets you toggle through the three options - Bright, Low, and Auto.

Click Image to Enlarge

Latest Reviews

February 25, 2024

Introducing the Hisense C1: A cube-shaped 4K UHD lifestyle projector with an RGB triple laser light source and integrated JBL ...

February 19, 2024

The BenQ X3100i is a 4LED, 4K UHD (3,840 x 2,160p) 0.65" DLP short-throw gaming projector that offers a BenQ-rated ...

© 2024 Projector Reviews

crossmenu linkedin facebook pinterest youtube rss twitter instagram facebook-blank rss-blank linkedin-blank pinterest youtube twitter instagram