Assembling the Screen Frame
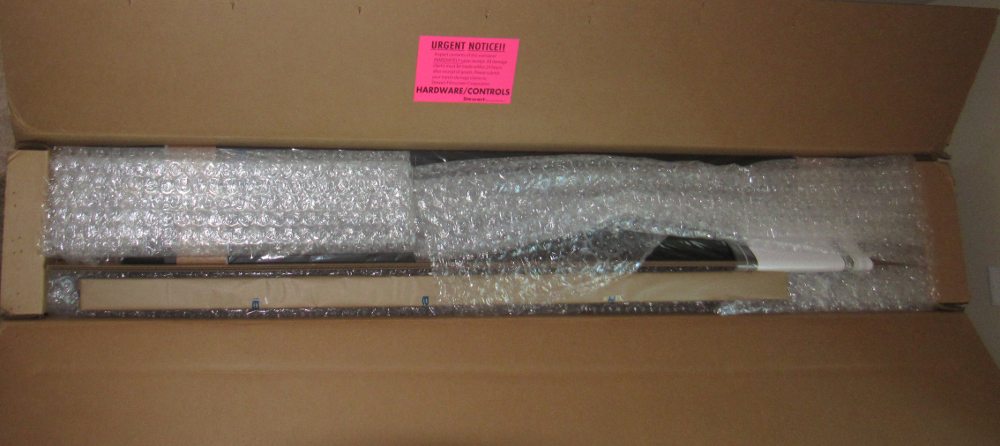
While the assembled screen frame has an overall horizontal dimension of about 133.5 inches, I elected the option to have the top and bottom of the screen frame made in two sections. This allowed the screen to shipped in a heavy duty box weighing approx. 80 pounds and having a size of about 82 inches long by 14 inches wide and 12 inches deep. The photo below shows how all of the parts where packed into this shipping box.
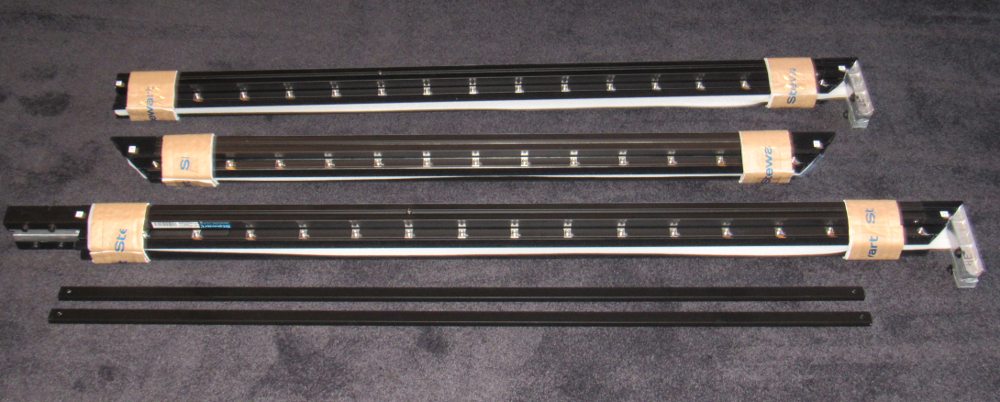
The photo below shows all of the parts that make up the screen's frame. The 6 frame sections were bundled with two per set. Note if the top and bottom frame sections were each provided as single piece then there would only have been 4 frame sections instead of 6. The additional back supports (braces) are the two smaller items at the bottom of the photo below.
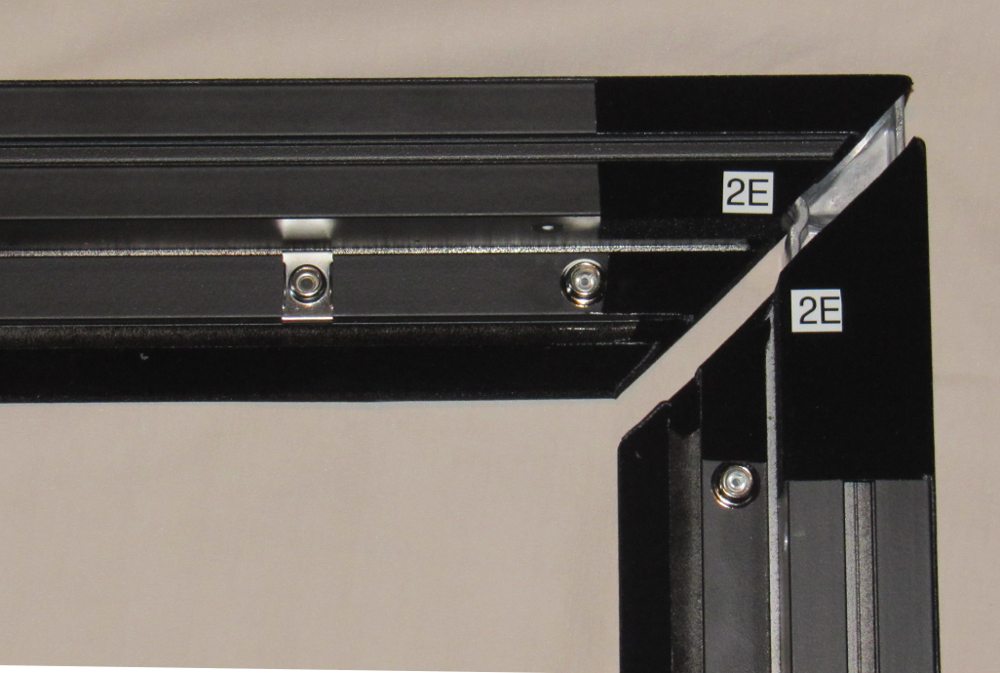
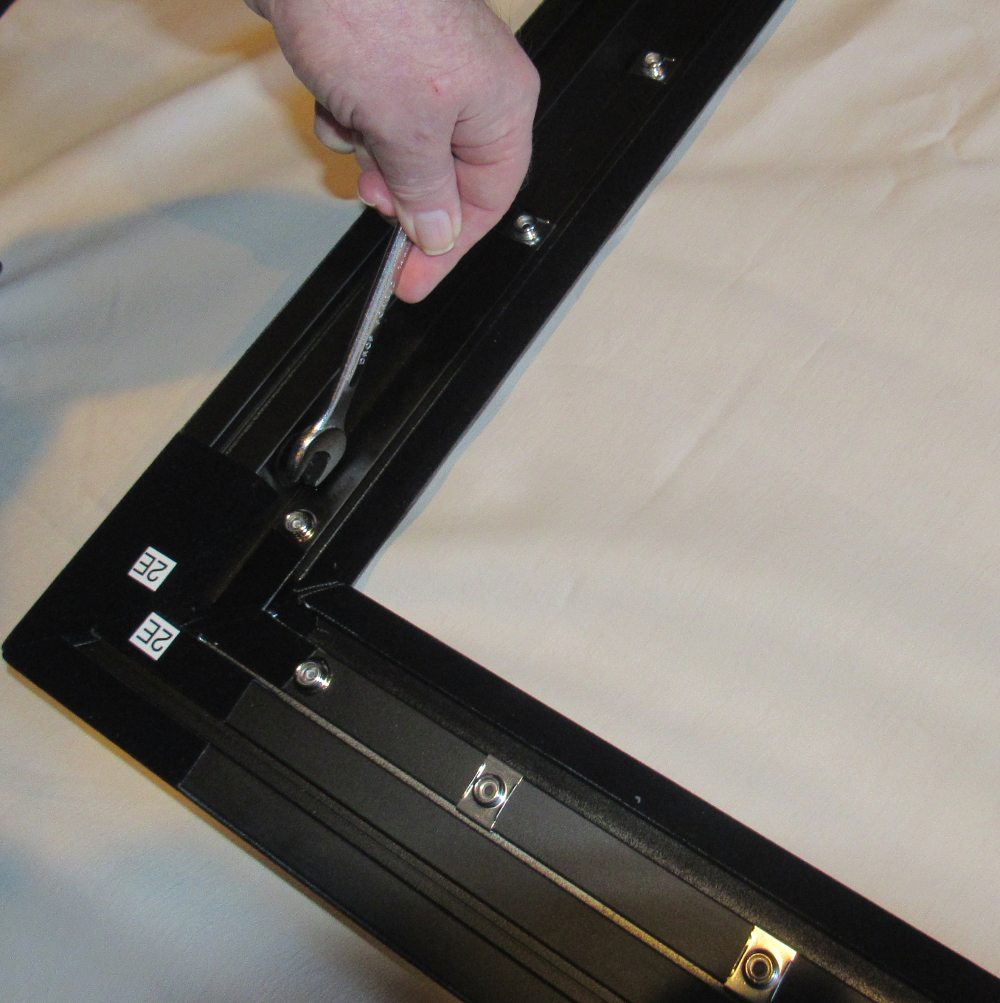
The photo below shows two screen frame sections being joined at one of the frame's corners. Stewart places labels on the matching sections that are to be joined together (i.e., "2E" in this case). Also the snaps (male half of the snaps), that are seen in the photo below, came pre-installed at the factory to the rear of the frame.
The following photo shows tightening of the single bolt that secures the two sections of the screen frame together.
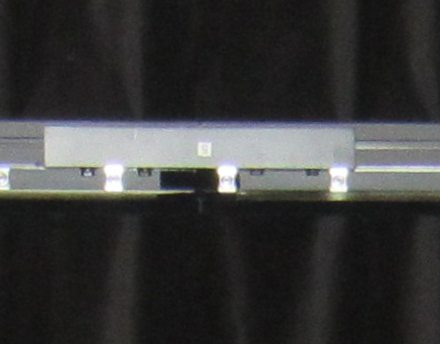
When the top and bottom of the screen frame have been supplied in 2 sections, then these frame sections slip together in a manner similar to the corners and also have a "L" shaped metal bracket (i.e., for added strength), as seen in the photo below. This bracket comes already attached to one of the frame sections and after the two frame sections are slid together the bracket is then attached to the other frame section with two bolts.
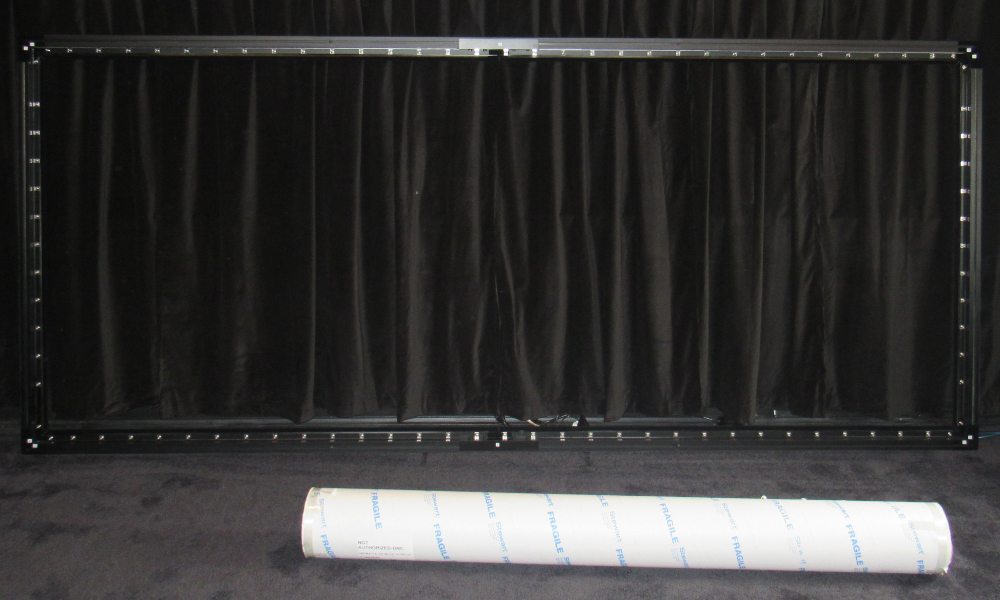
The photo below shows the rear of the assembled screen frame with the shipping tube for the rolled-up screen fabric.
Attaching the Screen Fabric and Final Assembly
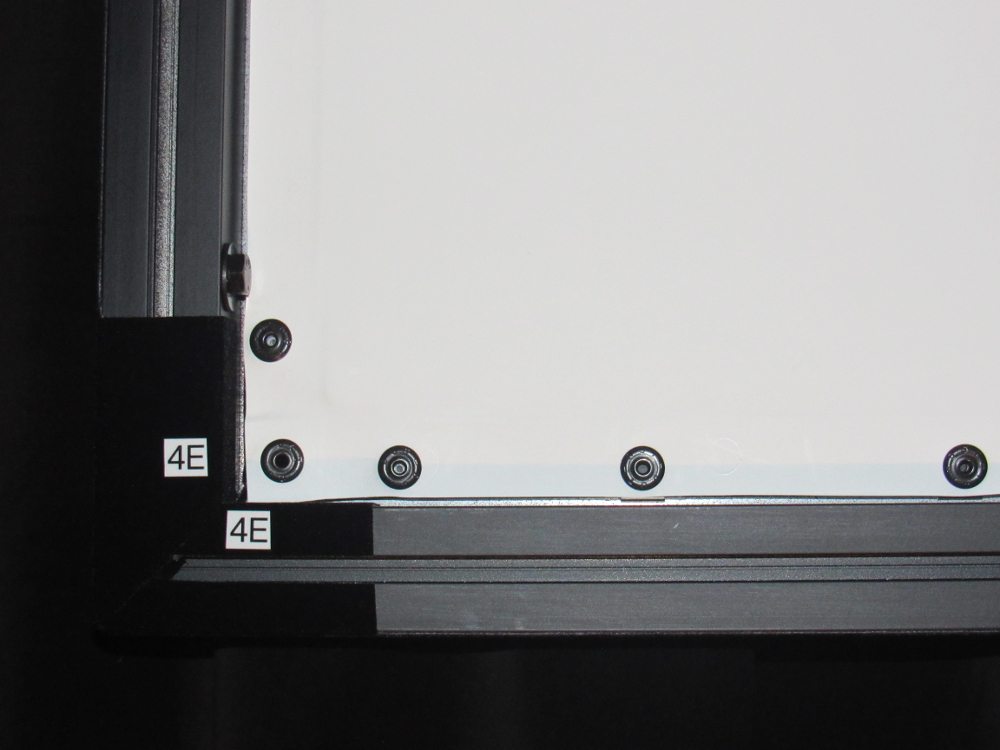
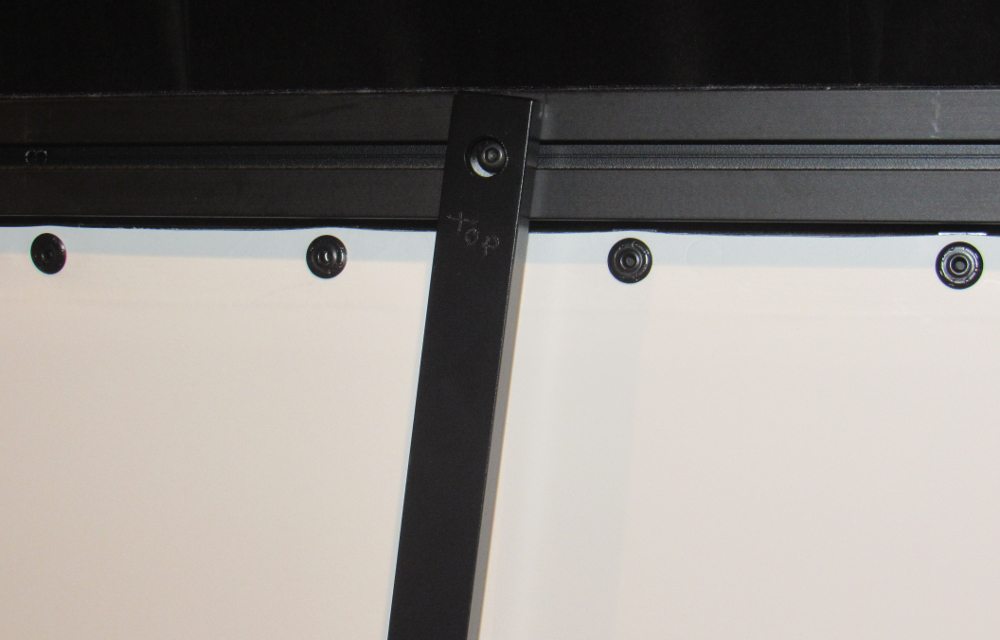
The screen fabric is attached to the rear of the screen frame using snaps. One half of each snap comes installed on the screen frame and the other half is installed to the supplied screen fabric. One corner of the rear of the screen is shown in the photo below after the fabric was snapped into place. The snaps are located every few inches along the top, bottom and sides of the screen frame with matching snaps installed on the screen fabric. I had no difficulty getting the fabric attached to the frame and the result was a very flat, taut screen surface without any waves or other issues.
After the screen fabric was attached to the frame, I installed the two supplied back supports (i.e., braces) to the rear of the frame. Smaller sizes of this screen may not require a back support or only a single one. The back support is attached with a bolt that screws into a nut that is captured in a slot on the rear of the top/bottom screen frame sections. The photo below shows the end of one of the back supports where it has been attached to the screen frame.
I found the assembly instructions provided by Stewart were a little vague as to the attachment and proper positioning of the two back supports that were provided. In the illustration provided in the owner's manual, the back support is shown installed vertically, perpendicular to the top and bottom of the screen frame. However, the length of the supports that were provided were a little too long for that configuration and I ended up positioning them as shown in the photo below (the screen is inverted in this photo).

Mounting the Screen
Stewart offers a wide range of mounting options for the Deluxe Wallscreen series of fixed frame screens. These are described on Stewart's web site and in the owner's manual as:
- EzMount brackets (new option for wall mounting)
- Standard Wall Mount
- Wraparound Wall Mount
- Stage Fly (Hanging) Mount
- Quick Snap Wall Mount
- T-stand Self-supporting
- Aperture Mount
- Tilt Frame
- Electric Tilt
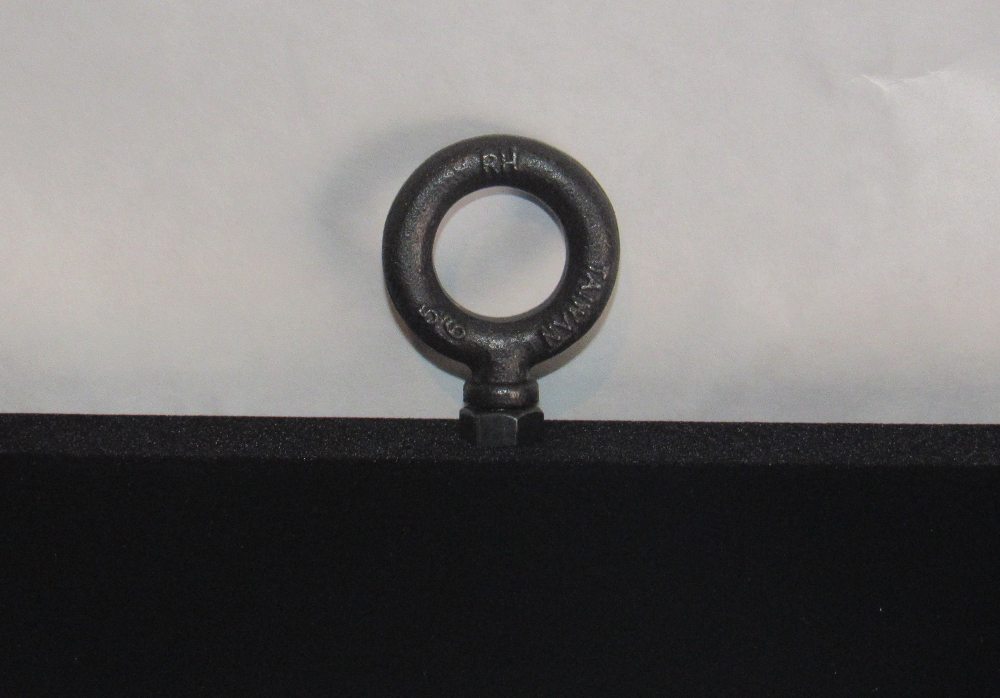
Most home theater owners will probably go with the new EzMount brackets for wall mounting the screen. However, for my specific home theater setup and room constraints I decided to go with the Stage Fly hanging mount. With this mounting option, Stewart provided two threaded holes along the top edge of the screen's frame. Eye-bolts (painted black) were provided that were screwed into these holes, as shown in the photo below.
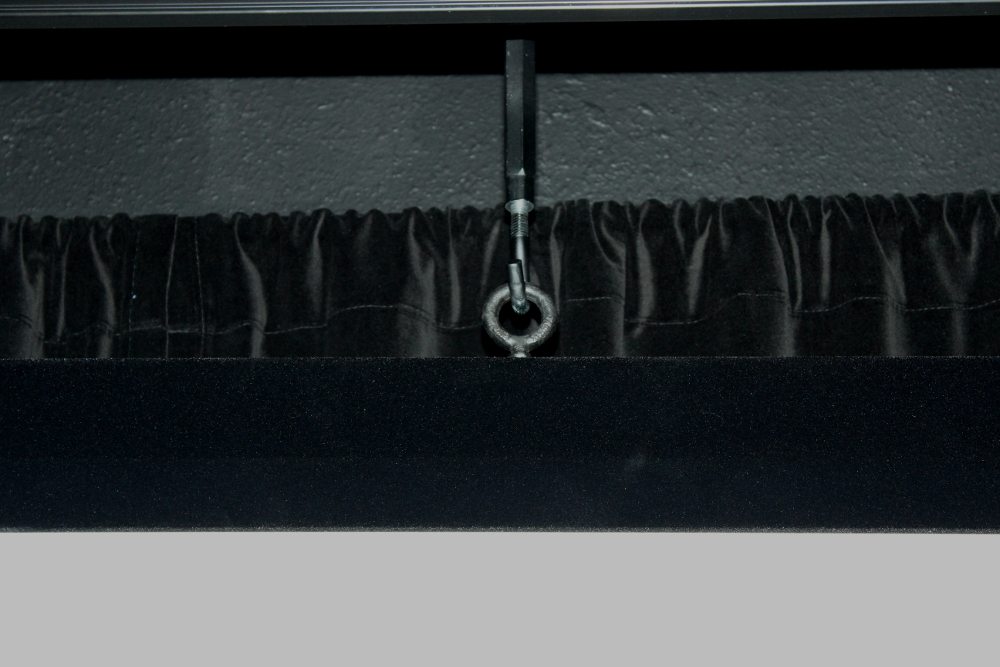
I screwed two locally purchased 'J' shaped hooks in my ceiling, thru the drywall and into the wood truss board above. I had Stewart position the screen's eye-bolt locations such they would directly align with the position of the hooks I had already installed in the ceiling. In order to position the screen the desired vertical distance down from the ceiling, I installed two locally purchased turnbuckles that I had painted black. This gave me both the desired drop distance down from the ceiling and also provided a convenient means to level the screen after installation. One of these turnbuckles is shown in the photo below holding the screen up by the eyebolt installed on the top of the screen frame.
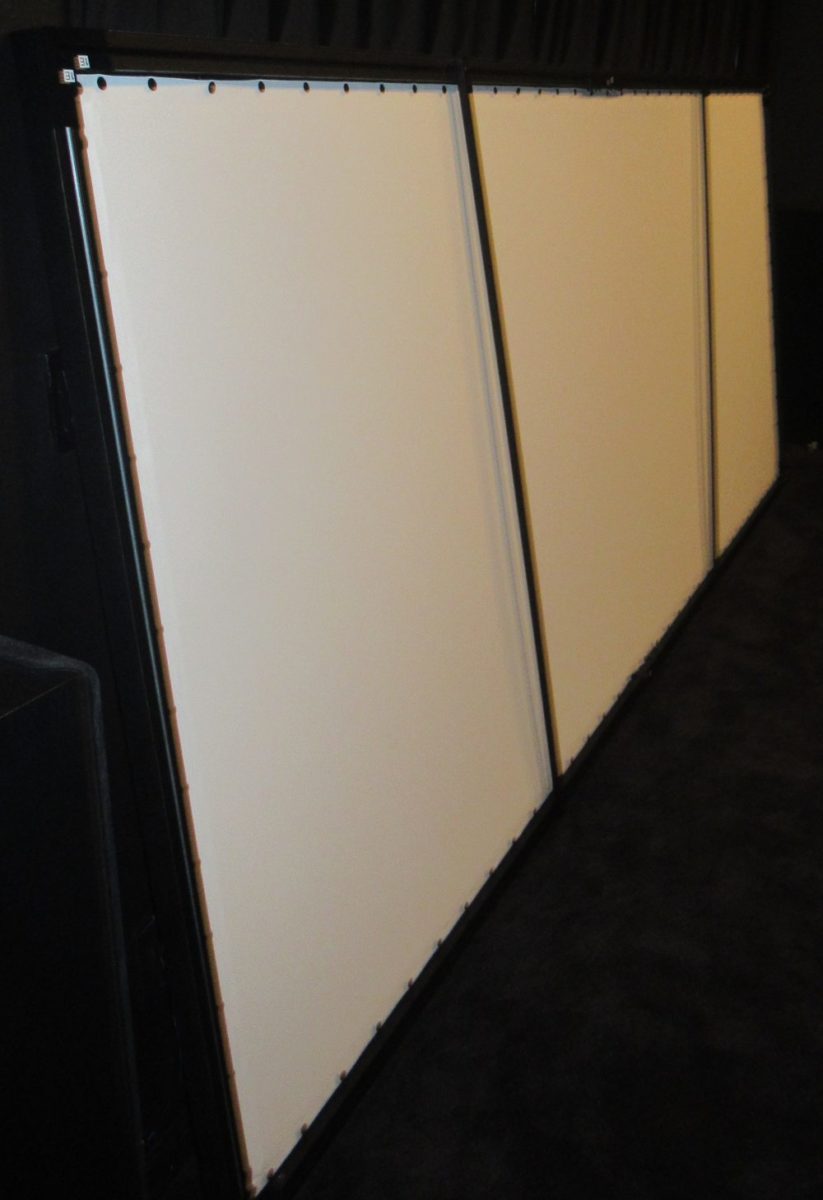
The Final Result

The photo above shows the assembled screen mounted in my home theater. As mentioned above, the result was a very flat, taut screen surface without any waves or other visible issues. The total time to assemble and mount the screen was perhaps 2.5 hours. While one person should be able to assemble the frame and attach the screen fabric, the mounting of the screen is a two person task.