HD20 Projector Highlights
- First $999 1080p projector to ship in the US!
- Reasonably good out of the box color
- Calibrates well, for very good colors, pleasing overall look to images
- Brightness in best mode is one of the brightest with over 700 measured lumens
- Brightness about average in "brightest mode" - just 1000 lumens
- Black levels are very entry level
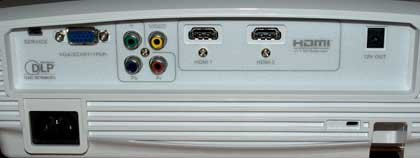
- Not as many inputs, outputs as most, no S-video
- Very limited placement flexibility, limited zoom range and no lens shift (typical for DLP projectors)
- Those who are sensitive to the rainbow effect will see rainbows with this projector
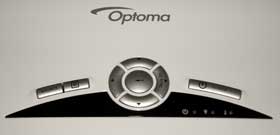
- Remote control works well, but backlight overly bright
- One more time: It's only $999 - You'll get your money's worth
Optoma HD20 Projector Overview
$999 is the new selling price point for entry level 1080p projectors, and the Optoma HD20home theater projector is the first we've seen at this price and, to our knowledge, the first of three at this price point. The other two include DLP projectors from Vivitek, and BenQ. We'll be reviewing those as soon as we can get them in.
Meantime, here's the first $999 projector for your consideration. There have been some deals floating around the last few months, mostly on Sanyo and Mitsubishi entry level 3LCD projectors. Those had started close to $2000 last year, but prices have come down, and there's been some free lamp rebates (figure worth up to $300) and dealer discounts that have occasionally brought their net prices down to around $1200 - $1400. Still, the Optoma HD20 is starting at $999, and will only come down from that price.
In other words, for the first time, you can buy a 1080p projector for what has been the most common price for nice 720p projectors.
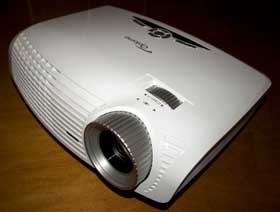
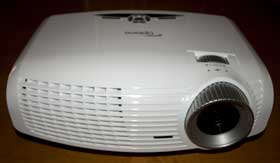
The Optoma HD20 is a "classic" and small DLP projector. The small is handy if you aren't doing a permanent installation. It certainly is easy enough to carry outside, say, to use with an inflatable screen, or to shine on a garage door or hanging sheet. For most people though, the HD20 is a really nice first projector that will work just fine in a light controlled family room, or small dedicated theater room.
On the other hand, its small size is also probably why it makes more fan noise than most other home theater projectors.
It's the picture, though, that we care about most. All considered, the HD20 does a pretty good job and, considering its low price point, is a very good value!
I'll discuss in depth, color accuracy, black level and shadow detail performance and other aspects of the picture quality in our Image Quality page. We'll look at all the physical aspects and features in our tour, and talk about brightness, sharpness and noise levels on the Performance page.
For now, though, it should suffice to say that, other than black level performance, the Optoma HD20 projector does a reasonably impressive job when it comes to image quality. Factor in the price, and the HD20 projector starts looking very attractive, offering 1080p for a price typical for more feature-laden 720p projectors. I'll discuss how the Optoma HD20 stacks up against a couple of the most popular 720p projectors, as well as an assortment of lower cost (but more expensive) 1080p projectors, in our competitors section, and also elsewhere in the review, when appropriate.
Last year I really liked the Optoma HD65, a small (and somewhat noisy) 720p projector that came out around $1000.
Optoma's new HD20 strongly resembles the HD65 in many regards, but offers you 1080p today for about the same price as 720p just a year ago!
Is the HD20 for you? Should you spend a bit more ($400 - $1500 more) for a higher performance 1080p projector? How about getting a brighter, more featured 720p projector for the same price - would that work better for your situation? These are a few of the important questions I'll try to answer in this review.
The Optoma HD20 will be sold by a significant array of online resellers, including leading home theater AV resellers and camera stores, as well as online and at "brick and mortar" arms of Best Buy, Staples, etc. You should have no problem finding dealers who will be stocking the HD20, among our dealer advertisers on this site.
Optoma HD20 Special Features
The Optoma HD20 home theater projector is a pretty basic projector when it comes to special features.
ImageAI
ImageAI is a feature to enhance black level performance. Basically when a scene lacks really bright areas, the overall brightness is dimmed down, lowering black levels. In this regard the ImageAI circuitry is somewhat similar to a dynamic iris. Here's the problem, though. The ImageAI circuitry, when engaged, tends to cause a jump or dip in overall brightness as scenes change from bright to darker, or the other way around.
Unfortunately, that jump or drop in overall brightness happens all at once (thus very noticeable), and typically several, to perhaps 8 or more, seconds after a scene change. I personally find that annoying. Check it out yourself. Personally, I recommend turning it off. If the fast change in brightness in the middle of a new scene doesn't bother you, then you get a slight improvement in black levels, but I suspect most of us will prefer ImageAI off for movie viewing.
A feature like this really doesn't do anything for watching sports and most TV, HDTV, so you wouldn't normally have it on for content from cable or satellite.
12 volt screen trigger
The Optoma HD20 does have one screen trigger. This allows you to trigger a properly equipped motorized screen, so that when you hit the power up button on the HD20 projector, your motorized screen will automatically lower. Power off the projector, and the motorized screen will retract. Keep in mind there are other ways to control motorized screens, including many that will work (and come with) radio frequency or infra-red remote controls.