Projector Reviews Images

BenQ HT9050 Home Theater Projector Review – Hardware

Posted on October 23, 2017 by Art Feierman

BenQ HT9050 Home Theater Projector Review – Hardware 1: Overview, Inputs and Connectors, Lens, Control Panel

Overview

Let’s start with a quick tour of the BenQ HT9050 projector from the front, then we’ll get into more details.

As I said, this is a largish home theater projector. No lightweight, it weighs in at an impressive 40.8 lbs! No doubt the LED light engine contributes to the weight (laser projectors also tend to be heavy). The key reason that it’s far larger than, say, the Optoma UHD65, Acer, or Vivitek HK2299, is for the optics and the extensive lens shift. Small DLP projectors typically have no lens shift at all, or a really minimal amount of vertical only (i.e. 5%). By comparison the BenQ has 60% – plus, it offers a good amount of horizontal lens shift as well. That is a major reason for the larger projector size.

The BenQ HT9050 itself is finished in both shiny and matte dark gray/black.

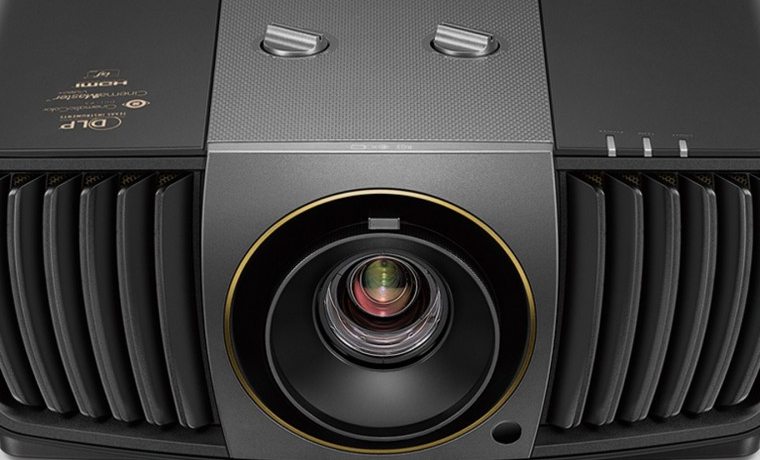
The 1.5:1 manual zoom lens is center mounted in the front (for the easiest installation). It is recessed. An infra-red sensor for the remote control is also found on the front, as are a pair of exhaust vents. Three indicator lights are on the front, top edge, to the right of the lens (if facing the projector).

Moving to the top, you will find two dials – one is for the manual vertical lens shift, the other, horizontal lens shift, and there’s plenty of it (+/-65% vertical, +/-27% horizontal).  Other than that, there’s only the BenQ logo up top. All the other action is located on the right side (again, if looking at the front). Even the receptacle for the power is on the side.

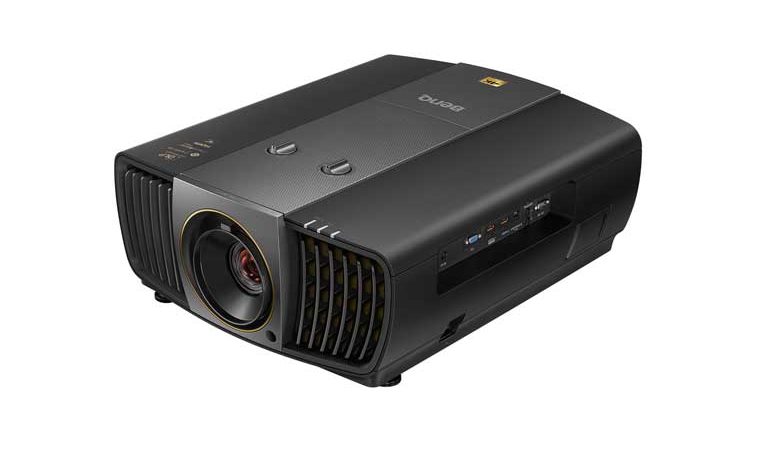
The inputs and other connectors are in a large connection panel on that right side, toward the front, while a small control panel is recessed closer to the back. There is no cable cover.

There obviously isn’t any lamp door since there isn’t a lamp to change. The usual standard screw threaded holes on the bottom are there to accept the typical ceiling mount.  I should mention that at just over 40 lbs, you need to be sure the ceiling mount you select is rated for at least 50 pounds. Many only claim 25 or so pounds, as there are plenty of projectors that weigh 20 pounds or less, even less than 10 lbs.

Under the projector, the front feet are screw thread adjustable. A narrow bar a couple inches wide is centered in the rear to provide a stable 3-point stance.

I mentioned the IR sensor in the front. There’s also one in the back of the HT9050.

HT9050 Inputs and Connectors

HT9050 Input Panel

BenQ HT9050 Inputs and Connectors
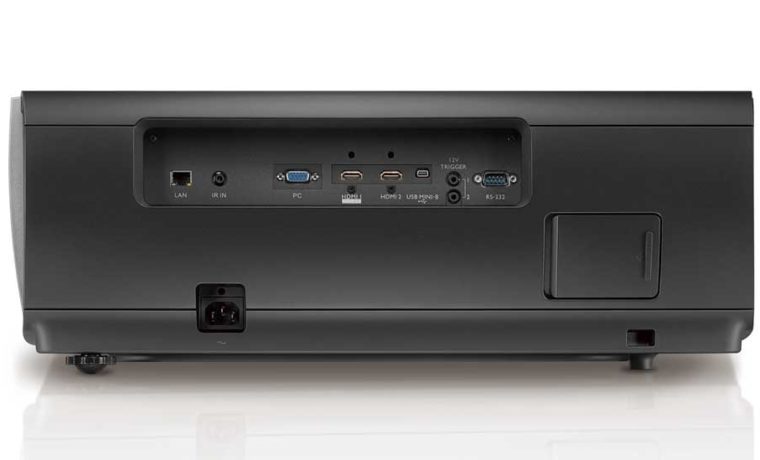
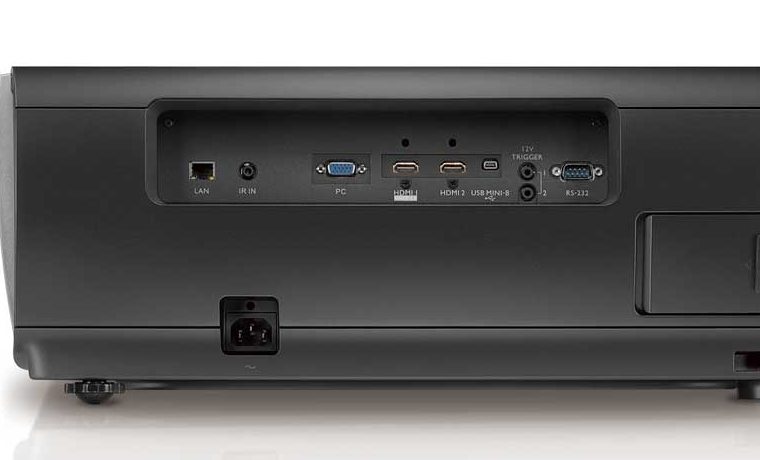
The BenQ HT9050 has plenty of inputs and connectors.

A pair of HDMIs provide the primary contact between the HT9050 and the outside world. One HDMI is HDMI 2.0 with HDCP 2.2 copy protection, while the other is the older HDMI 1.4a, but that does insure compatibility with some older sources that may not work with HDMI 2.0. Consider that a plus.

There are plenty of other inputs. The HT9050 has hard wired networking (LAN), a PC input (HD15 connector), a USB (as a service port), and also an RS232c (DB9) for old school command and control.

There are two, count them, 12 volt triggers – one could be used for a motorized screen, the other for an anamorphic lens sled, or perhaps to control suitably equipped motorized shades.

There’s even an IR input jack, so you can hardwire the remote control, in case the projector is used in a place where there’s no line of site to either IR sensor (such as in a rear screen setup.

The HT9050 Lens

Manual 1.5:1 Zoom with lens controls

BenQ HT9050 Lens
The BenQ HT9050's lens and lens shift controls.

As previously mentioned, it is a 1.5:1 zoom which is a respectable amount of zoom range. The projectors with the most range on zooms tend to have 2:1 or 2.1:1 range for even more placement flexibility. Still, it’s likely that in most rooms, if you desire, you could rear shelf mount this projector. But, in some deep rooms, with the projector in the back, the image size would likely be too large.

Because the lens is manual, there’s no lens memory function, so you are going to have to settle for the typical 16:9 screen aspect ratio and not the wider 2.35:1 or 2.4:1 that best matches the usual Cinemascope shaped movies.

Now, I do have a wide screen, so when I’m switching back say from a football game (16:9 = 1.78:1) to a normal movie (2.4:1), I get out of my chair and zoom the image larger, adjust the lens shift, and double check the focus. That works for me, but then, I’m reviewing so the projector isn’t ceiling mounted. For most folks (unless you are very tall or your ceiling very short), you’ll need a stepladder to do those adjustments. So, let’s just say, for most, pairing the HT9050 with a wide screen just isn’t practical.

Control Panel

Recessed Control Panel

BenQ HT9050 Control Panel
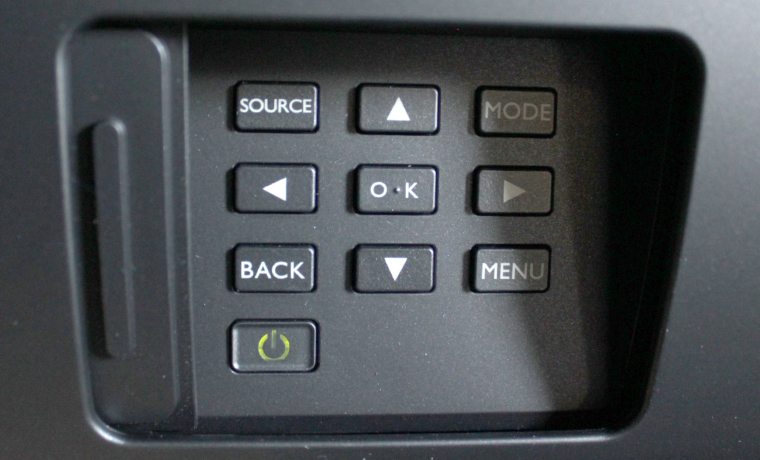
The BenQ HT9050's control panel is pretty typical - no surprises there.

Small buttons, recessed panel, but who really cares. We all rely on remote controls, except maybe when the projector is first being set up in a ceiling mount.

No surprises on the control panel. The power button (press once for on, twice for off) is in the bottom left of the panel. Above it are the Menu and Source buttons, as well with the four navigation arrows, and the Enter button in the middle of the diamond shaped navigation section.

BenQ HT9050 Home Theater Projector Review – Hardware 1: Overview, Inputs and Connectors, Lens, Control Panel

Overview

Let’s start with a quick tour of the BenQ HT9050 projector from the front, then we’ll get into more details.

As I said, this is a largish home theater projector. No lightweight, it weighs in at an impressive 40.8 lbs! No doubt the LED light engine contributes to the weight (laser projectors also tend to be heavy). The key reason that it’s far larger than, say, the Optoma UHD65, Acer, or Vivitek HK2299, is for the optics and the extensive lens shift. Small DLP projectors typically have no lens shift at all, or a really minimal amount of vertical only (i.e. 5%). By comparison the BenQ has 60% – plus, it offers a good amount of horizontal lens shift as well. That is a major reason for the larger projector size.

The BenQ HT9050 itself is finished in both shiny and matte dark gray/black.

The 1.5:1 manual zoom lens is center mounted in the front (for the easiest installation). It is recessed. An infra-red sensor for the remote control is also found on the front, as are a pair of exhaust vents. Three indicator lights are on the front, top edge, to the right of the lens (if facing the projector).

Moving to the top, you will find two dials – one is for the manual vertical lens shift, the other, horizontal lens shift, and there’s plenty of it (+/-65% vertical, +/-27% horizontal).  Other than that, there’s only the BenQ logo up top. All the other action is located on the right side (again, if looking at the front). Even the receptacle for the power is on the side.
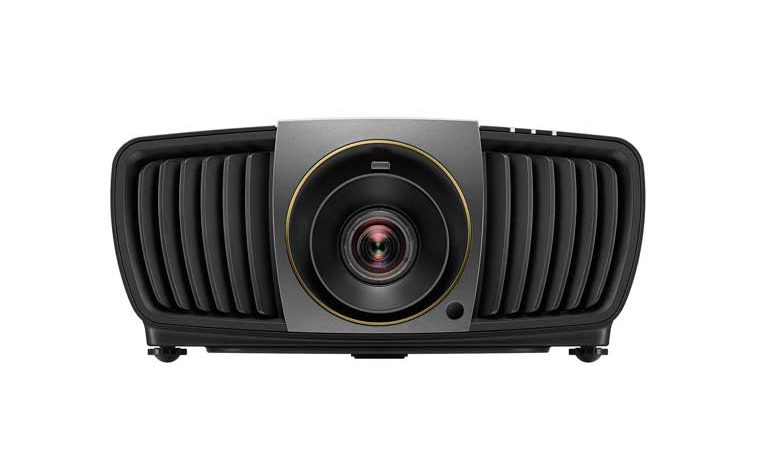
The inputs and other connectors are in a large connection panel on that right side, toward the front, while a small control panel is recessed closer to the back. There is no cable cover.

There obviously isn’t any lamp door since there isn’t a lamp to change. The usual standard screw threaded holes on the bottom are there to accept the typical ceiling mount.  I should mention that at just over 40 lbs, you need to be sure the ceiling mount you select is rated for at least 50 pounds. Many only claim 25 or so pounds, as there are plenty of projectors that weigh 20 pounds or less, even less than 10 lbs.

Under the projector, the front feet are screw thread adjustable. A narrow bar a couple inches wide is centered in the rear to provide a stable 3-point stance.

I mentioned the IR sensor in the front. There’s also one in the back of the HT9050.

HT9050 Inputs and Connectors

HT9050 Input Panel

BenQ HT9050 Inputs and Connectors
The BenQ HT9050 has plenty of inputs and connectors.

A pair of HDMIs provide the primary contact between the HT9050 and the outside world. One HDMI is HDMI 2.0 with HDCP 2.2 copy protection, while the other is the older HDMI 1.4a, but that does insure compatibility with some older sources that may not work with HDMI 2.0. Consider that a plus.

There are plenty of other inputs. The HT9050 has hard wired networking (LAN), a PC input (HD15 connector), a USB (as a service port), and also an RS232c (DB9) for old school command and control.

There are two, count them, 12 volt triggers – one could be used for a motorized screen, the other for an anamorphic lens sled, or perhaps to control suitably equipped motorized shades.

There’s even an IR input jack, so you can hardwire the remote control, in case the projector is used in a place where there’s no line of site to either IR sensor (such as in a rear screen setup.

The HT9050 Lens

Manual 1.5:1 Zoom with lens controls

BenQ HT9050 Lens
The BenQ HT9050's lens and lens shift controls.

As previously mentioned, it is a 1.5:1 zoom which is a respectable amount of zoom range. The projectors with the most range on zooms tend to have 2:1 or 2.1:1 range for even more placement flexibility. Still, it’s likely that in most rooms, if you desire, you could rear shelf mount this projector. But, in some deep rooms, with the projector in the back, the image size would likely be too large.

Because the lens is manual, there’s no lens memory function, so you are going to have to settle for the typical 16:9 screen aspect ratio and not the wider 2.35:1 or 2.4:1 that best matches the usual Cinemascope shaped movies.

Now, I do have a wide screen, so when I’m switching back say from a football game (16:9 = 1.78:1) to a normal movie (2.4:1), I get out of my chair and zoom the image larger, adjust the lens shift, and double check the focus. That works for me, but then, I’m reviewing so the projector isn’t ceiling mounted. For most folks (unless you are very tall or your ceiling very short), you’ll need a stepladder to do those adjustments. So, let’s just say, for most, pairing the HT9050 with a wide screen just isn’t practical.

Control Panel

Recessed Control Panel

BenQ HT9050 Control Panel
The BenQ HT9050's control panel is pretty typical - no surprises there.

Small buttons, recessed panel, but who really cares. We all rely on remote controls, except maybe when the projector is first being set up in a ceiling mount.

No surprises on the control panel. The power button (press once for on, twice for off) is in the bottom left of the panel. Above it are the Menu and Source buttons, as well with the four navigation arrows, and the Enter button in the middle of the diamond shaped navigation section.

Latest Reviews

February 25, 2024

Introducing the Hisense C1: A cube-shaped 4K UHD lifestyle projector with an RGB triple laser light source and integrated JBL ...

February 19, 2024

The BenQ X3100i is a 4LED, 4K UHD (3,840 x 2,160p) 0.65" DLP short-throw gaming projector that offers a BenQ-rated ...

© 2024 Projector Reviews

crossmenu linkedin facebook pinterest youtube rss twitter instagram facebook-blank rss-blank linkedin-blank pinterest youtube twitter instagram