The EPV Screens DarkStar® UST 2 eFinity is an ambient light rejecting screen designed for ultra-short projectors. This 123-inch 16:9 screen has a gain of 0.8 and it can reject up to 85% of overhead lighting making it a great option for many Laser TVs.
I previously doubled up our home office as the theater space: a dark room with no direct sunlight, a motorized screen in the ceiling which for the most part was only used in the evenings. I recently created a dedicated home theater/gaming space in a converted garage with a permanent big screen on the wall above an ultra-short throw projector. I share this as my feeble excuse for not thinking through how hard it would be to see a projected image in a room with East and West facing sliding doors to the outside that is full of light all day!
The DarkStar UST2 material did an excellent job rejecting ambient light even in the middle of the day
In discussing with Philip Jones, here at ProjectorReviews.com, what options I now had for at least a 120" screen in this environment, he suggested I reach out to Elite Screens. They convinced me that either an Elite Screens Aeon CLR® 3 Series or an EPV Screens DarkStar UST 2 eFinity was the screen I needed to combat the sunlight. Since Philip had already reviewed the Elite Screens Aeon CLR3, we thought it best that I try the EPV Screens 123" DarkStar UST eFinity.
EPV Screens is a division of Elite Screens which is focused on the custom installation market. The team at EPV Screens graciously offered to provide me with a DarkStar UST 2 eFinity sample that I can utilize in the future for Laser TV product reviews.
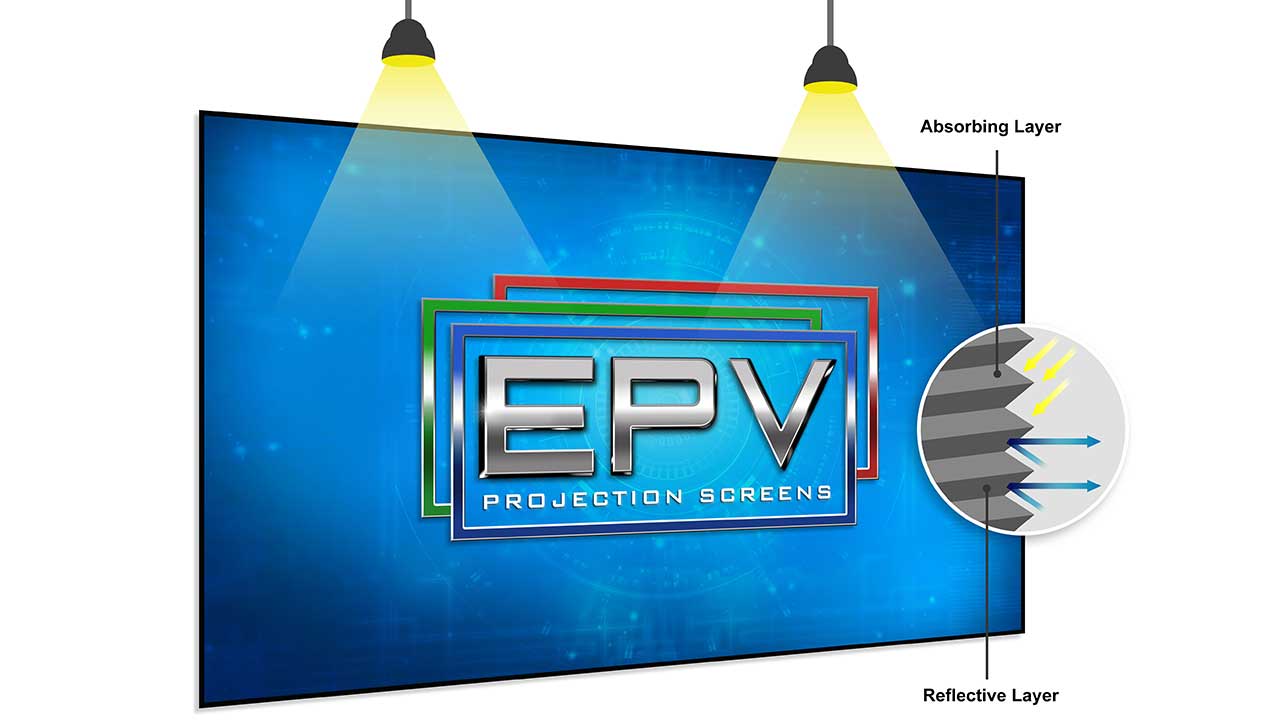
DarkStar UST 2 material does a great job of rejecting 85% of ambient light while still delivering accurate colors.
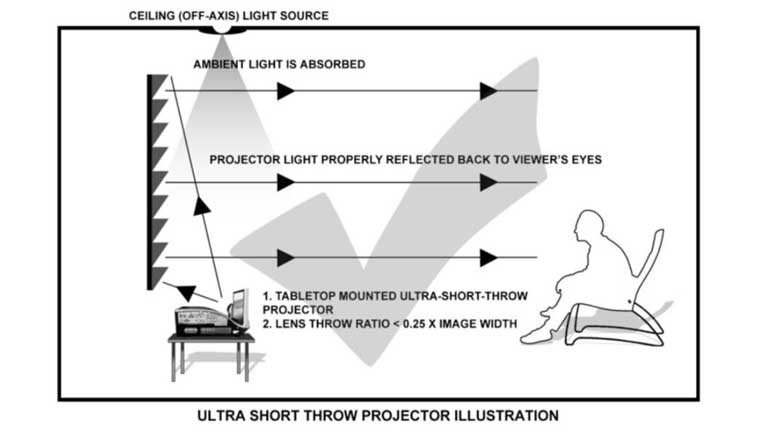
The DarkStar UST 2 is a multi-layer optical screen material designed for tabletop-mounted ultra-short-throw projectors. Since this material is designed to only accept light coming from a specific angle below the screen it does an excellent job rejecting 85% of room light. When compared to a matte white screen, there is a notable improvement in black level and contrast in a room with ambient light. The DarkStar UST 2 is ISF certified for color accuracy which is important since I plan on using it while reviewing Laser TVs in the future.
ASSEMBLY
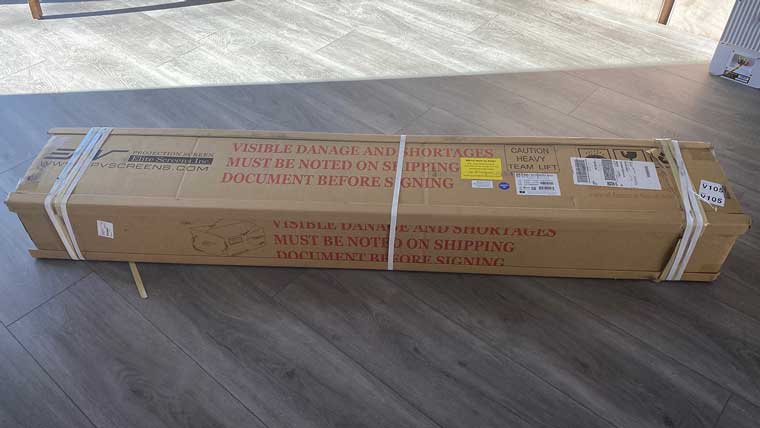
The screen was delivered in two days direct from EPV Screens. It arrived in a surprisingly small package for a very large screen: only 68” X 12” X 8” and just under 40lbs. I can appreciate the benefits of not shipping the screen pre-assembled: a package over 5 ft tall and 9 ft long would not only be very difficult, risky, and expensive to transport, but potentially impossible to maneuver through a home.
This ready-to-assemble version is extremely well packed, with sturdy outside corner trims attached to all edges of the cardboard packing case, preventing any intruding dents from getting to the contents. The box contains clear instructions to examine for any visible damage to the carton before signing for it, along with a contact number to call with any concerns. My package was in perfect condition.
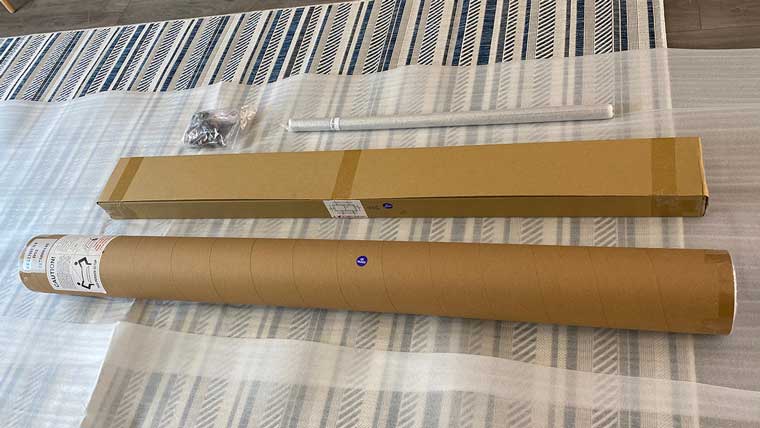
Once opened, the box reveals the user guide, which includes 14-steps of assembly instructions, and two soft padded EPE sponge sheets (each 12 ft long and 3 ft wide) that are to put on the floor prior to assembly. This is a nice touch to help prevent any accidental damage to the important side of the screen during construction. The sheets are also a good indicator of how much floor space you need to construct a 123” diagonal screen! Two further boxes are inside - one containing the components of the frame, the other a large tube that contains the very carefully rolled-up screen - along with a bag of hardware for the assembly.
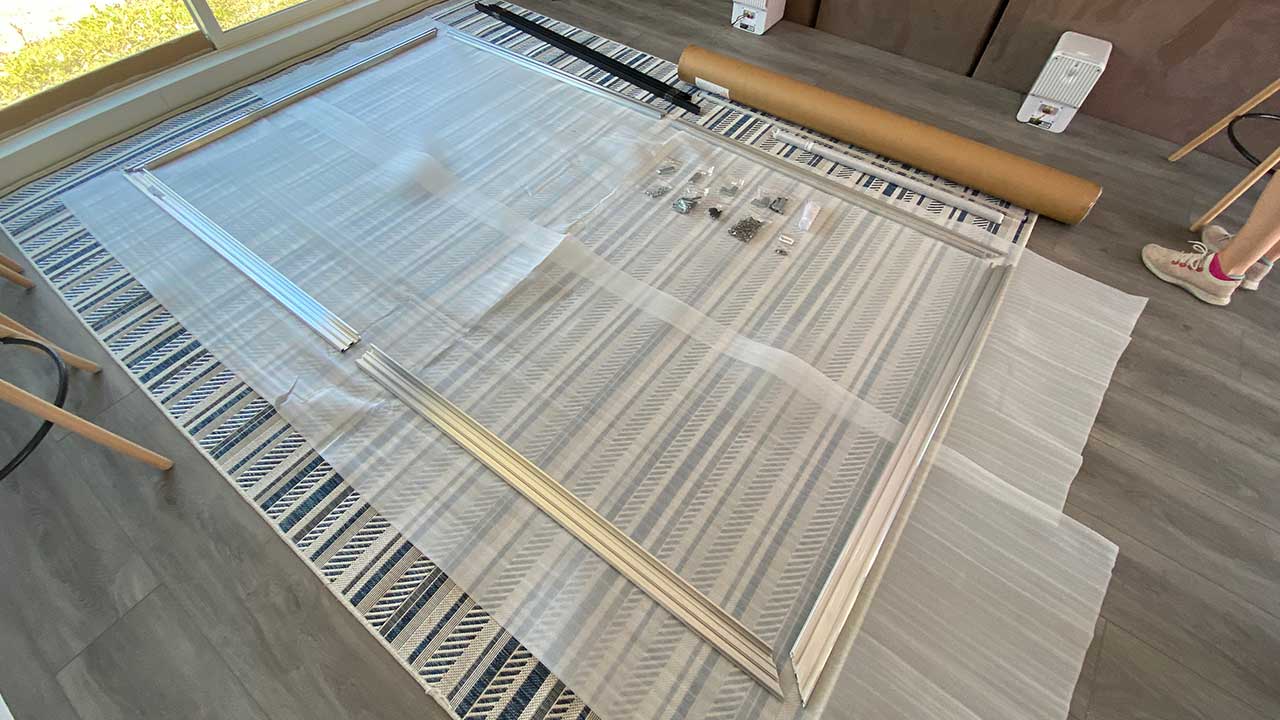
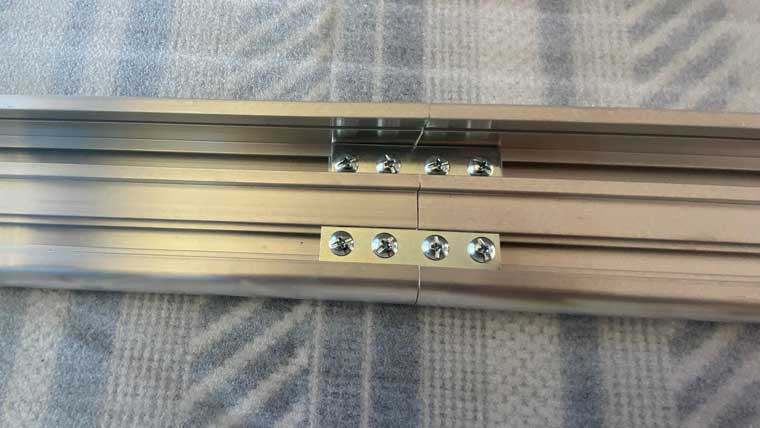
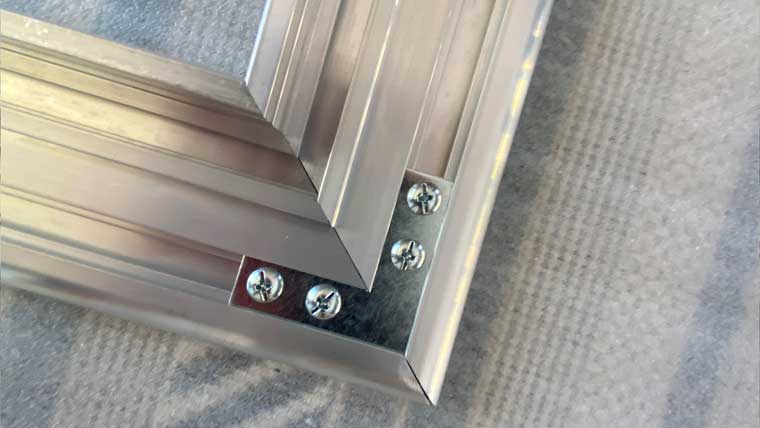
The instructions provided for the frame are very clear (there seems to be a step missing for the second horizontal but obvious what was needed from the pictures!). It’s a little bit fiddly: very small screws for my big fingers, but you don't need to be a professional installer for this part.
Attaching the screen, however, is much harder, and frankly not for the faint-hearted. The screen is very well protected in the tube, and per the notices attached, it has been carefully examined for quality - including photographs taken of it - prior to shipping. There are even two pairs of gloves for handling the screen, which is nice, but it all makes the unrolling - and subsequent attaching - a rather nervous experience: it was clear that if anything happens to this high tech, and expensive material now, it's all on me!
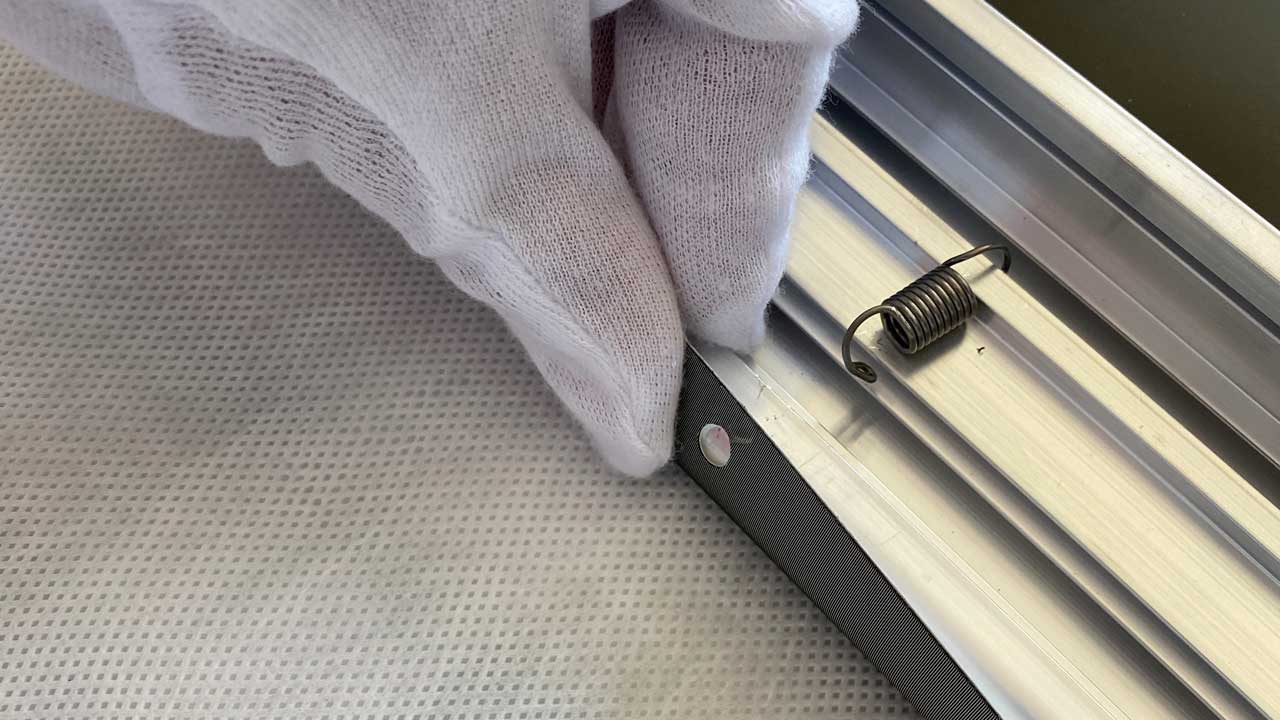
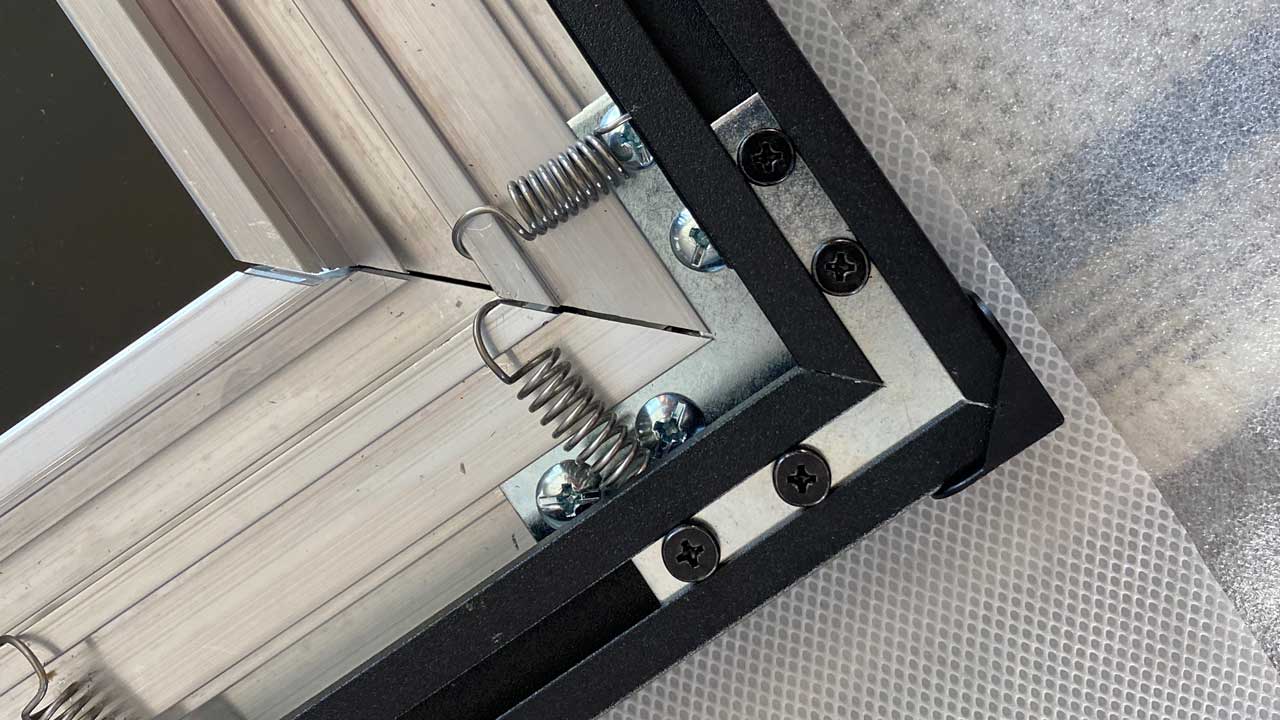
With the screen carefully rolled out, face down, on top of the sponge sheets, the frame is placed on top to sit within lines clearly marked on each corner. This is a perfect fit and there is surprisingly little overlap of the screen and the frame: definitely a lot less than suggested in the pictures in the installation guide. These pictures suggest plenty of the screen edge is available to wrap around the frame and insert the springs into, whereas in reality, it is very tight, particularly for the first springs, one in the center of each vertical, stretching the screen its full width.
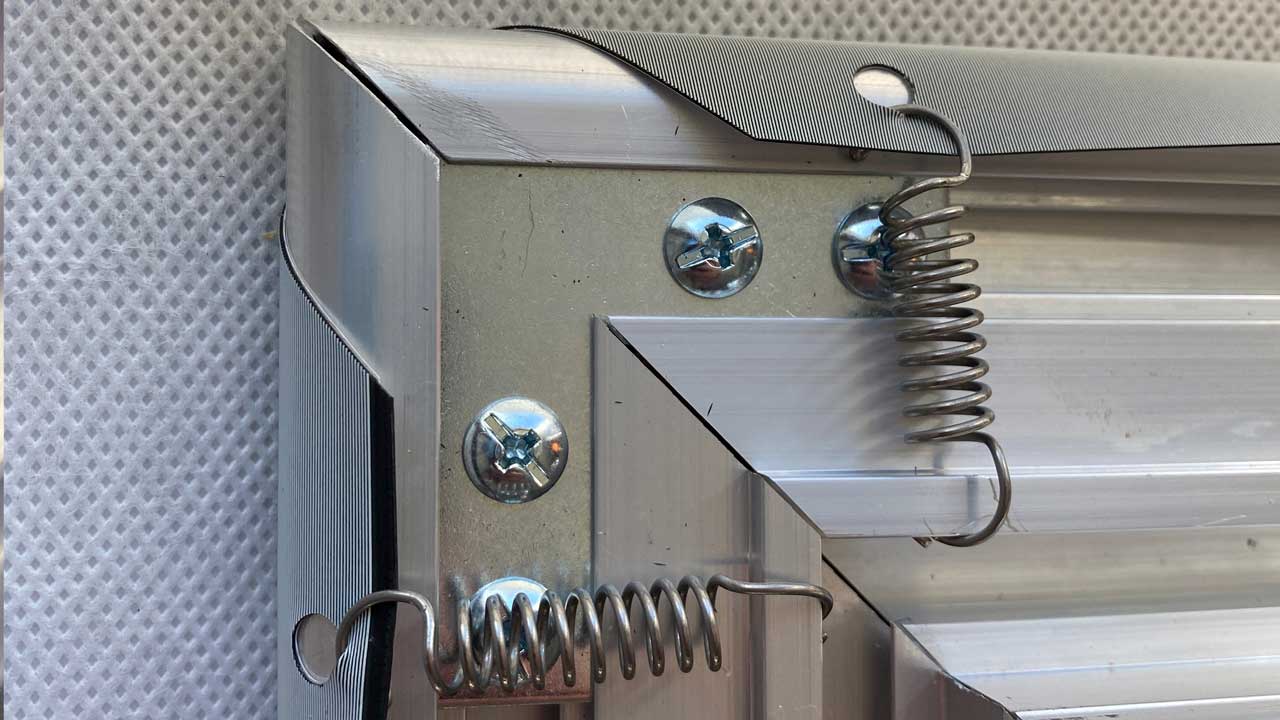
Spring tensioned attachment system keeps the screen taut and winkle free
It was hard to create enough clearance to get the hook at the end of the spring through the hole in the screen. The photos nearby show the guide picture versus the actual positioning of the springs, and the scratches on the frame are testament to where the hook was sitting. Springs flicked off several times as we added them, and I was surprised that the holes in the screen for the springs didn't include grommets - again unlike the installation guide suggests - and we were concerned that the hooks could tear the screen.
Screen material wrapped around the Edge Free Fixed Frame
All of this adds to the tension, if you'll pardon the pun. As expected, the more springs applied, the further stretched the screen becomes, and eventually there is a little more breathing room between the holes in the screen and the frame. We took the opportunity once all springs were in place to revisit them, re-securing them now there was more of the screen to work with, much closer to the way it looks in the instructions. As it happened, almost an hour after attaching all of the springs, one of the springs again broke loose, and on inspection this one had indeed tore the screen between the hole and the edge.
Once complete the screen feels very securely attached, and is perfectly flat and taught over the frame. Adding the trim to the frame is then very straightforward, and very nicely finishes the edges, including corners that make everything tidy.
The black Edge trim finishes the edges of the frame nicely
Putting the screen up on the wall is also very easy. The guide recommends a horizontal and vertical distance between the four mounts that are screwed to the wall on which the screen is hung. I prefer to spread the mounts based on the studs in the wall, since I don't think it really matters where the mounts meet the horizontal elements of the frame, but the vertical measurements are important to ensure the bottom of the screen clips tightly into place. It's a very simple, elegant, and effective way to hang the screen, which hugs the wall nicely.
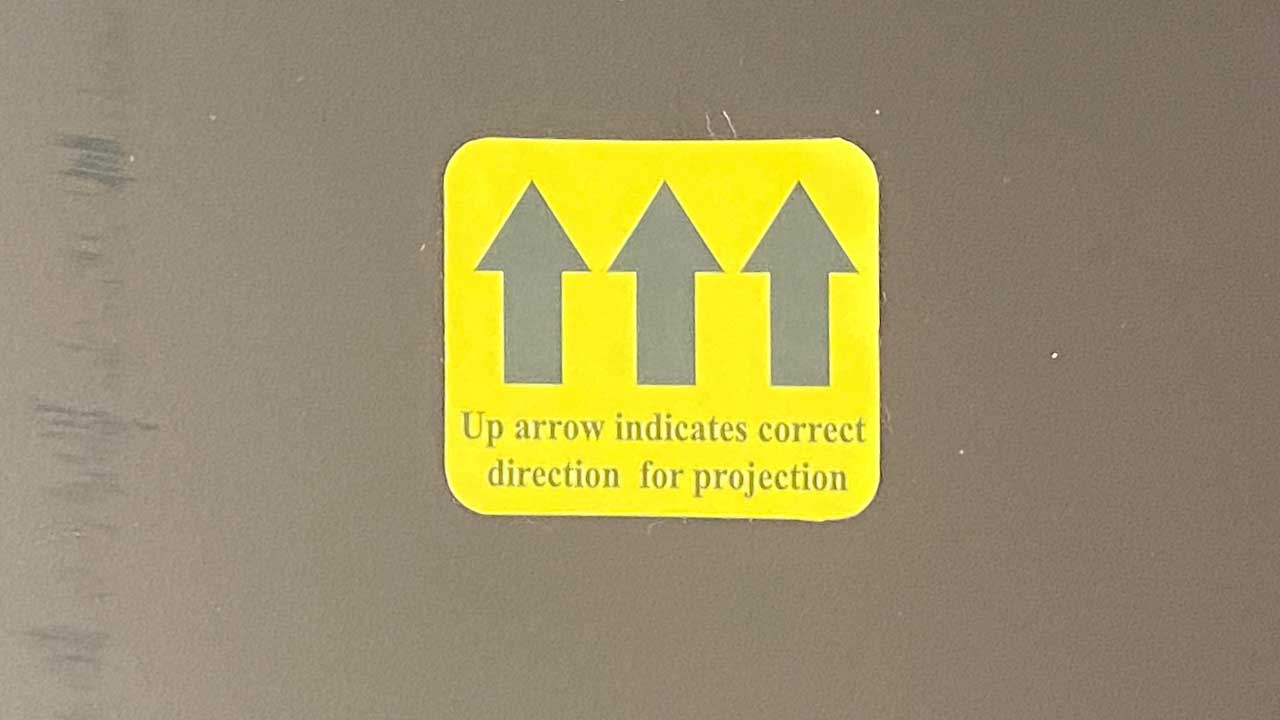
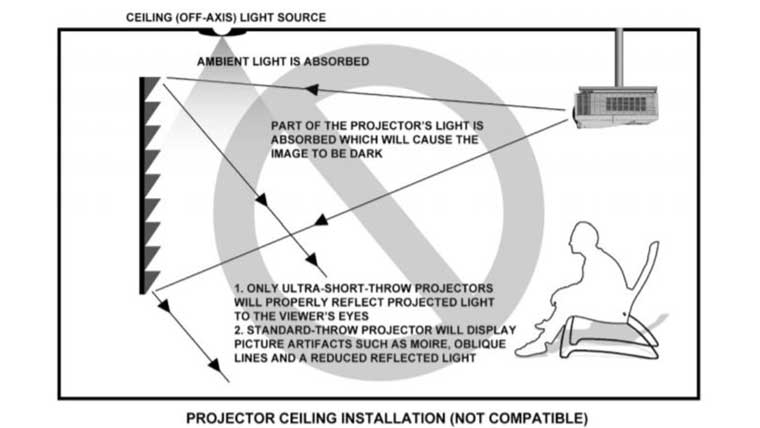
Mounting the DarkStar UST 2 upside down or utilizing it with a standard throw projector would result in a very dark picture
As we mentioned earlier, the DarkStar UST 2 screen material is designed to only accept light from a specific angle. The one critical thing to check when hanging is that you have the screen the right way up!
The screen is very clearly marked for top and bottom on the back, and if you pay attention to that while assembling it also then obvious from where the Elite logo is on the top of the frame. But the guide also provides several useful ways to ensure it is the right way up, the special surface of the screen readily showing which way is up versus down simply by looking at it and the way it reflects light or doesn't, as the case may be.
So the installation is, overall, a little stressful for a first-timer, it took over 3 hours to assemble and put on the wall, and given the price of the screen, I suspect many buyers will feel the relatively small fee to have it professionally assembled and installed a reasonable investment.
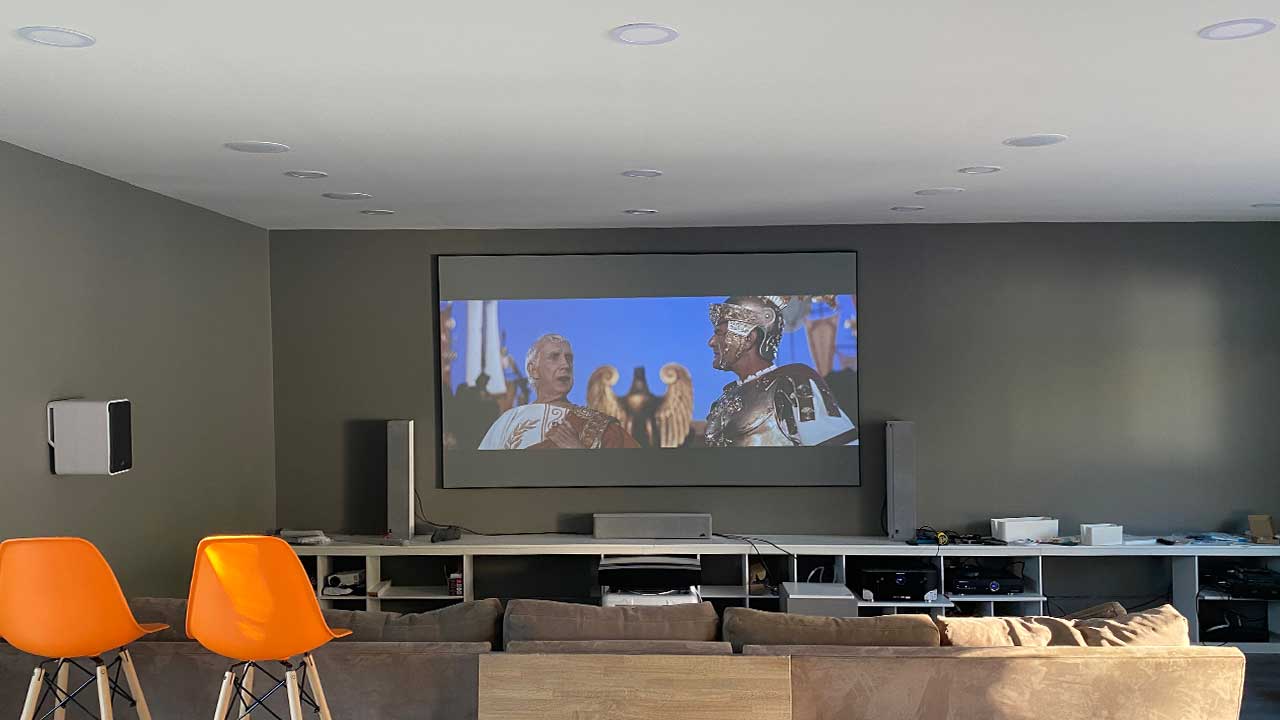
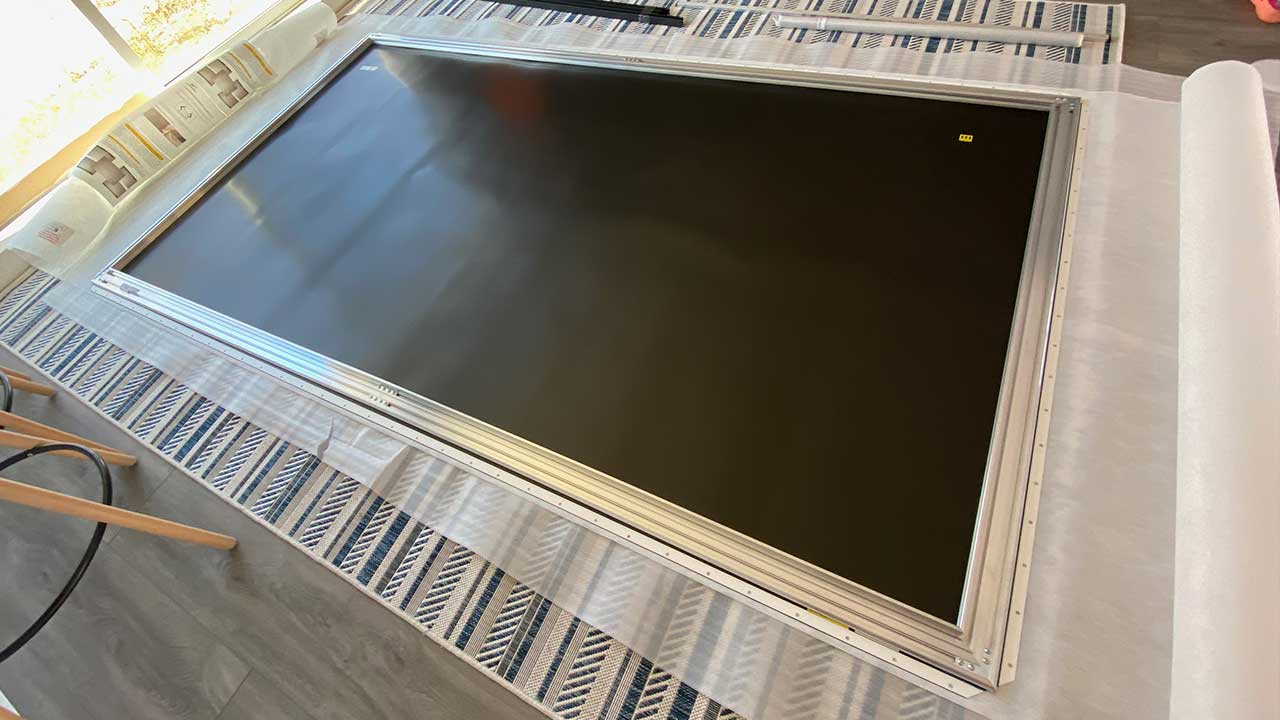
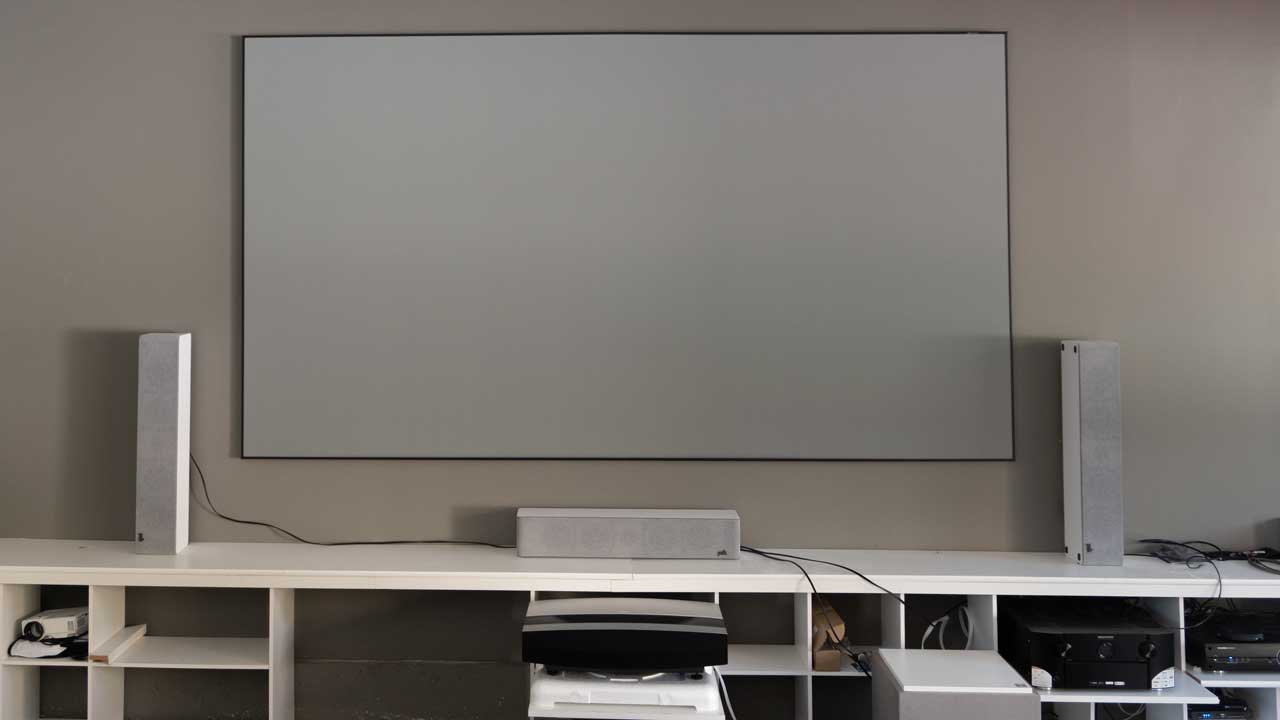
The eFinity screen's EDGE FREE design looks great mounted on the wall
But the instructions are very clear, the components are high quality and carefully controlled, everything is precisely measured and cut, and the result is quite spectacular! The "edge free" bezel, which is less than 1/2 inch wide, creates the effect if a massive high-end LCD TV, a beautiful, clean, modern look on the wall.