Projector Reviews Images

JVC LX-NZ3 4K Laser DLP Projector Review- Hardware

Posted on January 2, 2020 by Phil Jones

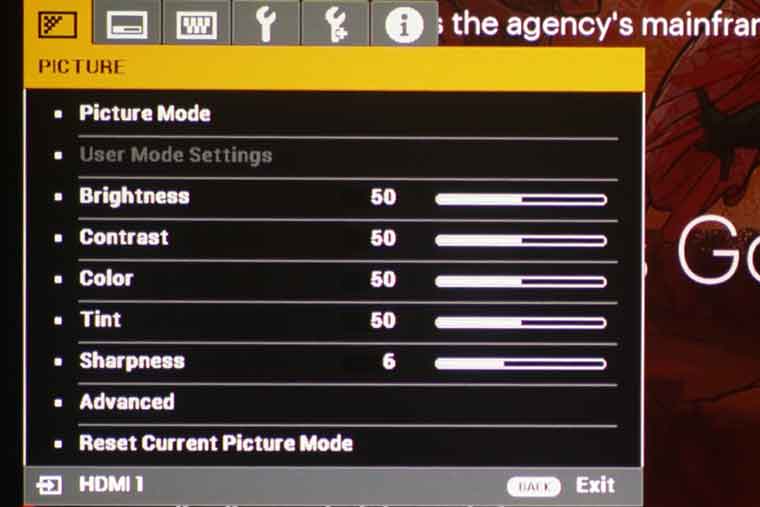
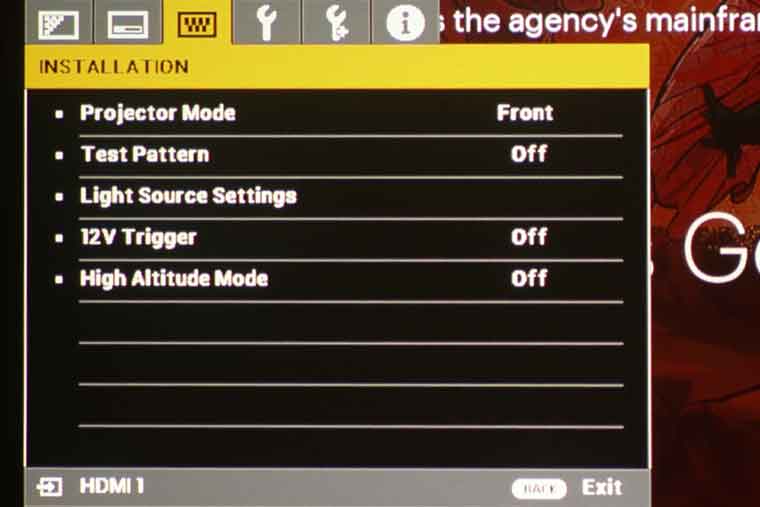
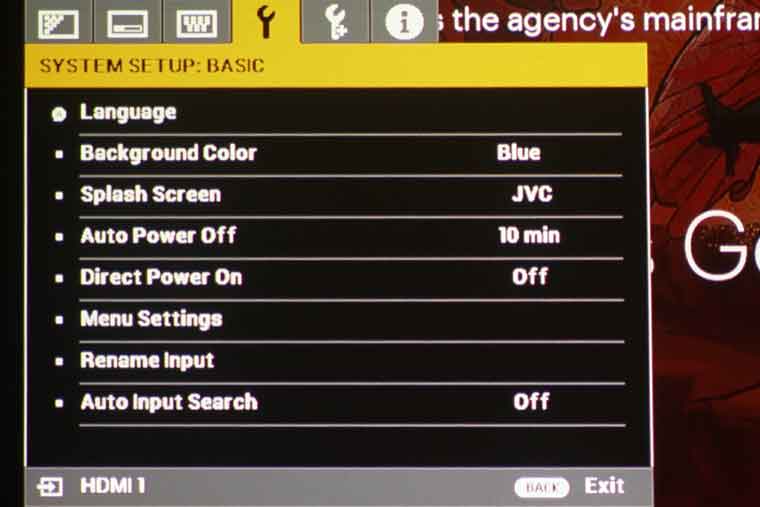
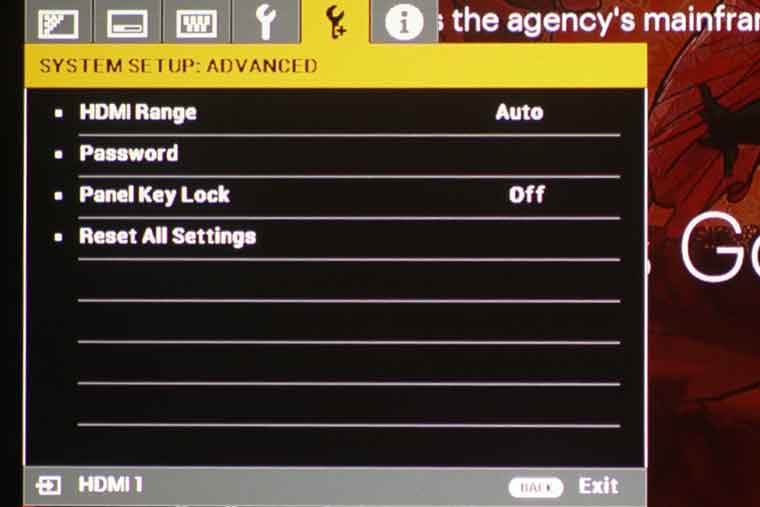
JVC LX-NZ3 4K Laser DLP Projector Review - Hardware Tour: Overview, Inputs and Connectors, Lens Throw and Shift, Control Panel, Remote Control, Menus

OVERVIEW

The JVC LX-NZ3 is a rather compact home theater projector measuring approximately 16 inches wide, 13” deep x 16” Wide x 5” High and weighing just under 14 pounds, due in part to its DLP technology. It is much smaller than JVC DILA based home theater models. The LX-NZ3W as a white chassis while it’s twin model, the LX-N3B is a black unit.

The front of the LX-NZ3 is very clean with the lens positioned on the left and the IR sensor on the right. There are manual zoom and focus controls located around lens.

On the top, directly above the lens are the vertical/horizontal lens adjustment knobs.  Towards the top rear, is a simple control panel along with three indicator lights.

The hot air exhaust vent is on the left side of the projector, while the cool air intake vent is located on the right side. All the inputs and connections are located on the rear of the chassis.

INPUTS AND CONNECTORS

The inputs and connections are all located on the rear of the LX-NZ3. Starting from the left, there is a VGA computer input followed by two HDMI inputs, The HDMI 1 input is 18Gbps HDMI/HDCP 2.2 Compatible which allows playback of 4K@60 HDP content.

Next, is a USB Type-A port which can be used to power an external device like an HDMI signal extender. There is also RS322 control port and a 12volt trigger. The power connection is located on lower left side.

Since this a “serious” home theater projector, you will not find an internal speaker or audio outputs. This type of projector normally does not have multiple sources connected directly to it since a receiver is usually utilized for AV switching. The LX-NZ3 is also not equipped with internal streaming services which negates the need for audio outputs. In a home theater, audio is normally handled by an A/V receiver and speakers, so the lack of audio features is not a big deal.

LENS THROW AND SHIFT

When it comes to placement flexibility, the LX-NZ3 offers 1.6:1 which is a good amount of zoom range. Most home theater projectors which have zoom lenses with a range of 1.1:1 to 1.6:1, depending on the brand and model.

Here’s the throw distances for the LX-NZ3 for filling a 100” 16:9 screen (measured from the front of the lens to the screen):

  • Closest: 118 inches (9 feet 10 inches)
  • Furthest: 189 inches (15 feet 8 inches)

While the LX-NZ3 is a DLP projector, it still offers a decent amount of horizontal and vertical lens shift which increased the model’s installation flexibility.

Lens Shift: 60% Vertical and 23% Horizontal

Just remember, like most projectors, the more horizontal shift you use, the less vertical adjustment you will have available.

CONTROL PANEL

The control panel of the LX-NZ3 is very simple but most people will only use the control panel for initial setup, then rely on the remote control.

The POWER button is located on the left. Press it once to power the unit on and press twice to power off. Beside it is the MENU button and a HIDE button to temporarily blank the screen.

Next are four arrows for navigating the projector’s menu with an OK button located in the center (which most companies call ENTER).

Finally, to the right is INPUT to toggle between inputs and a BACK button which takes you back up one level in the menus.

REMOTE CONTROL

The LX-NZ3 has a backlit remote control. It is slimmer than the previous JVC projector remote with less buttons. While the remote is smaller and simpler, the buttons are well spaced and key buttons are easy to locate.

The top row of the remote contains the POWER button which you must press twice to power the unit off. In the middle is a LIGHT button which turns on the remote’s backlight for a few seconds. On the top left is an INPUT button to toggle between inputs.

The section below contains buttons to select one of the preset/saved picture modes. There is also a dedicated GAMMA button to quickly change Gamma settings.

The next section holds a HIDE button to temporarily blank the screen as well as a TEST button to access the test pattern. There are a group of buttons that contain the 4-way navigation buttons with an OK (enter) button in the center. There is a MENU to access the main page of the menu and a BACK button to move you up one level in the menus.

Lastly there are BRIGHTNESS and CONTRAST buttons to directly access the adjustment settings.

MENUS

The LX-NZ3 has a less complex menu system than JVC’s NX-Series models. LX-NZ3’s overall menu is well organized and easy to navigate. The images of the menu shown in this section represent only a small number of all the sub-menus available. I tried to show a couple more notable sections found in the most used sub-menus (image, setting and networking, etc.). While the font size on the menu is a little small, it is still readable at a “normal” distance. The position of the menu can also be moved.

Latest Reviews

February 25, 2024

Introducing the Hisense C1: A cube-shaped 4K UHD lifestyle projector with an RGB triple laser light source and integrated JBL ...

February 19, 2024

The BenQ X3100i is a 4LED, 4K UHD (3,840 x 2,160p) 0.65" DLP short-throw gaming projector that offers a BenQ-rated ...

© 2024 Projector Reviews

crossmenu linkedin facebook pinterest youtube rss twitter instagram facebook-blank rss-blank linkedin-blank pinterest youtube twitter instagram