Main Menu
Controls for aspect ratio, Brightness, Contrast, etc. Also Sharpness Overscan or Crop, Source, and more
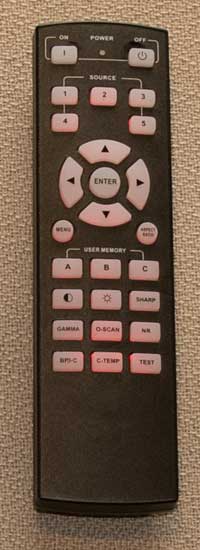
The Vivitek remote control is about average size, black with backlit buttons that are a soft red with a slight orange caste, not too bright or too dim.
From the top, you'll find separate power on, and power off buttons.
Right below are 5 buttons, cleverly labeled 1 through 5. These are your Source control buttons. Instead of pre-assigning them HDMI 1, 2, etc. Vivitek lets you go into the menu system and select which source to assign to each button. I stuck with the defaults which made button #1 (Vivitek calls it Key 1) HDMI 1, #2, HDMI 2, #3 Component Video 1, and so on.
It should be noted that when you power up, the Vivitek's normal process is to return to the last source that was selected.
Moving down the remote control, next is the navigation area, with the four arrow keys in a round formation with Enter in the center. Just below to the left, is the Menu button to open the navigation, and to the right is a single button to select aspect ratio.
Below that are three buttons for User Memory modes, to directly recall them. They are labeled A, B, and C on the remote control.
Further down are buttons for direct access to adjustments: Contrast, Brightness, and Sharpness in the first row, then Gamma, Overscan (nice, the projector offers a choice of Overscan or Cropping should you have edge noise, as sometimes happens with HDTV. On the right side of that row is the Noise Reduction.
The bottom row has Brilliant Color (toggles between on and off), Color Temp, and on the right, Test which brings up black white, and each primary and secondary, a checkerboard, and a fine black and white mesh test patterns.
 Click Image to Enlarge
All the major and most minor menus are here. Some have comments. As I said previously, the H9090's menu system is old school. You won't find preset modes like Theater, Living Room, Film, Natural. But you can save four of your own.
[sam_pro id=1_56 codes="true"]
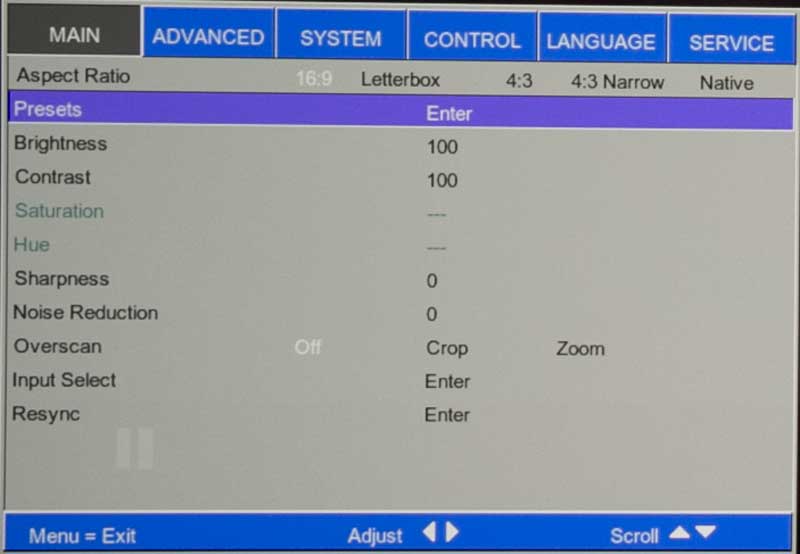
Controls for aspect ratio, Brightness, Contrast, etc. Also Sharpness Overscan or Crop, Source, and more
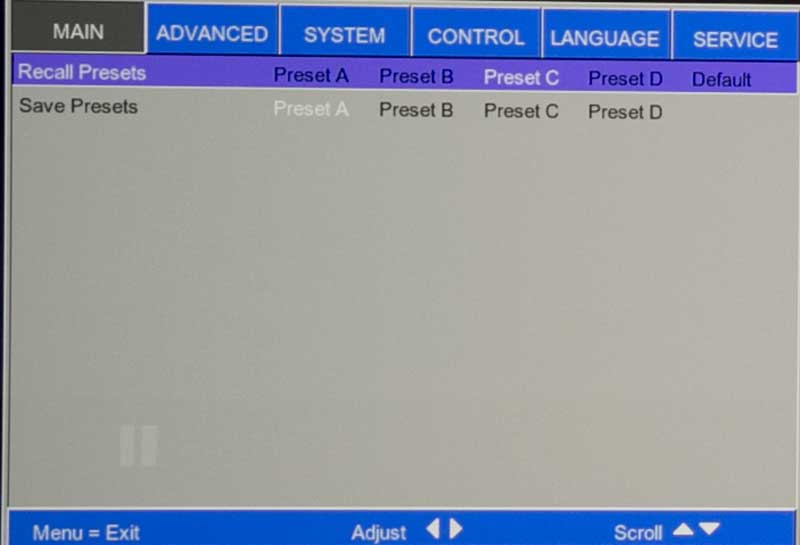
Save up to four different groups of settings.
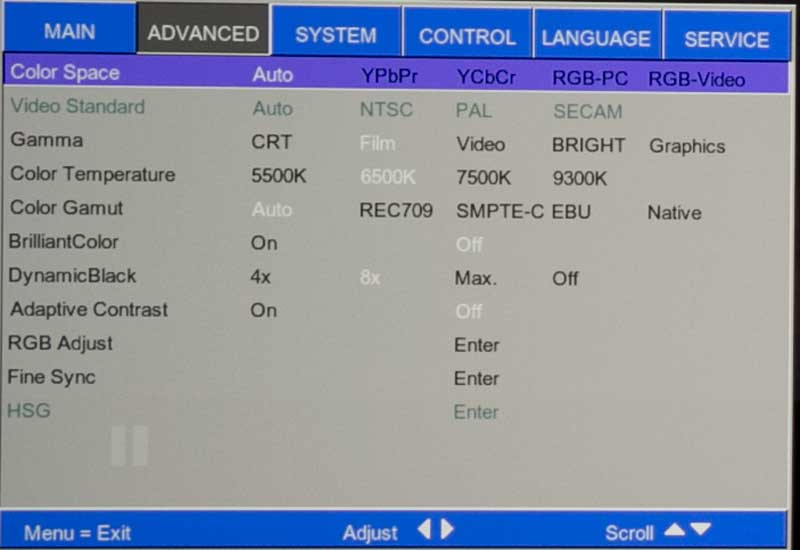
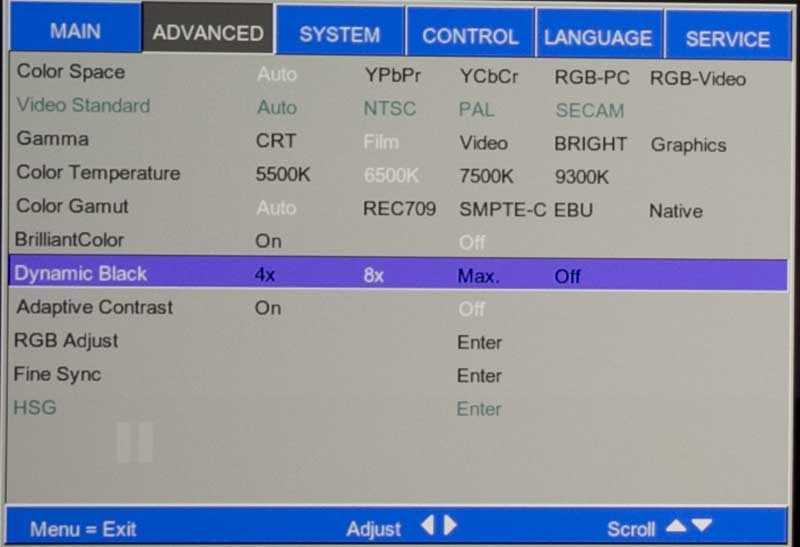
Fun stuff here - color and gamma controls (including all needed to calibrate), Brilliant Color and Adaptive Contrast
Same as previous, Brilliant Color highlighted
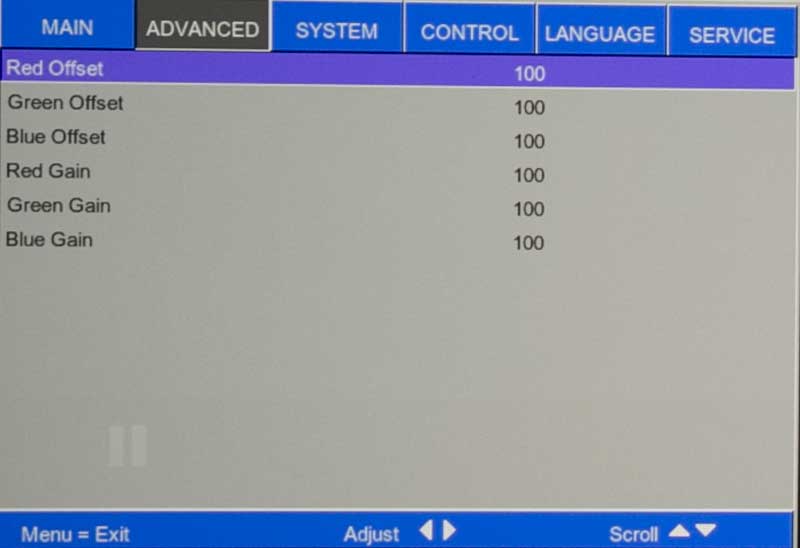
Gain and Offset controls
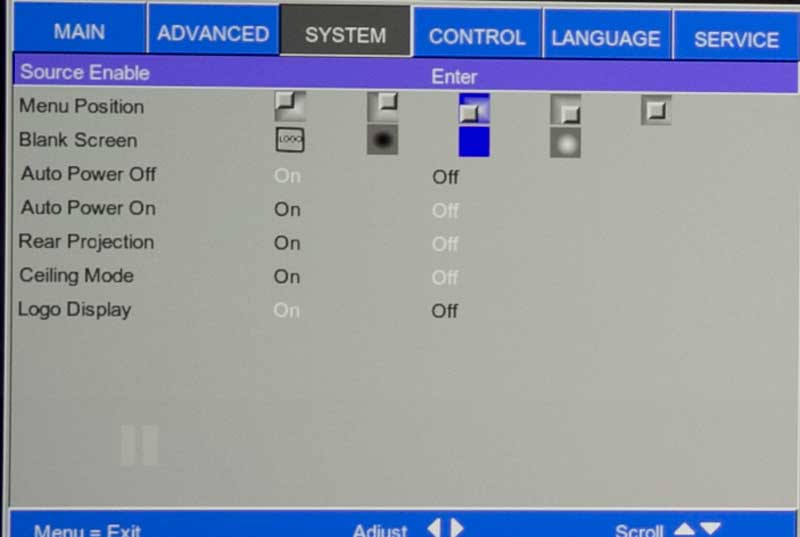
Operations stuff: Positioning the Menu, Auto Power features, Orientation...
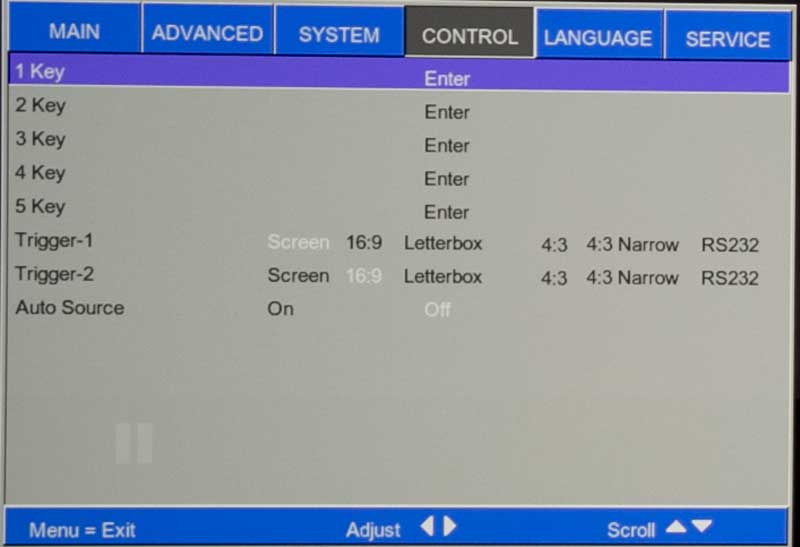
Select which sources for the 1-5 numbers on remote, define the triggers functions, select Auto Source
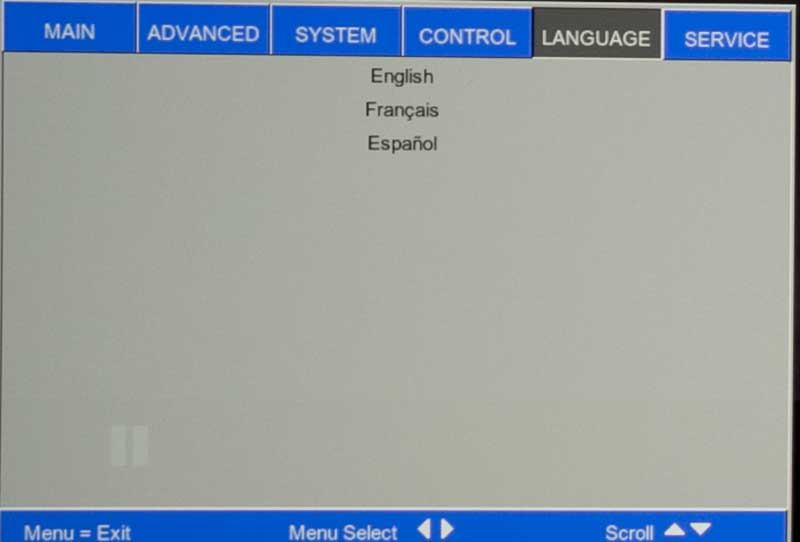
Only three, would indicate different versions for different parts of the world
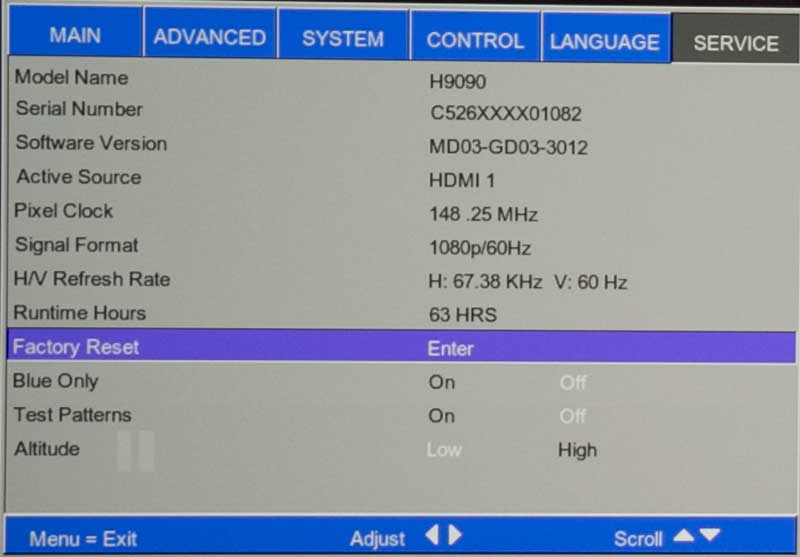
Mostly it's an information menu, including hours used, but has test patterns, Reset, and Low/High Altitude option
The H9090 offers a small amount of horizontal lens shift, and a respectable amount of vertical lens shift. It's got a lot more lens shift than most lower cost DLP's but less than most competing 3LCD and LCoS projectors. The manual is foggy at best, in defining the amount of shift. Looks like you can move the image across a range that is 120% of screen height. That would allow a projector using a 100" diagonal screen to be mounted from about 5 inches above the top of the screen (when ceiling mounted) down to 5 inches below the bottom of the screen, or anywhere in between. That is measured from the center of the lens.
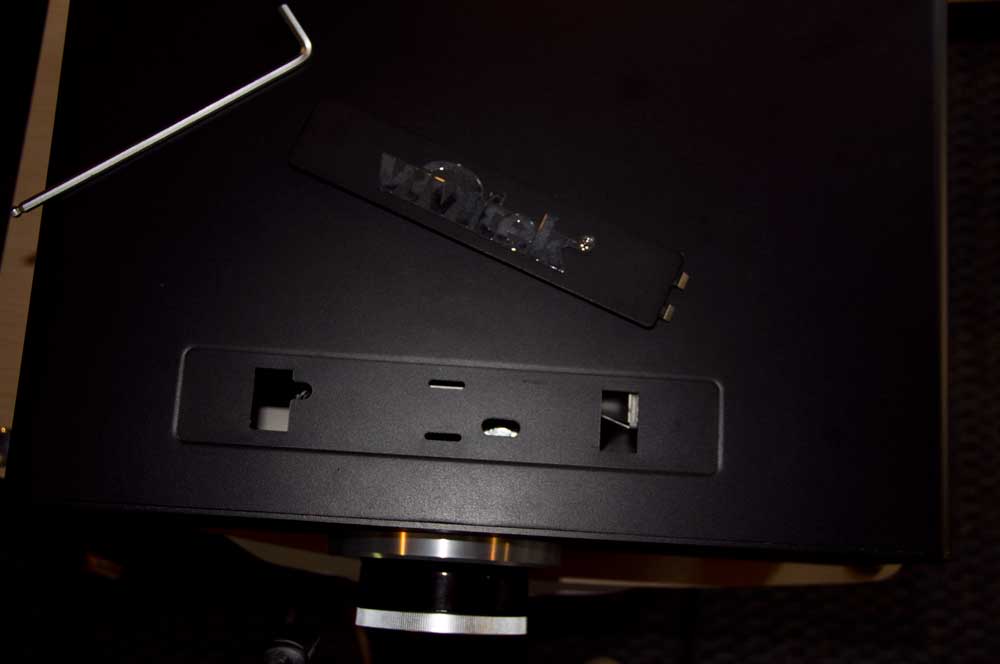
The hex wrench inserts into the rectangles on the left (horizontal shift) or right (vertical shift) to adjust the lens shift. You can see the removable Vivitek nameplate that normally covers those openings.
A lot of DLP projectors that do have decent range are limited to a Zero offset, meaning that the center of the lens can be no higher than the top the screen surface, or no lower than the bottom. An extra 5 inches isn't a lot, but if you have, say, a tall ceiling, every bit helps.
Horizontal lens shift is 30%, so for a 100" diagonal screen we're looking at the ability to place the projector 13 inches left or right of center, of the screen, or any where in between. Reminder, using some of one lens shift (V or H) limits the amount of the other.
One other note of interest. Normally you do not tilt a projector, but it is interesting that that Vivitek says this projector cannot be tilted more than 15 degrees when in operation. What makes that a bit unusual, is that many solid state projectors boast in particular that they can work at almost any angle. Well, it's not something you need to worry about.