Projector Reviews Images

BenQ W1500 Projector - Hardware Tour 2

Posted on December 25, 2013 by Art Feierman
BENQ W1500 HARDWARE TOUR,  PAGE 2:  Wireless HDMI (WHDI), Remote Control, Menus

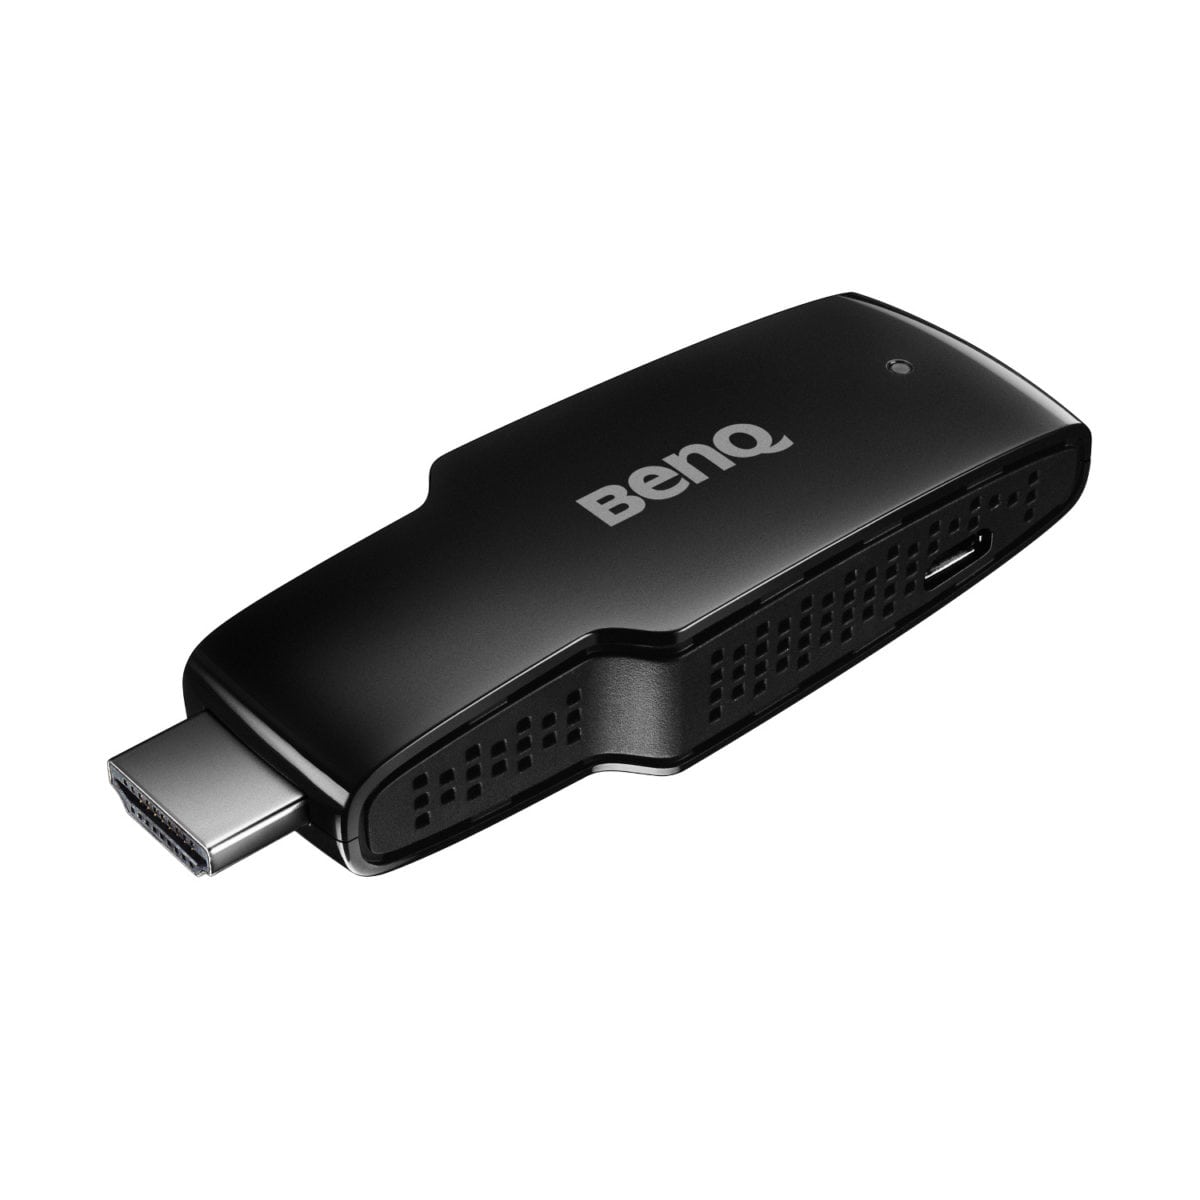
BenQ W1500's Wireless HDMI - WHDI - Dongle Transmitter

BenQ's Wireless HDMI solution, as mentioned in the Special Features section, uses a dongle type transmitter.  That is, you simply plug in this dongle into the HDMI output of your satellite/cable box, game console, Blu-ray player, etc.  It talks to the receiver that's built into the W1500 projector.

Range is respectable, as already mentioned.  The dongle, interestingly, does not pull power from the source you plug it into.  Instead, the BenQ comes with an AC adapter, and a USB adapter to power the dongle, but power it you must.  I foolishly tried just plugging it in, and expecting it to work, without consulting the manual.  I knew about the AC and USB but figured I'd do it the "hard way" - learn by experience.  You've been warned.  It needs power to work.

While the wireless HDMI performance is fine - the signal is lossless (no degradation), and range is certainly acceptable within one room, and likely able to work if the source is in a nearby room.


Click Image to Enlarge

Based on preliminary testing, I don't think that it will really cover an entire house, unless it's a very small one.  Thereis one limitation to the single dongle design of BenQ's wireless HDMI solution:

Not everyone uses an AV receiver (which provide HDMI switching, so you would plug all your HDMI devices into your receiver), or an external switch box.  I know, because I don't.  I normally run HDMI cables from my sources to the back of whatever projector I'm using.  If I wanted to go wireless HDMI, with my multiple sources, I'd need to buy a switch box (or switching AV receiver), as you can apparently only have one dongle.

BenQ W1500 Remote Control

I mostly like this remote control. The W1500 remote is finished in white, has a pretty good layout, and a very nice, red backlight (well, there's a bit of orange in that red).

Let's run though the organization of the remote and the various buttons, starting with the Power button at the top left.  Press once to power on. Unlike most projectors, the W1500 has a second button for powering down, which, in this case is located just to the right of the Power On button.   A single press turns the projector off.   On the far right at the top is the backlight button.  Pressing it will turn on the back light, which will stay on for almost 15 seconds.  Pressing other keys also turns on, or keeps the backlight on.

The next two rows are the source choices.  You'll find two HDMI inputs, and also a button for the Wireless HDMI (labeled "Wireless").  The other sources are Video, PC, and Component.  As there are two component video inputs, pressing the Component button a second time will toggle you from Component Video 1, to Component Video 2.

Next comes 9 buttons organized into three rows. This section is for navigation, and is laid out exactly like the Control Panel, which means Menu/Exit is in the upper right.  Arrow keys occupy the top and bottom center buttons and the middle row left and right.  The up and down arrows double as keystone correction controls when you aren't in the menus, while the left and right arrows take on the job of volume down and up.

Auto for a PC signal is upper right, while a button to blank the screen, called Eco Blank is lower left, and a Source select button is in the lower right.  Hitting Source brings up a menu with the full list of sources (you can see this in our Menus section).  That leaves just 18 more buttons to run though, in six rows of 3.

The first of these rows has Aspect Ratio, PIP (Picture-In-Picture), and SRS (surround sound) On/Off.

Next row has one button for each of the three User modes.

Next comes two rows of direct access to image features, including: Contrast, Brightness, Sharpness, Color (saturation), Color Temp, and Sharpness.

On the left side of the next row is "Fine Tune" which takes you directly to the Color Temp controls for Gain and Offset (bias).  3D Mode comes next, and also invert for reversing the glasses left and right images.  Finally, on the last row, there's a Mute button (mutes sound only), a Freeze (frame) button, and Test for two test patterns you can bring up.  (unfortunately, no color test patterns, just a simple white grid.

Click Image to Enlarge

W1500 menus

BenQ's menu design hasn't changed much in the last decade, in fact if anything, other than the addition of new features, they have barely changed at all, going way back to the old 720p BenQ PE-8700, which I owned about 10 years ago.

© 2024 Projector Reviews

crossmenu linkedin facebook pinterest youtube rss twitter instagram facebook-blank rss-blank linkedin-blank pinterest youtube twitter instagram