Projector Reviews Images

BenQ InstaShow Review

Posted on June 19, 2019 by Dave Duncan

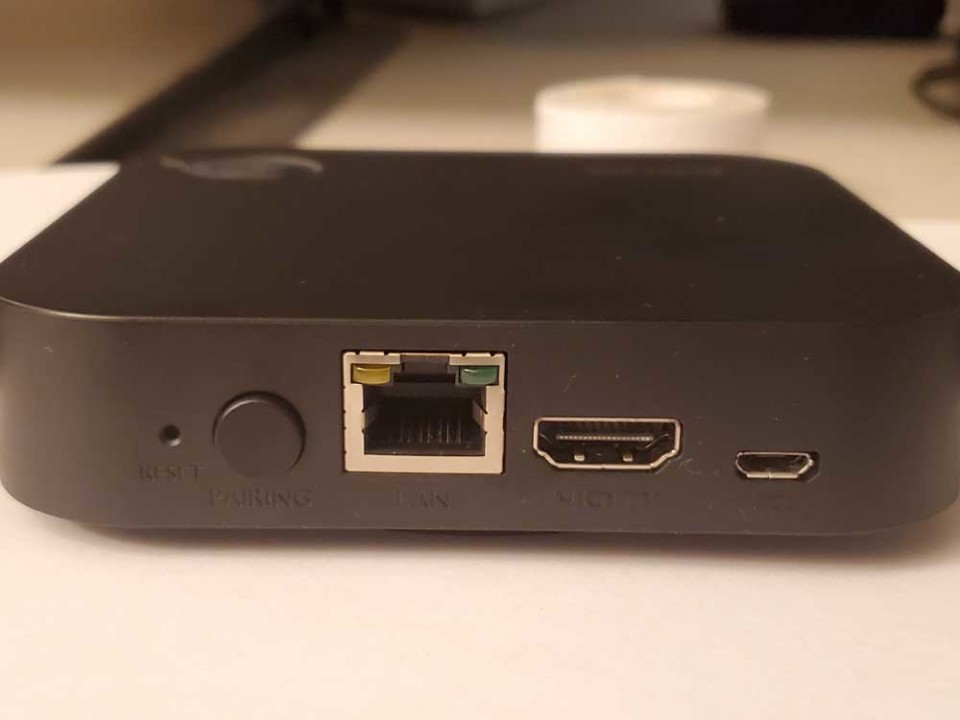
The InstaShow Host has only a couple of connections. The HDMI output, Micro USB for power and an RJ45 if you want to hardwire it into the network.

The InstaShow system consists of a simple transmitter and receiver. The magic is in the engineering and performance BenQ has developed into the product. It truly is as simple as plugging the InstaShow host into your display and then plugging the Instashow button into your computer.

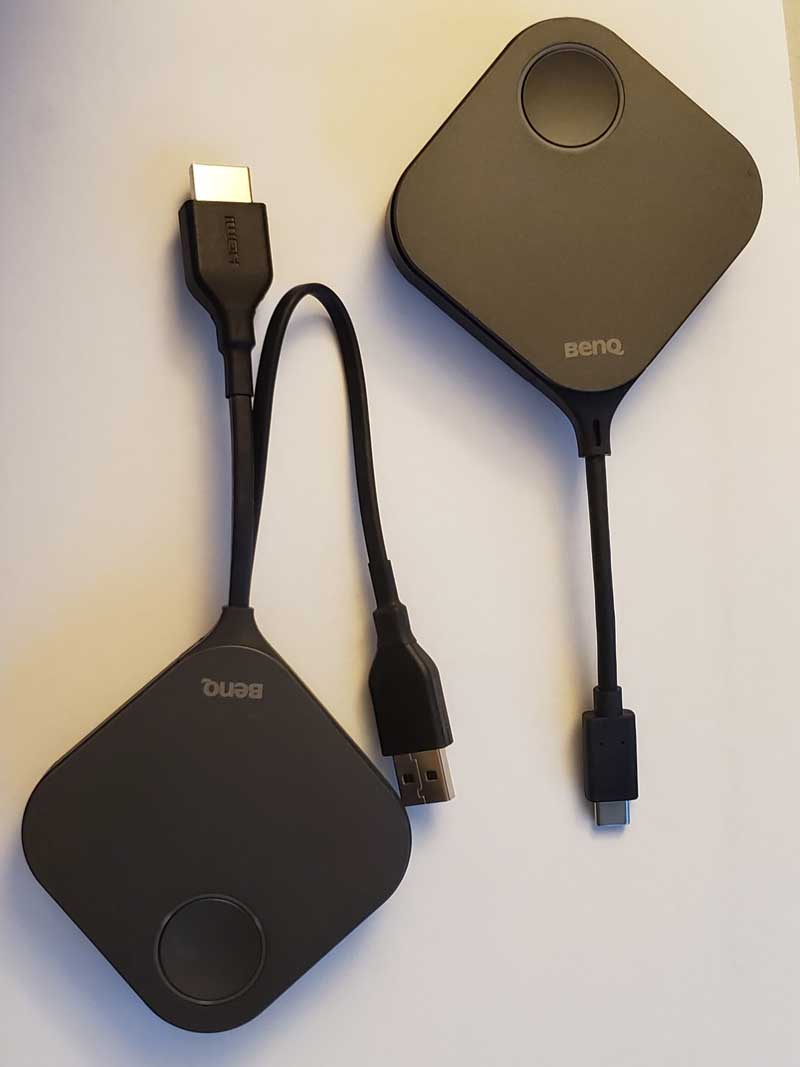
The WDC10 InstaShow button needs 2 connections, USB and HDMI, while the all-new WDC10C only needs 1, USBC and you are ready to go. Did I mention there was no software? The best feature of this product is there is nothing to install at all. No driver to load, no mirroring app to install absolutely nothing. All you need to do is push a button and you are presenting.

Not only is the BenQ Instashow about as easy as using a cable, but it is also about as secure as one too. The InstaShow system uses HDMI 1.4b with HDCP (High Definition Content Protection) to connect to your source. Then it transmits it completely encrypted using WPA2 with 128 bit AES encryption. You can't get any more private than that.  BenQ has done a lot of testing and has provided a security whitepaper on their site if you would like more information.

Wireless presentation has had its ups and downs over the years, sometimes it becomes the star of your meeting as it drops frames and takes so long to refresh that there are awkward silences. Then you start to really hope that it's not going to disconnect. Many times, the meaning of your presentation can get lost in the poor performance of the device you may present with.

That is definitely not the case with the BenQ InstaShow. This is a great product. They are focused on SMB and Corporate huddle spaces and they sure have produced a nice system for those customers. Anyone who can plug in a cable and press a button can be a presenter in a matter of seconds.

Highlights

I have worked with and tested a long list of wireless presentation devices over the years. I really took notice of a few great features of the BenQ InstaShow system that should definitely be highlighted.

1 - Setup is simple, no IT department needed. Just plug it into your display and present.
2- No software to install. No software on your laptop, or Display. The InstaShow system does all the work for you. Just like a true cable replacement.
3 - No charging is needed, The BenQ InstaShow is always ready to present when you are. Getting its power from USBA or USBC it is ready to present.

  • One button press to present
  • Point to point doesn’t need your network (very secure)
  • Up to 30 FPS for great presentations and video
  • Full HD 1080 performance
  • Works with BlueRay! / DVD HDCP compliant
  • Up to 16 users can have a button connected and be ready to presents
  • Web management for advanced configuration ( If you want to, not needed)

InstaShow Special Features

Instashow is a really easy system to use.  Connect, press, present. This is the wireless solution a lot of users are looking for.  In most meetings, there are 1 or  2 presenters. The InstaShow WDC10 is perfect for this scenario.  As it supports up to 16 users, everyone on in the meeting can be connected and ready to present at the press of a button.

I have mentioned the Instashow is easy to use, but how easy?  It is about as simple as passing a cable around a conference room.  You take the Instashow button, you connect it to your computer. If you have the WDC10, you connect the USBA and HDMI connectors. If you have the WDC10C, you just plug in the USBC.  You will see the button light up and turn red as it boots up and automatically pairs itself to the InstaShow host.  In few moments the button will turn green.  Giving you the green light to present.  One simple press of the button and your display is wirelessly sent to the InstaShow host for display.  Yes, it worked that simply during my testing and use.  There is more about that in the performance section. I ran it for hours with different content and measured the delay between my local screen and the display attached to the InstaShow host.  Make sure and give that section a look. 

When presenting with the Instashow button, you could run into the need to pair your button to the host. Perhaps you purchased another button, or you purchased a new WDC10C to support new devices with USBC..  BenQ made that simple as well.  You press the pairing button on the host for 5 seconds and the display screen will change to read “pairing”.  Then you hold down the mode button on the InstaShow button for 5 seconds until you see the lights blink red and blue.  A couple of seconds later the light will turn green. Telling you it is paired to the host and ready to present.  If your InstaShow host is mounted close to the ceiling, have no worries, they covered that.  You can put it into pairing mode using the web management console.  No need to go get a ladder!

The InstaShow system is really flexible allowing 16 users to be ready to present. One thing to note is there is no moderator function.  What that means is that everyone is on their best behavior to not press the button they are connected to. If they do, their content becomes live on screen. This is really not that big of a deal.  As I mentioned above, most meetings have 1 maybe 2 presenters.  No one is looking to be purposefully disruptive by pressing the button to take control.  If an accident should take place, a simple press of the correct presenters button puts the right content on screen. 

Mounting

I love the thought that BenQ put into the mounting of the Instashow host. In most conference rooms when you add an accessory to a Panel or a projector you are then challenged with, “where do we put it?”.  If you have a projector mounted to the ceiling, or a panel neatly hung on the wall, you don’t want to end up with cables and plugs everywhere. 

You have a few options with the InstaShow host. As shown in the photos above.  Included in the box is a back plate that the Instashow locks onto, with a snap and twist.  This backing plate can be secured to a pole with the included velcro strap, which is great if your display is hanging from the ceiling.  The backing plate can also be secured to a wall with screws (not included), or even better, stuck to the back of a panel with the included 3M double sided sticky pad.  That covers just about all the bases for mounting.  Not to mention all options are pretty simple and quick. 

Setup

As a TCP/IP based network device, the setup doesn’t get any easier. Once you have the InstaShow host mounted, secured, and powered up. Your done. You may need to pair a button, which is as simple as putting the host into pairing mode via the web management console or the sync button. Then hold down the mode button on the button until the light blinks. The rest happens on its own.

The InstaShow host creates its own 802.11 5G wireless network. Out of the box, it is ready to go. You plug it, it boots up and is ready for a button to send your presentation content. I will touch on this more in the managing section. You do not have to configure anything. Out of the box, the InstaShow Host is ready to go. If you need to change some settings to the network setup you can do that in the web management console. You can even adjust the transmitting power!

Managing

The InstaShow is ready to present out of the box, but you may find that you need to change a few things to fit your corporate situation.  Perhaps you want to turn down the transmission power so that the signal doesn't carry over into other conference rooms.  Maybe you want to completely hide the SSID? The choice is yours. 

The InstaShow WDC10 / WDC10C come with an embedded web management console in the host.  Allowing you to connect with your browser to make any changes you would like to.  If your InstaShow host is ceiling mounted, this is where you will find a way to put it in pairing mode when you purchase more buttons. 

The web management portal is not overly complicated. Very similar to most wireless routers these days, it opens up to a summary and you have a menu bar on the left.  Below is a list of the pages and the settings you will find on each one.  The Instashow gives you a lot of options to customize and integrate it into your use case. 

Information - This is the summary screen where you see the current status of the InstaShow Host.  You can also enter a custom message to be shown on screen.  Perhaps a conference room name?

WAN - Here you can specify the WAN connection type and IP address for your InstaShow created wireless network. 

Wireless Network -  Change the broadcast wireless network and security settings, like SSID.  This is also where you can adjust broadcast power, which is a great feature. 

Pairing -  Here you get a nice overview of the paired devices and place the host into pairing mode. 

Advance Setting -  Restart / Shutdown is availale here as well as adjustments to tweak frame rate, and picture quality. 

Scheduling-  Schedule routine restarts to make sure the system is fresh and ready to perform.

Tool -  change password,  upgrade firmware, export configuration (useful for large deployment) and adjust log settings. 

Legal Announcement - The legal stuff

Performance

The performance of the InstaShow was fantastic. I was greatly impressed.  I was able to keep it running for extended periods of time without it disconnecting, and without any noticeable delay increase. 

While running the InstaShow Button in presentation mode I was measuring a delay between 130 - 150 milliseconds, which is lightning fast.  I did notice that when in Presentation mode there is a noticeable framerate drop in the displayed video. The audio still hangs on in sync, but you can see some chop in the video frame rates. 

Switching the InstaShow button into Video mode, with a simple mode button press, the latency dropped down to 100ms, it stayed there as well.  There were a couple of moments where it would be around 120ms, but that is so small. There was some fluctuation, but I let it run for hours expecting it to get worse with time, and it did not. It was rock solid.  The framerate was smooth and looked great. Even after 3 hours of running, it was still clocking around 100ms and the framerate was smooth, audio in sync and performing well. 

The button did get a little warm after hours of use, but it didn’t miss a beat and worked very nicely. I would not hesitate to deliver a presentation with the BenQ  InstaShow WDC10C. 

Up next was to connect the Instashow up to a Blueray player. That is usually the first or second question when you are speaking to people about wireless presentation.  Does it do video? Not only does the Instashow do great video straight from your laptop screen, but it will also stream a Blueray.

I wasn’t sure if that would work, as most devices get hung up on the HDCP.  The Instashow worked very well.  I let if play through two whole movies. First Passengers, then a Dogs Journey Home.  The InstaShow does need to be in video mode. In presentation mode, it was somewhat choppy. 

The DVD performance is great. You could use the InstaShow as a switcher in a classroom or conference room.  Having all your sources plugged into an Instashow button, you would be able to readily switch between them. 

Hardware

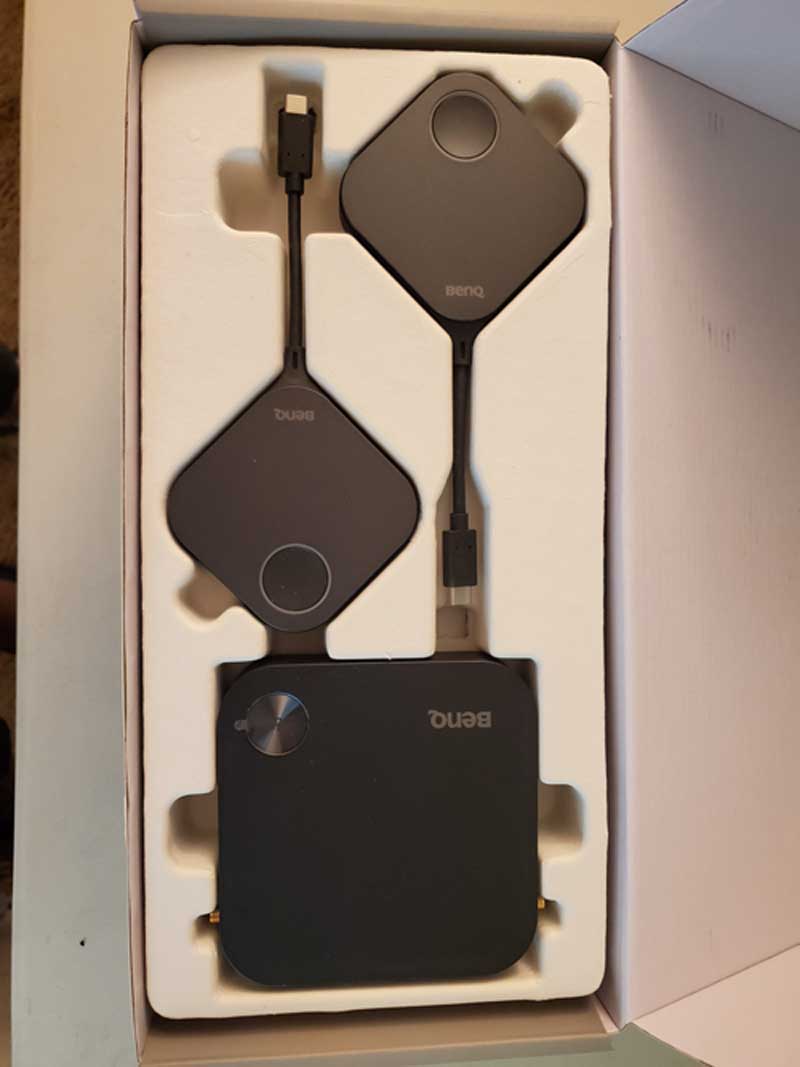
BenQ includes everything you need in the box. You have a storage bin to place the buttons into when not in use. It had some heft to it and was solid. There is the mounting ring, velcro and double-sided sticky pad. As well as the meat of the system, the Instashow Host and InstaShow buttons.

The InstaShow Host has only a couple of connections. The HDMI output, Micro USB for power and an RJ45 if you want to hardwire it into the network.

The Instashow buttons are simple as well, the WDC10 has HDMI and USBA, while the new WDC10C only has USBC for a great one cable connection.

Summary

The BenQ InstaShow is a great wireless presentation system. Out of the box it is as simple as you need it to be. You can have it hooked up in moments and be presenting seconds later. Its that easy. They include all the necessary installation options, whether your are a professional installer or an end user, they have made this part very simple. If you are looking for an easy way to add HDMI to your conference room, this is it. The BenQ Instashow is a true HDMI cable replacement for the conference room.

I would recommend this product for your conference room, huddle space or class room.

Pros

  • Easy to use, just press a button to present
  • No software at all
  • Setup out of the box, just hook it up and go
  • Expandable with up to 16 buttons
  • Configurable with the web management console
  • Excellent performance with Computer and Video sources
  • Supports HDCP!
  • No charging, it is ready to go seconds after plugging it in

Cons

  • No mobile device support
  • No moderator function to control the presentation source
  • No passcode to secure it
  • No touch pass through for interactive panels

All in all these Cons are pretty small items, for BenQ’s target market, the SMB and huddle space this wireless presentation system sets the bar high. If you are looking for a wireless solution, you can’t go wrong with the BenQ Instashow for your conference room or classroom. 

Latest Reviews

February 25, 2024

Introducing the Hisense C1: A cube-shaped 4K UHD lifestyle projector with an RGB triple laser light source and integrated JBL ...

© 2024 Projector Reviews

crossmenu linkedin facebook pinterest youtube rss twitter instagram facebook-blank rss-blank linkedin-blank pinterest youtube twitter instagram