Setup and Menus
The EX7240 has a 1.2:1 zoom lens with a throw ratio between 1.30:1 and 1.56:1. For example with a 80 inch wide screen the projector can be placed from as close as (80 x 1.3 =) 104″ to as far as (80 x 1.45=) 124.8″ from the screen. With the projector placed on a table and level, the bottom of the projected image will be little below the projector's level.
The physical setup of the projector is very straight forward with the basic zoom and focus rings on the projector’s lens and a drop down front foot that can be used to tilt the projector upward if necessary to align the image with the screen. The projector’s automatic vertical keystone correction feature works well to restore the correct geometry of the projected image when the projector has been tilted upward. A slide control is located on the top of the projector, just to the rear of the lens, for the adjustment of horizontal keystone correction if need. This adjustment should only been needed for the case where the projector cannot be placed directly in front of the horizontal center of the screen.
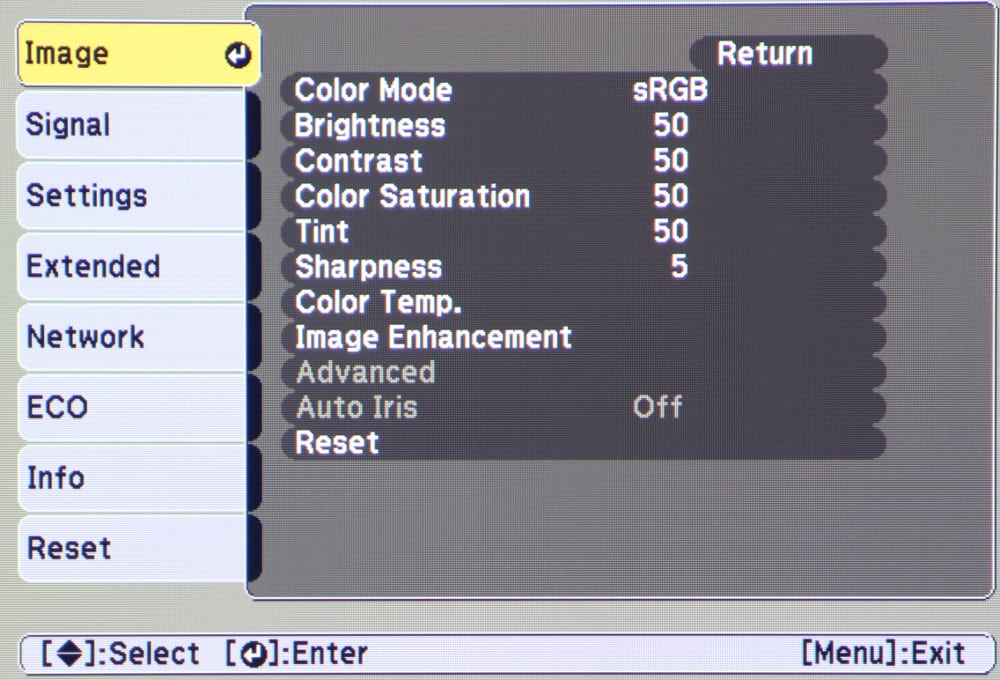
The EX7240 Pro has a well organized menu structure with good on-screen graphics. When the menu button is pressed, the top-level menu is displayed with the “Image” menu selected as shown below.
Image Menu
The top level Image Menu is shown in the 1st gallery photo above. Several of the items on this menu will display sub-menus when that specific item is selected. A few of those sub-menus are shown the remaining photos in this gallery.
When Color Mode is selected the sub-menu shown in the 2nd gallery photo above is displayed. There are 5 preset color, or picture, modes available. These are discussed in more detail the next two sections of this review.
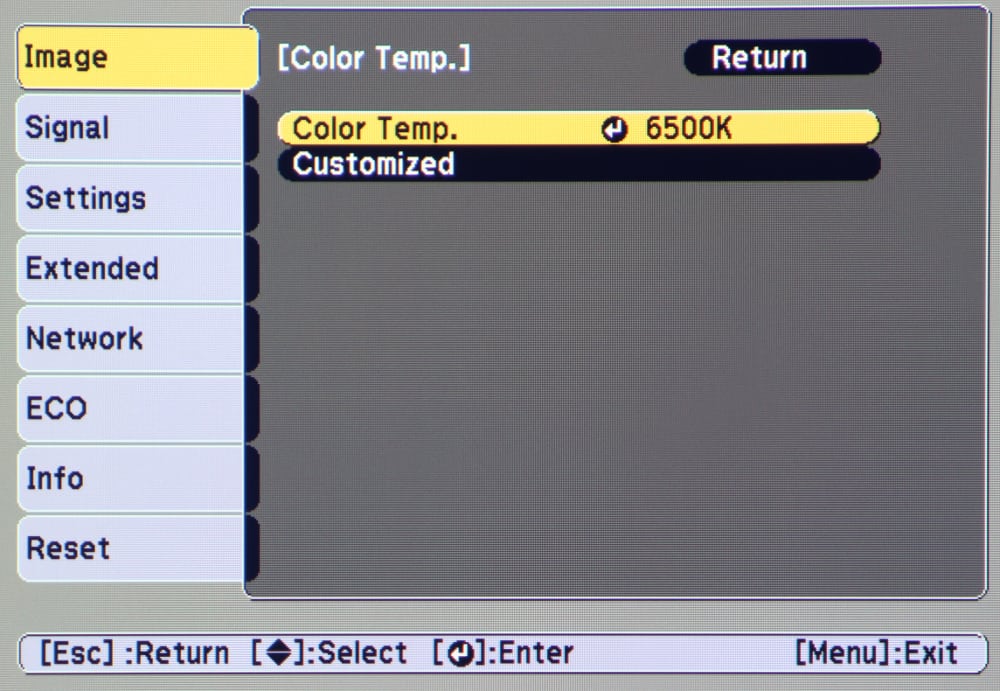
Along with the standard picture settings for Brightness, Contrast, Color, Tint, Sharpness (all available from the main Image Menu), there is a Color Temperature adjustment available. When selected the sub-menu shown in the 3rd gallery photo is displayed. From this sub-menu the user can adjust the desired color temperature as a series of steps higher for lower from the factory default value or choose to create a custom value. When the Custom option is selected the sub-menu as shown in the 4th gallery photo is displayed where the user can use the RGB Gain and Offset controls to adjust the color temperature and to correct for grey scaling color errors. This requires professional tools for a accurate grey scale calibration.
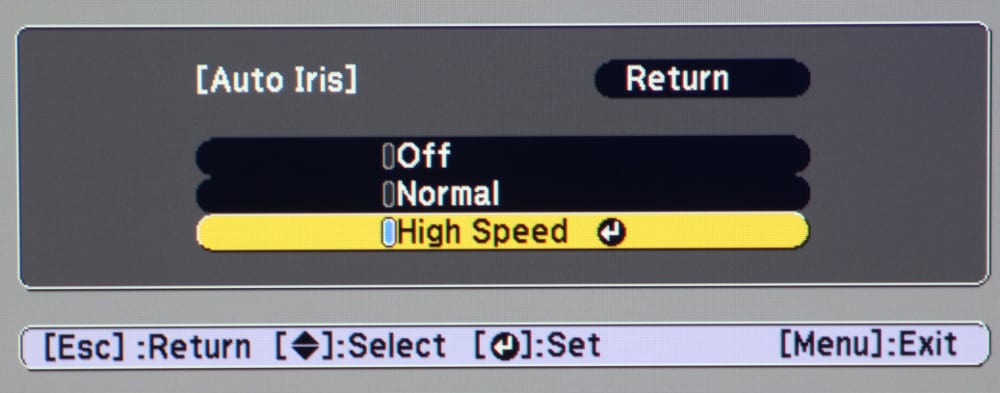
The Auto Iris setting is only available when the projector is operating in either "Dynamic" or "Cinema" color modes. When the Auto Iris item is selected, when operating in either of these modes, the sub-menu shown in the 5th gallery photo above is displayed.
I also noted that the "Advanced" item on the Image menu is not available unless the input signal is in interlaced format. This will normally not be the case when connected to a computer for the input source, or with many HD Video sources.
Finally the Image Enhancement item on the Image menu is to be used with analog inputs and offer adjustments to stabilize the image or reduce noise or flickering in the image, if needed.
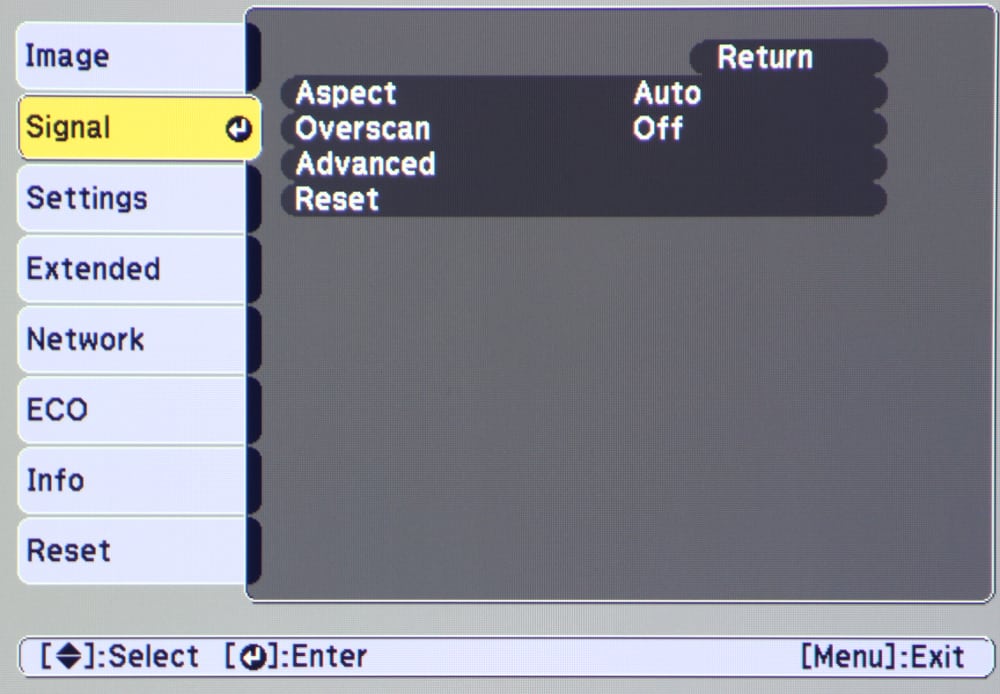
Signal Menu
The top-level Signal Menu is shown in the 1st gallery photo above. The menu allows the user to adjust the processing to be used for the input signal. One of the items under the advanced settings of the Signal menu is shown in the 2nd gallery photo and this allows the user to set the HDMI video range. "Normal" range is used for video sources, such from a DVD or Blu-ray Disc player, or to "Expanded" for when the source is a computer displaying graphics, photos, or presentations.
Eco and Info Menus
The 1st gallery photo above shows the Eco menu. It is from this menu you can select to operate the projector in normal (high lamp brightness) or Eco (low lamp brightness) mode.
The 2nd gallery photo above shows the Info menu. This menu presents information about the projector including such information as the current input signal type and the number of hours on the projector's lamp.