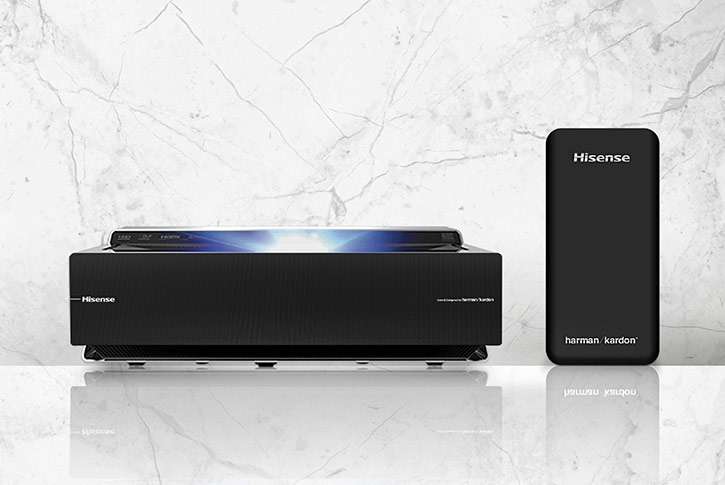
All of the Hisense Laser TV’s inputs are on the "back" – by our description, the part of the projector facing the screen. This design keeps cables easy to hide, and out of the way. And should your table, credenza, or AV cabinet house your other gear such as 4K Blu-ray player, satellite receiver, streaming devices, and even a full AV receiver, things should stay very neat cable wise, which should please other members of your household.
That should prove especially true considering this projector is most likely destined for living rooms, media rooms, family rooms and bonus rooms, rather than dedicated home theaters. (Hey, this projector works pretty great in my home theater too, where it is now, although I started viewing in a room with light gray walls, and a large side picture window.)
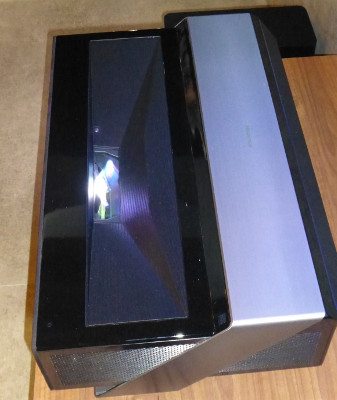
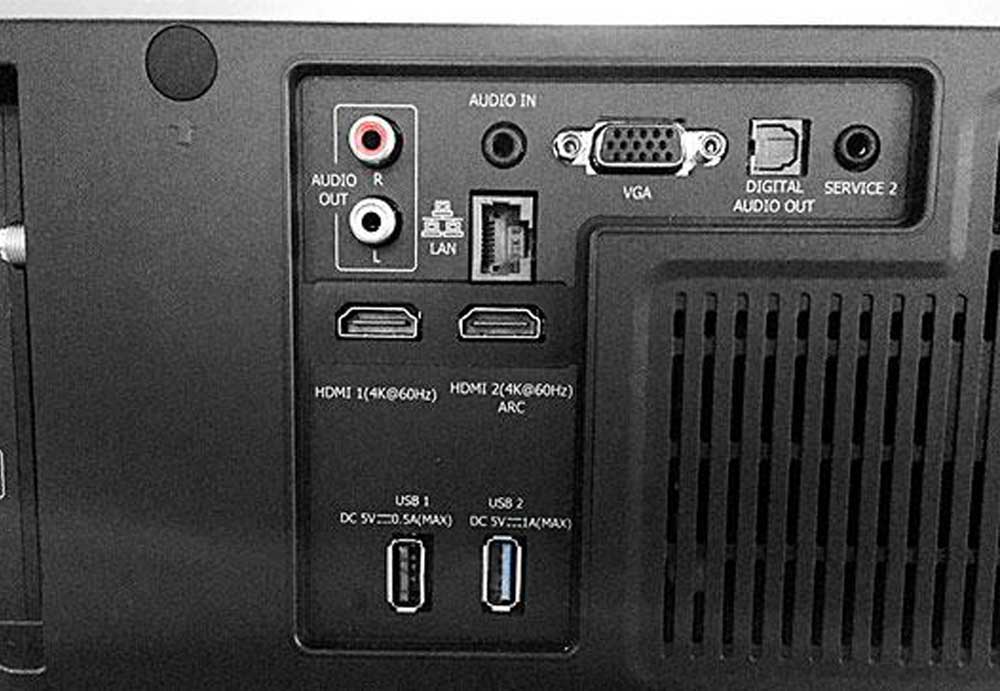
The collection of inputs is fairly typical for a serious home theater / home entertainment projector, from the top left:
There is a pair of RCA phono jacks for stereo audio output. Then to the right, is one stereo mini audio input. The “old school” computer VGA port is the next connector over (an HD15 connector).
Then, I find next, much to my approval, a Digital Audio Out jack, which is something many home entertainment systems with built in speakers lack. This allows you to output, (among other things) audio that came into the Hisense Laser TV projector over its smart streaming capabilities. That, along with other options, means you can use the internal sound system (and subwoofer) with smart capabilities and with other devices (like Blu-ray or Blu-ray UHD player sending audio over HDMI). But you can also send any audio coming in through the projector to your separate surround sound system if you have one. Cool.
The last connector on the top row is a service port, which I assume is for possible firmware upgrades or diagnostics.
On the second row (to the right of the audio jack), is the Ethernet jack – to hardwire to your home network. Now that’s always a great idea if you are streaming directly through the projector, as the hard wired network connection should prove faster and more reliable than using the wireless option (which the projector also has).
Below the RJ45 network connection are a pair of HDMI connectors. Both are apparently HDMI 2.0 or higher as both indicate 4K@60Hz It is possible that some very old HDMI devices won’t work with the HDMI 2.0, which is why many home theater and home entertainment projectors offer one HDMI 1.4 and one 2.0 or higher.
Finally further down are a pair of HDMI inputs. (With 5 volt power) suitable for thumb drives aka memory sticks. Hisense offers the suggestion of using a USB extension cable to simplify using those USB devices, since the jacks themselves are typically going to be hard to access once everything is set up.
Wait, we’re not quite done. On the back but facing the right side (if you are looking toward the projector and screen), are three more connectors – a traditional threaded antenna input, another service port (mini-USB) and RS232 serial port for “old school” command and control.