Hitachi CP-TW2503 PROJECTOR – HARDWARE TOUR: Overview, Lens Sensors, Control Panel, Inputs and Outputs, and the Remote Control
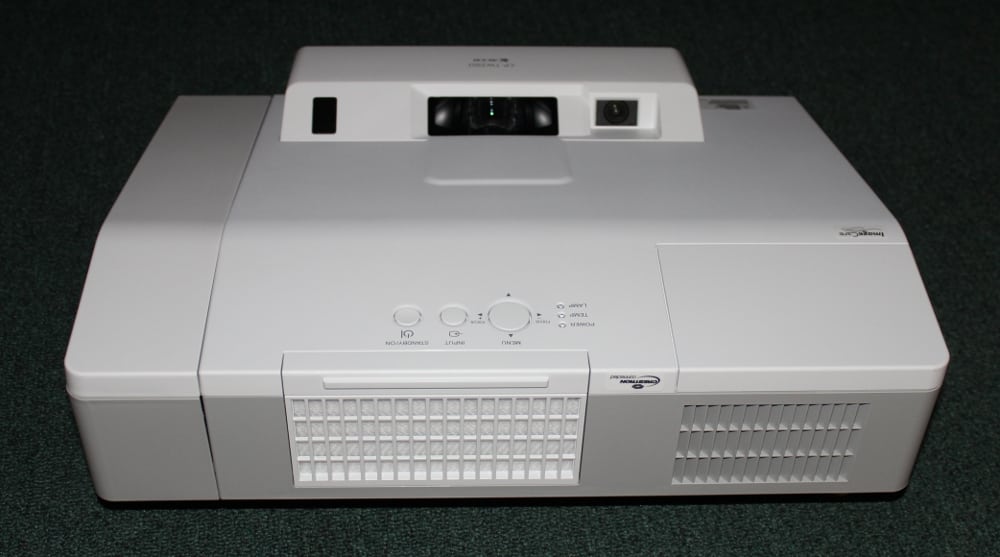
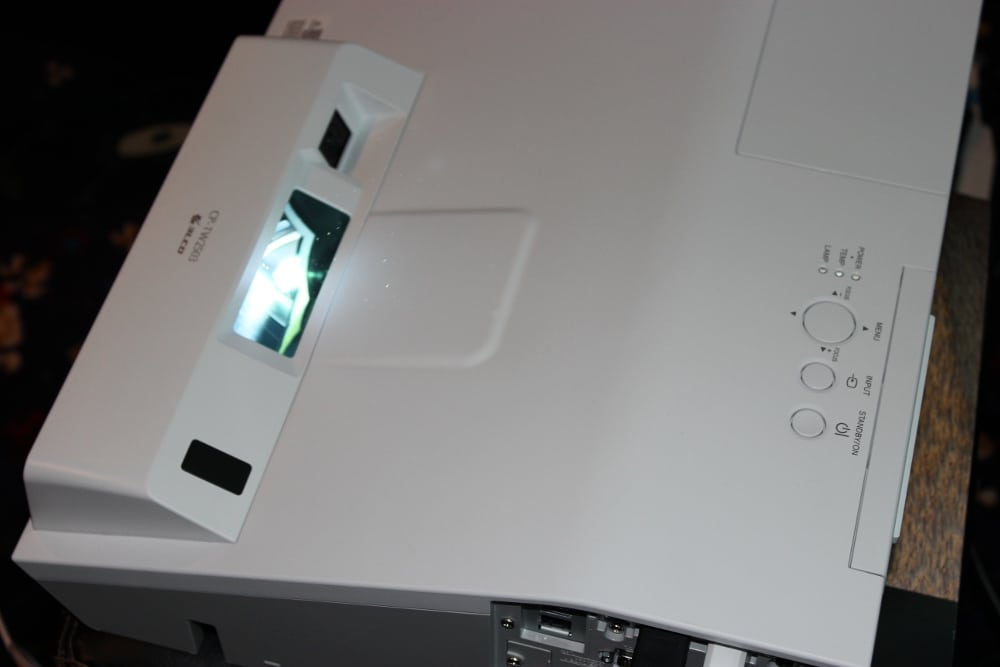
As is typical for ultra short throw projectors, the projection lens of the CP-TW2503 is positioned toward the rear on the top surface (with the projector sitting on a table). The lens it is tilted at a steep angle, pointing “up” when the projector is table mounted just below the projection surface, or “down” when wall mounted just above the projection surface, with the light from the projector emerging at a steep angle. The lens is recessed within a rectangular opening as shown in the following photo.
Hitachi CP-TW2503 - Turned On
According to the CP-TW2503's spec. sheet, the projector is to be placed so that the projector's lens is approx. 0.3 times the image width back from the projection surface. Hitachi lists the following value for the distance from the front edge of the projector to the screen for the following screen sizes (16:10 aspect ratio screens):
Screen Size (Diagonal) Projector Front to Screen (inches)
60 5.0
70 7.8
80 10.5
90 13.3
100 16.1
The intended screen/whiteboard size (with a 16 x 10 format image), as per Hitachi spec. sheet, is 60 inches to 100 inches diagonal. Note that larger sizes aren’t practical for an interactive projector, as people can’t interact with the upper portion of the surface if it’s 7, 8, 9 feet off the floor.
There is no optical zoom feature, but the projector does offer digital zoom that can shrink a full screen image down to a smaller size, and there is separate magnify function to enlarge just a portion of an image up to fill the full screen. The remote has zoom in and zoom out buttons for convenience.
Unlike many such projectors, the CP-TW2503 offers a power focus feature that can be adjusted using the focus buttons on the supplied remote control.
Control Panel
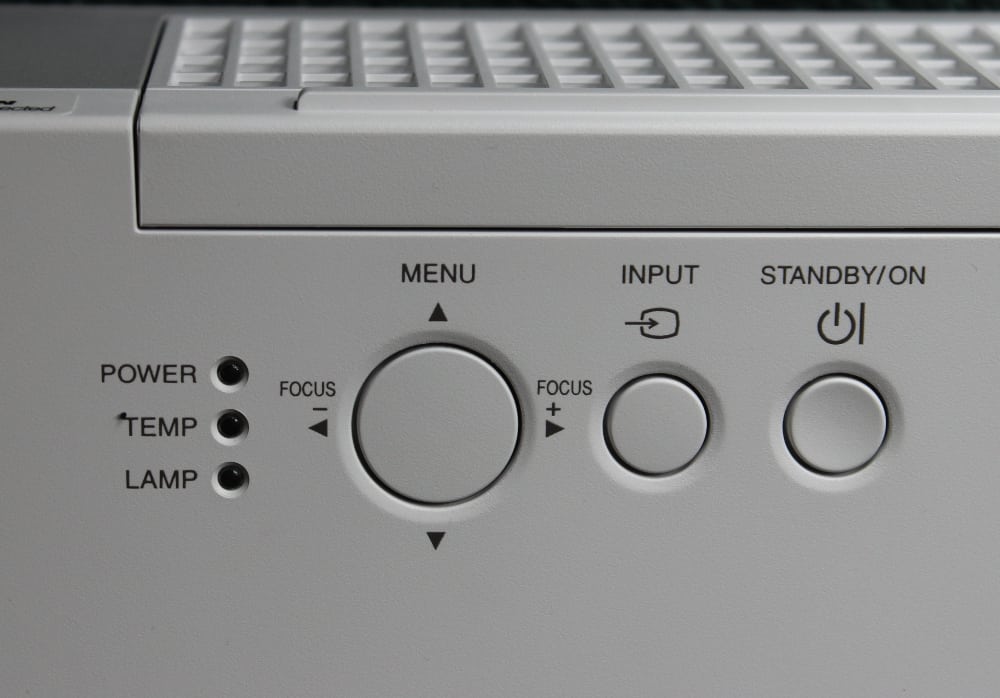
The control panel (see photo above) that is located toward the front of the projector's top surface (when table mounted). The control panel is rather simple and only duplicates the most essential functions that are found on the supplied remote control. Starting at the left side of the control panel there are LED indicator lights for Power, (over) Temperature, and a light to indicate a lamp failure. Next is a large round 4-way button can be used to focus the image and bring up the projector's on-screen menus. When displaying a menu this same button also serves to navigate the menu. Next is an Input button that cycles through the projector's available inputs and finally is the Standby/Power button that is used to turn the projector on or off.
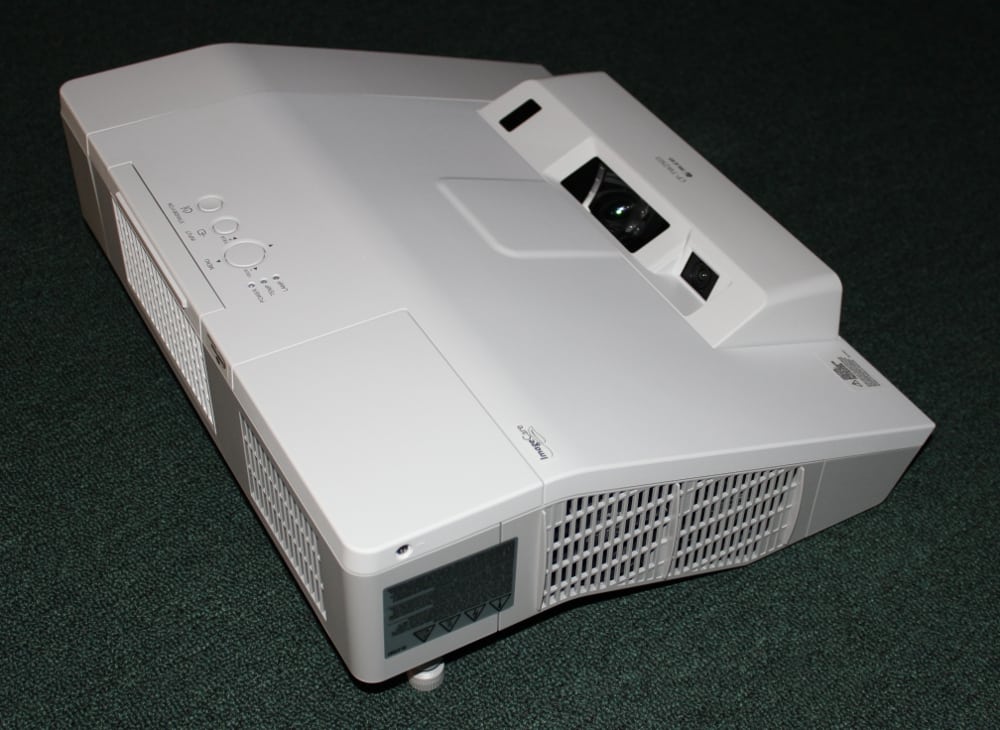
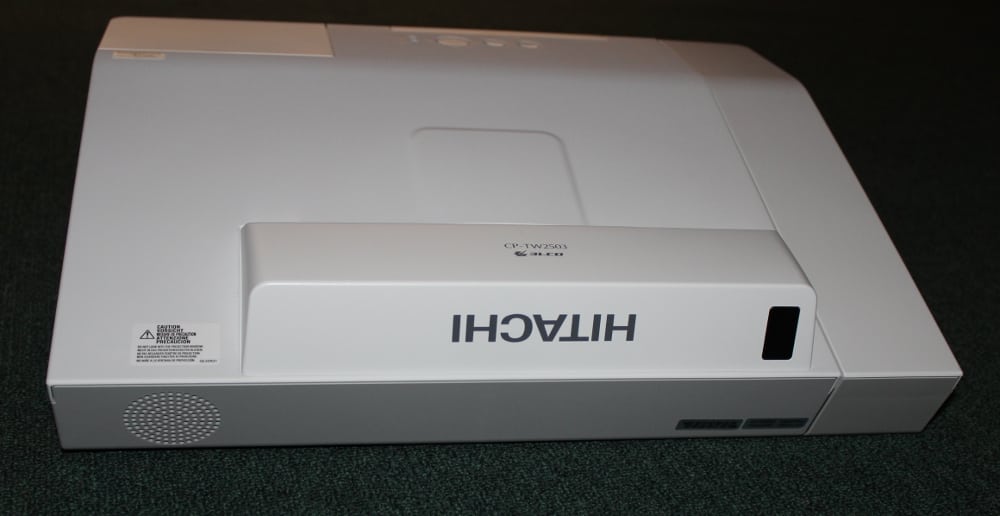
The photo gallery above shows the CP-TW2503 in a table-top position. The air inlet vent and the filter cover are located on the front panel, as seen in the first and last photos in the above gallery. Also seen in the first photo, is the raised section that extends from the top of the case that houses, from left to right, a forward facing sensor for the remote control, the projection lens, and the 'camera' used to interactive features. The air exhaust vent is located on the right side of the projector, as shown in the second photo in the above gallery. The rear of the projector, seen the third photo of the above gallery, has a rear facing sensor for the remote control and the grill for the built-in speaker. The left side of the projector, as seen in the fourth and fifth (with cable cover removed) photos of the gallery, has the signal connector panel.
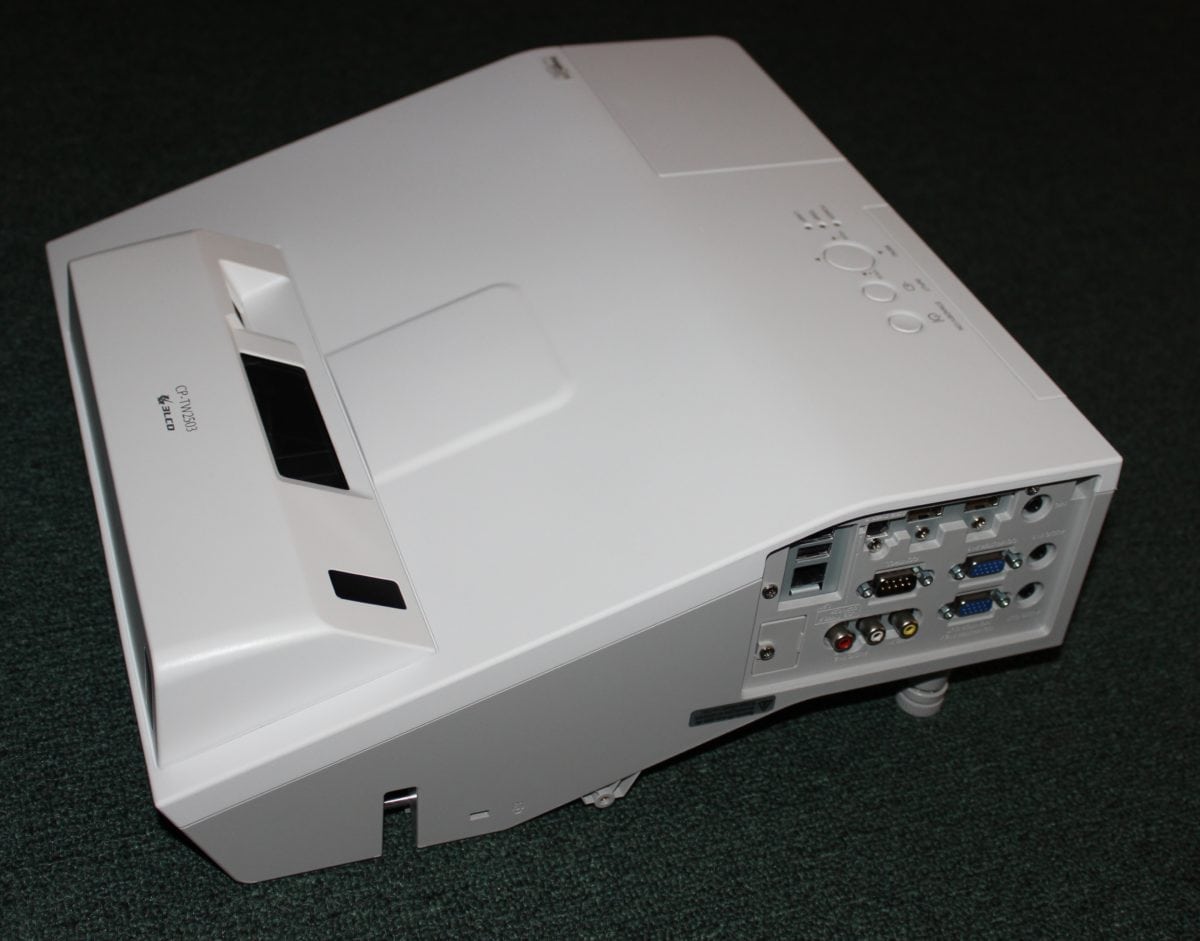
Signal Connector Panel
The signal I/O connector panel is shown below.
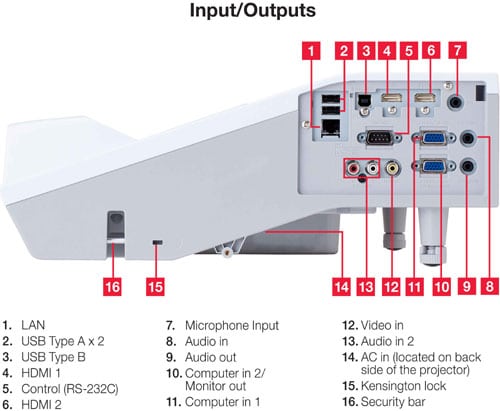
The CP-TW2503 has two HDMI inputs, analog computer input(s) and an output, and a composite video input. Audio inputs and outputs plus a microphone input are also provided. USB connectors are provided for connecting to a computer (e.g., for the interactive features and controlling slide shows) and for attaching a USB flash drive containing photos, videos, and audio files for use in a computer-free presentation. Also the optional wireless networking adapter, when used, would plug into one of the USB ports. There is also a LAN connector for connection to a wired network and a RS-232C port for connection to a wired controller. Overall the CP-TW2503 provides a good suite of inputs and outputs.
The AC Power connector is located on the bottom of the projector as shown toward the right side in the following photo.
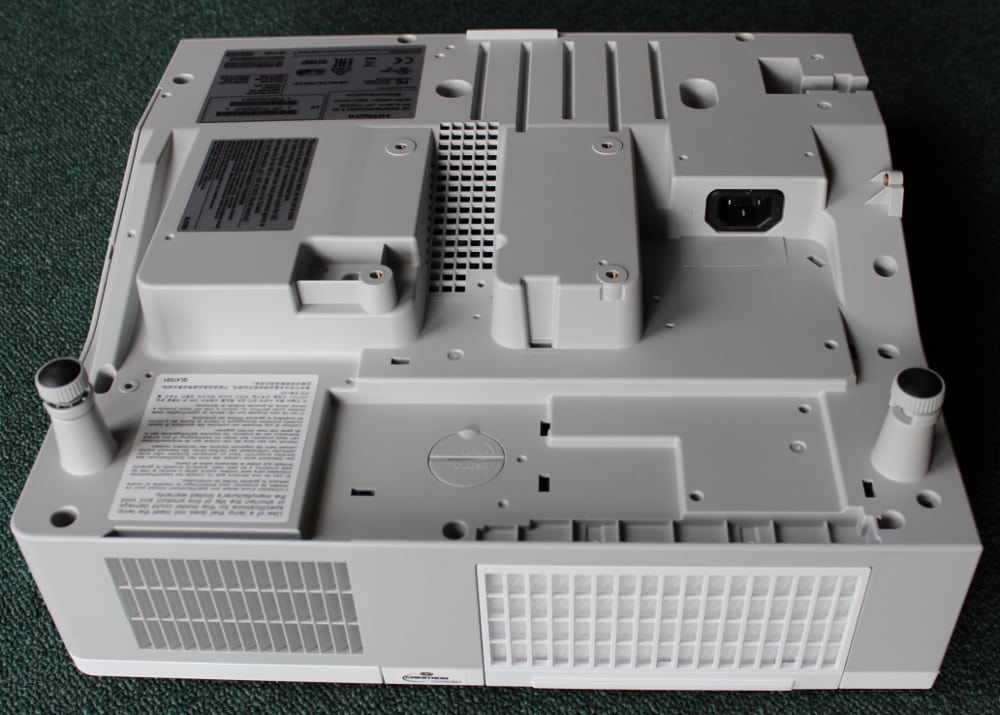
Also seen in the above photo are the two front adjustable feet that are used when the projector is table mounted and can be used to adjust the tilt and to level the projector.
Interactive sensors
The CP-TW2503 is supplied with two interactive pens as shown below.
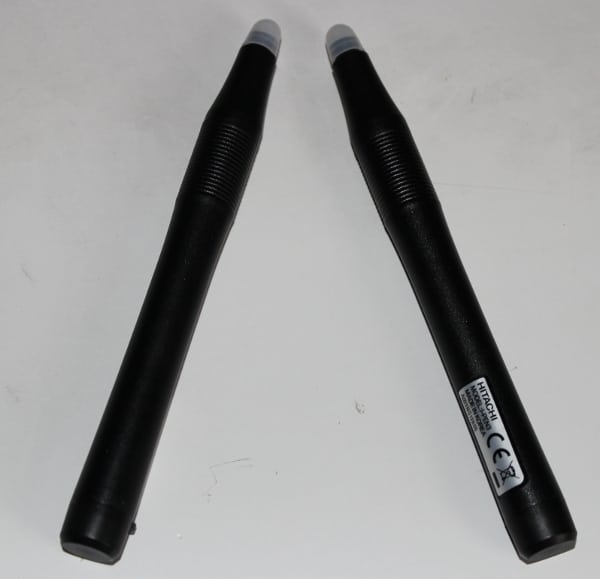
As it typical for such interactive pens, the tip is pressure sensitive and is intended to be pressed against a rigid projection surface, and that's why a normal fabric screen is not appropriate for use with such interactive projectors, as the screen surface could be damaged. A whiteboard is the most common projection surface for use with an interactive projector and the CP-TW2503 can also be mounted vertically, using an optional table mount, to create an interactive table top when projecting downward onto to a large white table top.
The projector has a 'camera', or sensor, located right next to the projection lens that is used to calibrate and to track the position of the interactive pens relative to the projected image.
Remote Control

The Hitachi CP-TW2503's remote control is a compact one measuring approx. 5.3 x 1.9 x 1 inch. It has 33 small button making it a little crowded. The remote's case is black with light grey labels for the key. Bright white labels would have made the labels easier to read under subdued room lighting. Also there is no backlighting, so this remote is not well suited for use in a dark room, but should be OK in a typical classroom or conference room with moderate lighting.
I found the range of the remote to be very good. It worked reliably for operating the CP-TW2503 standing about 20 ft. back from the projector and toward the side of the room, perhaps 25 degrees off axis.
The Power Button is red color while all the rest are grey. The top row of buttons include the Input selector, buttons for the IWB (displays IWB mode menu for interactive features), Calibration (of interactive features) and Power.
The second row includes buttons for selecting the Aspect ratio, Auto (adjust for analog signal inputs), Accentualizer menu (an image sharpness enhancement feature) and HDCR menu (a contrast enhancement feature for use in brightly lit rooms).
The third row has two button each for Focus and Digital zoom. The digital zoom worked somewhat different than on some other projectors in that it can generally only make the image smaller than full screen while there is a separate a magnify button (see below) that used to enlarge one area of the image up to fill the full screen.
The fourth and fifth rows have two buttons each for Page Up/Down, Magnifiy On/Off, MyButton (memory 1 & 2) , and Volumn Up/Down.
The sixth row includes buttons for Keystone/Perfect Fit (allow either manual or automatic keystone correction), Template (cycles thru on-screen test patterns or patterns to aid when drawing with the interactive pens), Freeze (of the displayed image), and AV Mute.
The lower third of the remote has the Menu (to display the on-screen menus and also serves as a left mouse button when the remote is used as a mouse for an attached computer) and Navigation buttons, Esc (to back up one level in the menus), Enter (to select a menu item), plus a Position button (to move the image up/down left/right, but only when the image has been digitally zoomed down to less than full screen). The Position control can also be used to change the position of the projector's on-screen menus. Finally there is a Reset button (to reset a menu item to the factory default value and also serves as a right mouse button when the remote is used as a mouse for an attached computer).