Projector Reviews Images

Optoma UHD60 Review and Comparison to UHD65 – Hardware

Posted on December 11, 2017 by Art Feierman

Optoma UHD60 Review and Comparison to UHD65 – Hardware: Overview, Lens, Inputs and Connectors, Control Panel

Overview

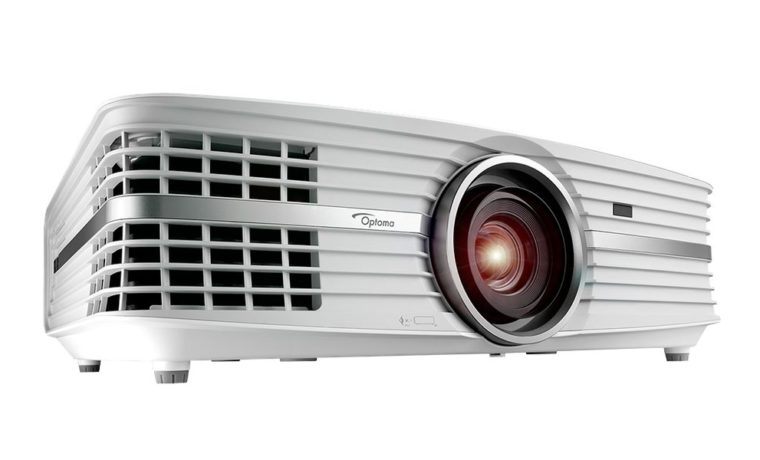
The UHD60 is a medium-sized home theater projector measuring 19.6 inches wide, 13 deep, and 6 inches high. It’s finished in white with a glossy top, matte finish on the sides with brushed silver trim. It looks good, though, like the UHD65, it probably won't win any awards for style. The hot exhaust vent is on the left front corner when facing the projector’s front.

Optoma UHD60 Front Angled
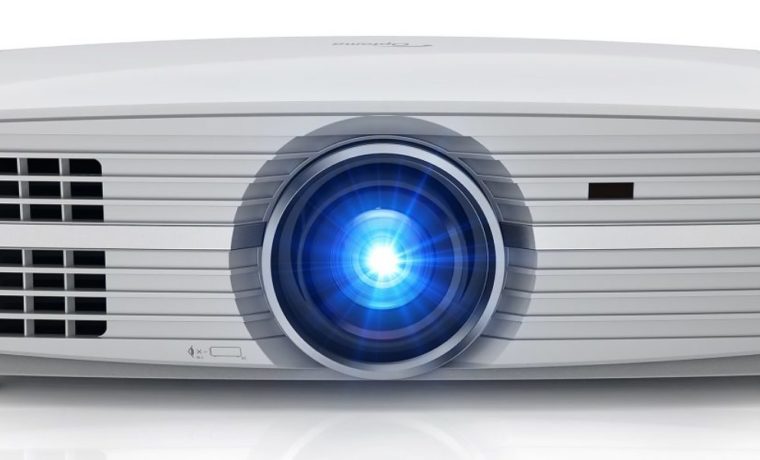
The front of the Optoma UHD60 includes a center-mounted lens and the hot air exhaust vents.

There are two adjustable front feet. The lens is slightly recessed, with manual focus accomplished by rotating the lens edge. There’s an IR sensor for the remote control on the front, to the right of the lens.

The other lens controls are on the top, hidden behind a large door that runs the width of the projector.

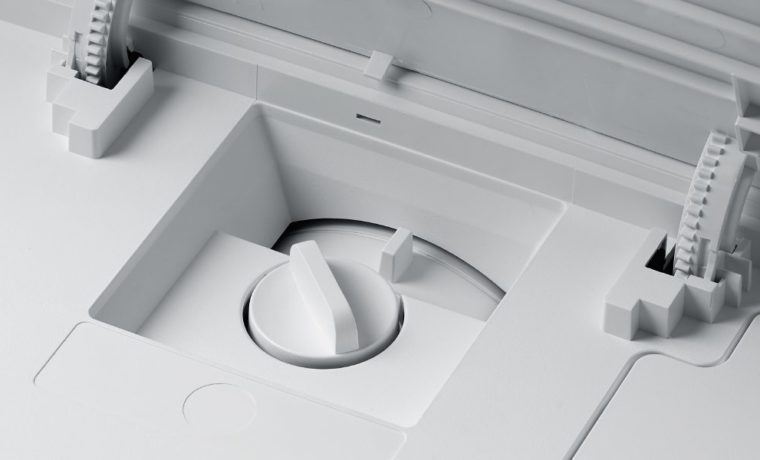
Optoma UHD60 Lens Controls
The manual zoom function UHD60’s 1.6:1 lens is located below the top door. Directly behind the recessed control is a round dial for adjusting the modest lens shift.

The control panel of the UHD60 is located on the left side of the projector, toward the rear, when facing the projector's lens.

All the inputs and the two rear facing four watt speakers are located on the back of the projector.

The Lens

Optoma UHD60 Lens
The Optoma UHD60 has a recessed 1.60:1 manual zoom lens.

The manual lens has a 1.6:1 throw ratio. To adjust the focus, rotate the lens barrel from the front of the projector. To adjust the zoom lens, open the top door, where, inside, there’s a ring type adjustment for the manual zoom. Directly behind that – toward the back, is the manual lens shift dial. 1.6:1 is a good amount of zoom range, some projectors have less, none have more than 2.1:1 zooms.

What the UHD60 doesn’t have is motorized features, and without those, there’s no Lens Memory. Lens Memory lets you save multiple zoom and lens shift settings, so you can, by the touch of a button, switch back and forth to different image sizes and aspect ratios.

Lens Memory allows one to use and fill completely a wide screen, such as my own 2.35:1 screen which matches most wide screen movies. Then, switch back for 16:9 content – which will leave a letter box (dark areas on the far left and right).

Lens Memory has allowed widescreen users to fill the screen. Without it, there’s always using an anamorphic lens and motorized sled. That might cost more than this projector, which is why Lens Memory is a coveted feature. But, at this price point, it’s only found on Epson projectors (and an old Panasonic that is still hanging around).

One complaint! The UHD60 lens and light path leak a lot of light. You’ll spot it hitting the ceiling in front of the projector if you are ceiling mounted. I’m testing with it on a table top and the amount of leaked light is quite significant, although not enough to impact the picture.

I’d say it’s definitely a lot of light leakage for a projector at this price point.

Inputs and Connectors

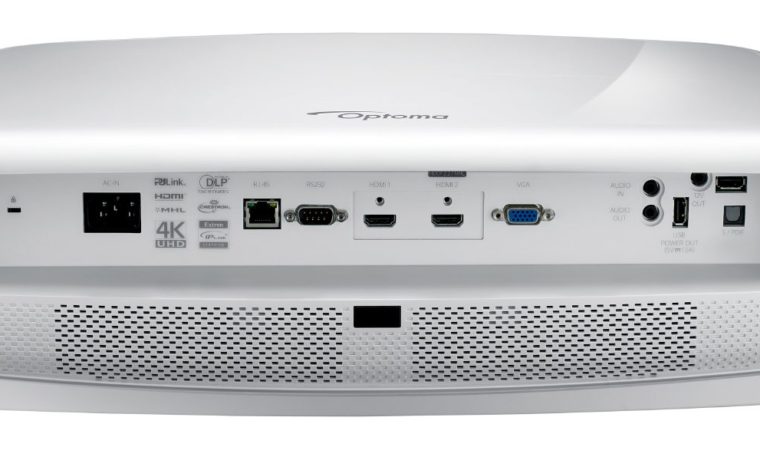
Optoma UHD60 Inputs and Connectors
The Optoma UHD60 has plenty of inputs and connectors for your home theater needs, including networking, HDMI, USB, and audio inputs and outputs.

Let’s take a look:

Starting from the left, there’s a Kensington lock slot for security, followed by the power cord receptacle. For wired networking there’s an RJ45 connector for use with CAT5/6 cables. No projector is really complete without the traditional RS232 serial port for old school command and control.

Now we get to the inputs, starting with a pair of HDMI inputs. HDMI 1 is on the left, and is the older HDMI 1.4, while HDMI 2 supports HDMI 2.0, and the matching HDCP 2.2 copy projection that is required to play those 4K Blu-ray UHD movies.

There’s even a traditional VGA port for analog computer output. Of course, most things these days use HDMI, but should you have an old PC at home, you are covered.

After a space, there is a pair of stereo audio jacks one for input, one for output. ] A pair of USBs (one marked with power), a digital audio jack, and lastly a 12 volt screen trigger.

Next up is the control panel.

Control Panel

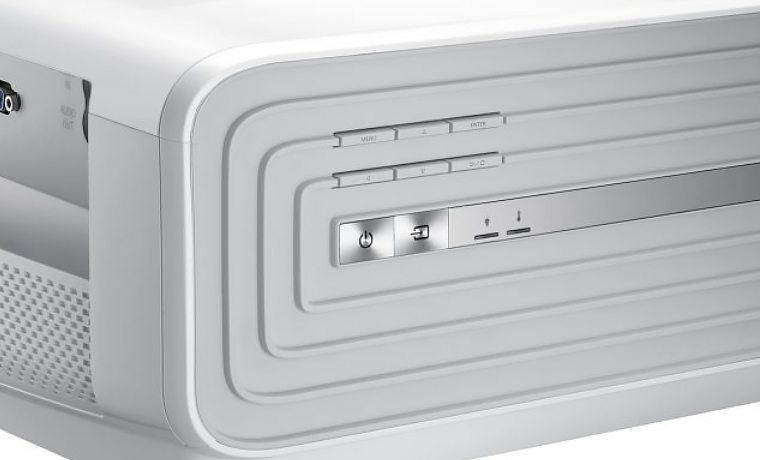
Optoma UHD60 Control Panel
The UHD60 control panel is located on the side of the projector.

Optoma’s goal was to make the control panel nearly invisible. I’d say they were successful. They kept the number of buttons to a minimum. Some companies will add a number of extra buttons for quick access to more features, but, from a practical standpoint, other than installers, we live and die by the remote control.

Again, if you are facing the front of the projector, the control panel is located on the left side, and close to the back.

Normally you would walk right by and not notice the controls, but for the power indicator light. That light will be red if the projector is off, or blue if on, and flashing while powering up or down.

The controls are straight forward, if a little odd for not having the usual diamond shaped (or round) navigation. The top row has the Menu on the left, up arrow in the middle and Enter on the right. Below the Menu is the left arrow, then in the center, the down arrow, and finally the right arrow on the right side.

Still, it’s perfectly functional. What it lacks are any “extras” which is not really a problem, as we all pretty much rely on the remote control.

There are two indicator lights (in addition to the light on the power button (blue for on, red for off/standby).

Below those six buttons are two larger ones, the lit up one is the power button, the source button to its right.  That’s all there is, and all that’s truly needed.
Latest Reviews

February 25, 2024

Introducing the Hisense C1: A cube-shaped 4K UHD lifestyle projector with an RGB triple laser light source and integrated JBL ...

February 19, 2024

The BenQ X3100i is a 4LED, 4K UHD (3,840 x 2,160p) 0.65" DLP short-throw gaming projector that offers a BenQ-rated ...

© 2024 Projector Reviews

crossmenu linkedin facebook pinterest youtube rss twitter instagram facebook-blank rss-blank linkedin-blank pinterest youtube twitter instagram