Posted on November 20, 2018 By Chris Kahl
ViewSonic LS620X Short Throw Laser Projector Review – Hardware 2: Control Panel, Remote Control, The Menus
The ViewSonic LS620X projector has a simple control panel consisting of three status indicator lights, and a 10 button keypad. The indicator lights are located directly above the control pad in a single row. They are, left to right, the Light source indicator, Temperature indicator, and Power indicator. The indicator lights illuminate in different colors, burn steady or flash to indicate different the different statuses of operation as well as display different errors.
The power button is a little bit larger, and is located to the right of the other control pad buttons. The remaining nine buttons are organized in three rows of three. The top row, left to right, is Menu/Exit, Vertical Keystone Correction/Up Arrow, followed by Auto Sync. Auto Sync automatically chooses the best picture timings for the projected image.
The next row consists of a Left Arrow, Enter button, and a Right Arrow. The final row is made up of Blank, which hides the projected image, followed by a Down Arrow/Vertical Keystone Correction, and Source, which displays the source selection menu.
The ViewSonic LS620X includes a medium sized remote control that is laid out in a simple, easy to navigate format. It requires two AAA batteries, which are included. There are IR receivers for the remote control located on both the front and back of the projector, which makes using the remote even simpler. The top row of the remote control is where we find a larger, red Power button. The power button toggles the projector between On and Standby mode. Also in the top row we find Source, to display the Source menu.
The next section allows for simple, one-touch access to different sources without needing to use the menu. Left to right, we find Computer 1, Computer 2, and HDMI. Below that we find Auto Sync, which chooses the best picture timings for the displayed image, and Video.
Below that we find the typical directional keypad: Up and Down Arrows that double as Vertical Keystone Correction, a Left Arrow and a Right Arrow, with Enter in the middle. Next we find a blue in color Menu button, a bright orange Laser button which activates the built-in laser pointer, and Exit.
The next section starts with a row of four buttons, and has an odd symbol on the first button. This odd symbol is actually for Aspect Ratio, and allows the user to display the Aspect Ratio menu. Next we find Information, followed by 3D (to display the 3D menu), and Blank to hide the projected image.
The final section is made up of three rows of three buttons each. The first row is Freeze, followed by Mute, and Pattern, which displays the embedded test pattern. In the next row, we find the Presentation Timer, Volume Up, and Digital Zoom, which displays a zoom bar to allow you to zoom in and out of the image. Keep in mind this is digital zoom, not optical zoom.
The last row has the green Eco Mode button, followed by Volume Down and Color Mode.
ViewSonic LS620X Display Menu
ViewSonic LS620X Vertical Keystone Correction
ViewSonic LS620X Digital Zoom
ViewSonic LS620X 3D Menu
ViewSonic LS620X 3D Mode
ViewSonic LS620X Picture Menu
ViewSonic LS620X Color Temp Fine Tuning
ViewSonic LS620X Color Management
ViewSonic LS620X Source Menu
ViewSonic LS620X System Setup Basic
ViewSonic LS620X Presentation Timer
ViewSonic LS620X Language Menu
ViewSonic LS620X Menu Settings
ViewSonic LS620X Operation Menu
ViewSonic LS620X System Setup Advanced
ViewSonic LS620X Audio Settings
ViewSonic LS620X Security Menu
ViewSonic LS620X LAN Control Menu
ViewSonic LS620X Standby Menu
ViewSonic LS620X Network Standby Menu
ViewSonic LS620X Wired LAN Menu
ViewSonic LS620X Information Menu
ViewSonic LS620X Source Quick Menu
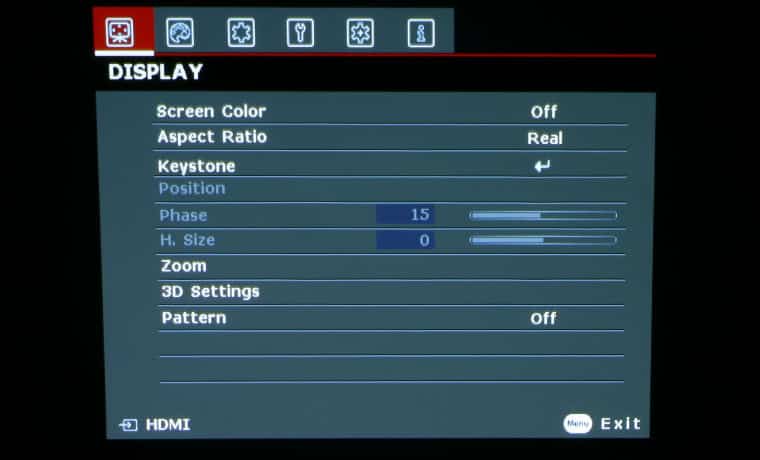
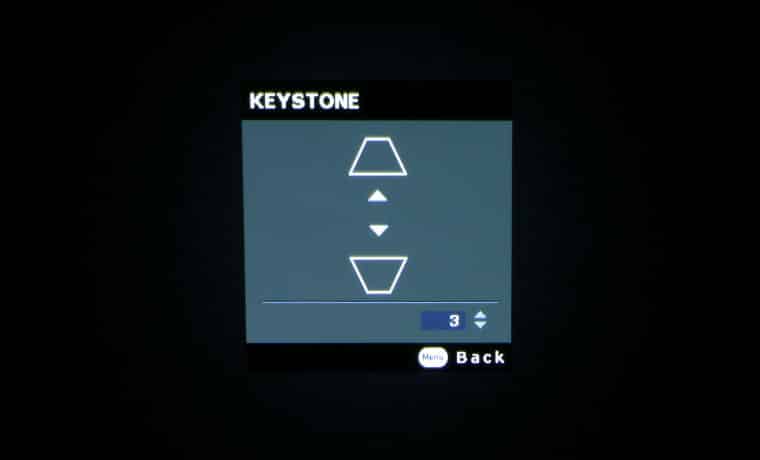
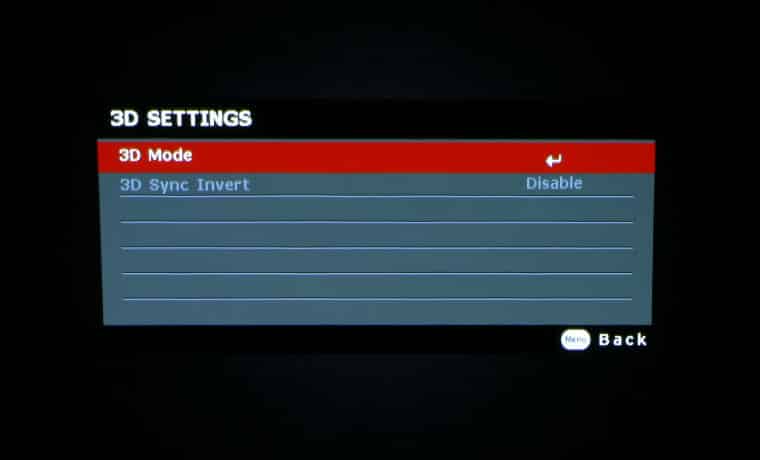
Display Menu – Screen Color, Aspect Ratio, Keystone, Position, Phase, H. Size, Zoom, 3D Settings, Pattern
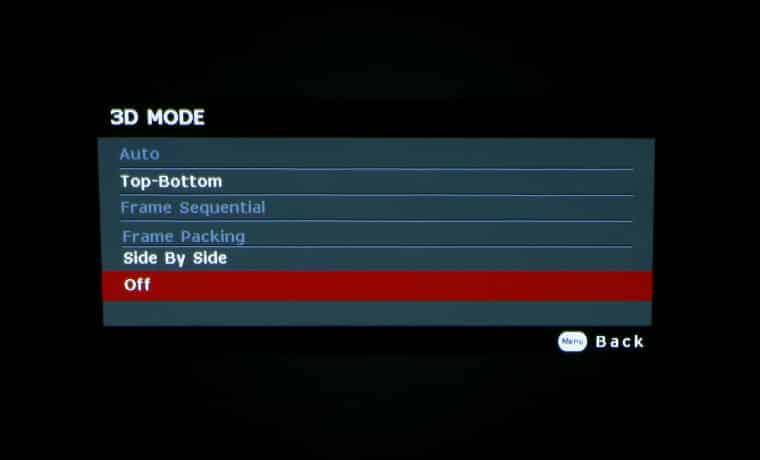
3D Sub-Menu – 3D Mode, 3D Sync Invert Disable/Invert
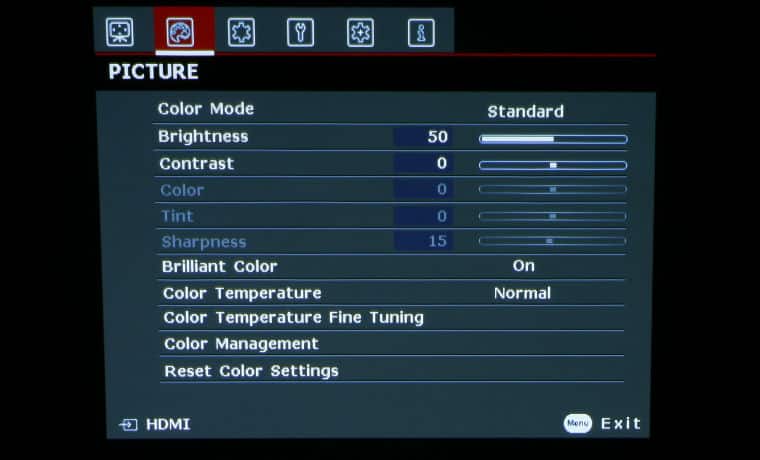
Picture Menu – Color Mode, Brightness, Contrast, Color, Tint, Sharpness, Brilliant Color, Color Temperature, Color Temperature Fine Tuning, Color Management, Reset Color Settings
Color Mode Sub-Menu – Bright/Dynamic/Standard/sRGB/Movie/(3D)
Color Temperature Sub-Menu – Warm/Normal/Cool
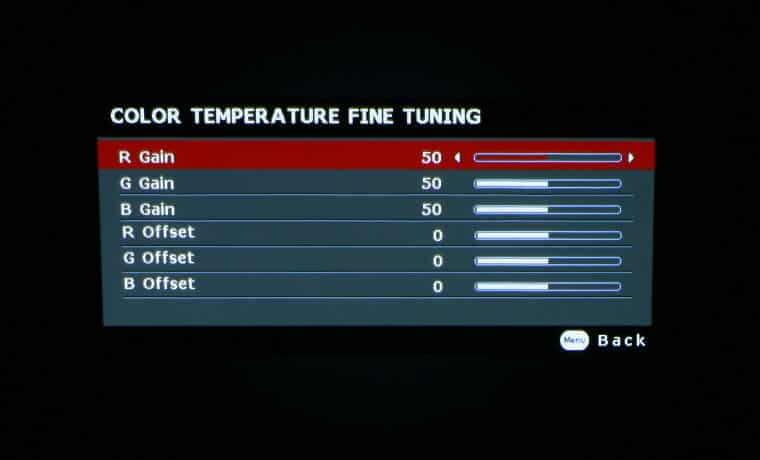
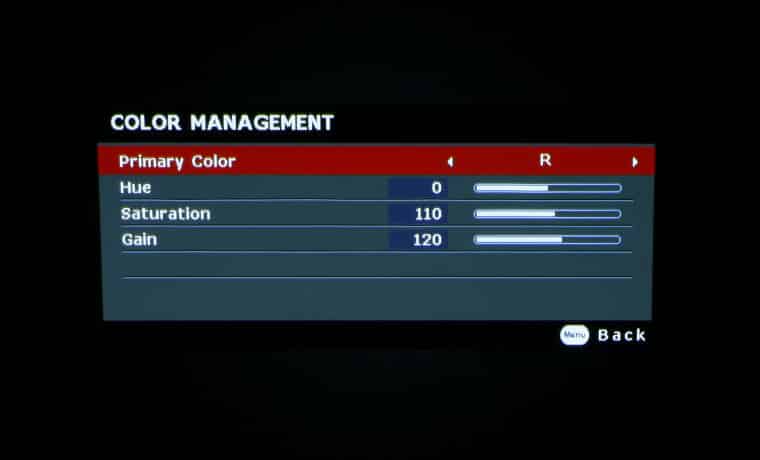
Color Temperature Fine Tuning Sub-Menu – Primary Color, Hue, Saturation, Gain
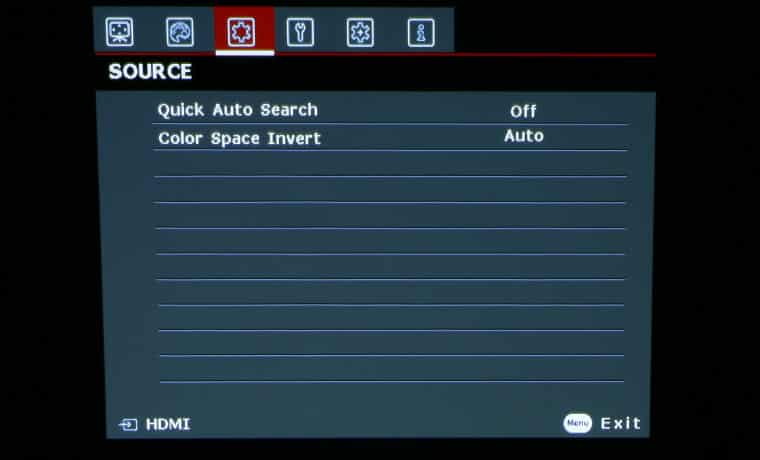
Source Menu – Quick Auto Search, Color Space Invert
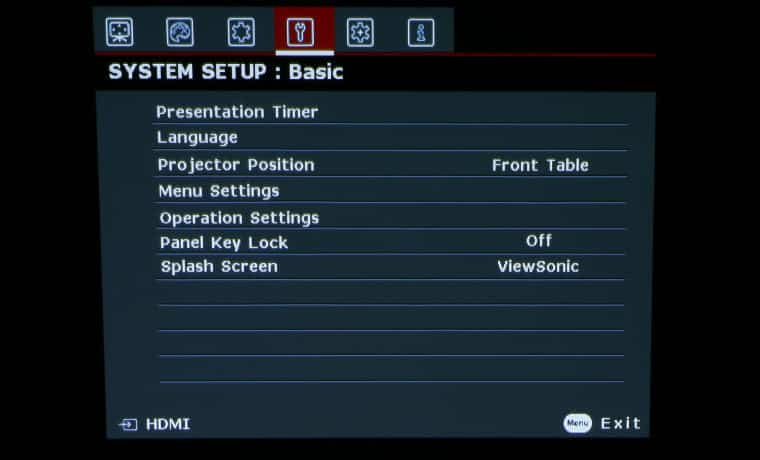
System Setup: Basic Menu – Presentation Timer, Language, Projection Position, Menu Settings, Operation Settings, Panel Key Lock, Splash Screen
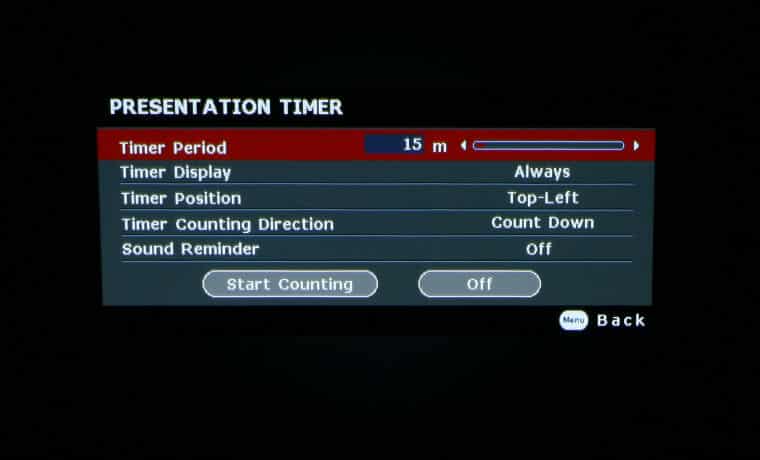
Presentation Timer Sub-Menu – Timer Period, Timer Display, Timer Position, Timer Counting Direction, Sound Reminder, Start Counting/Off
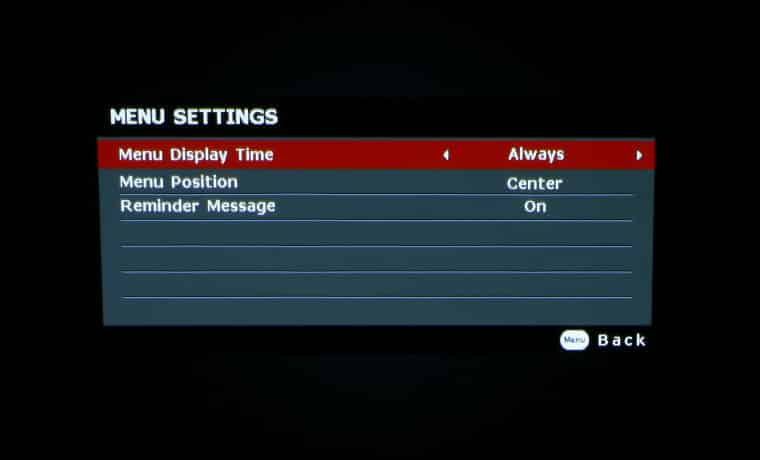
Menu Settings Sub-Menu – Menu Display Time, Menu Position, Reminder Message
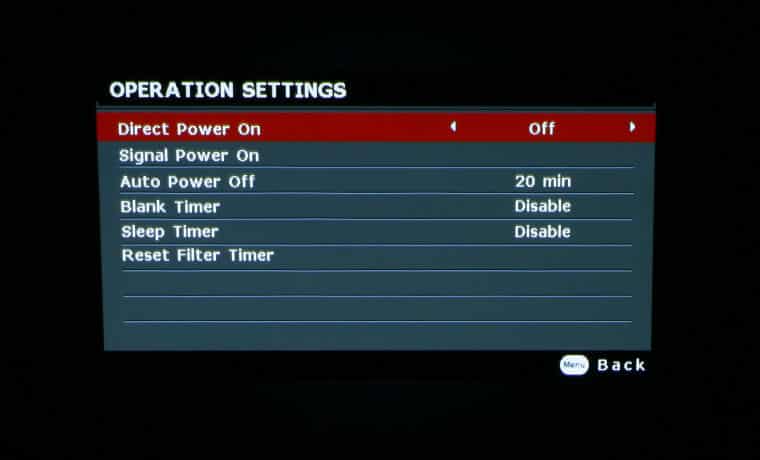
Operation Settings Sub-Menu – Direct Power On, Signal Power On, Auto Power Off, Blank Timer, Sleep Timer, Reset Filter Timer
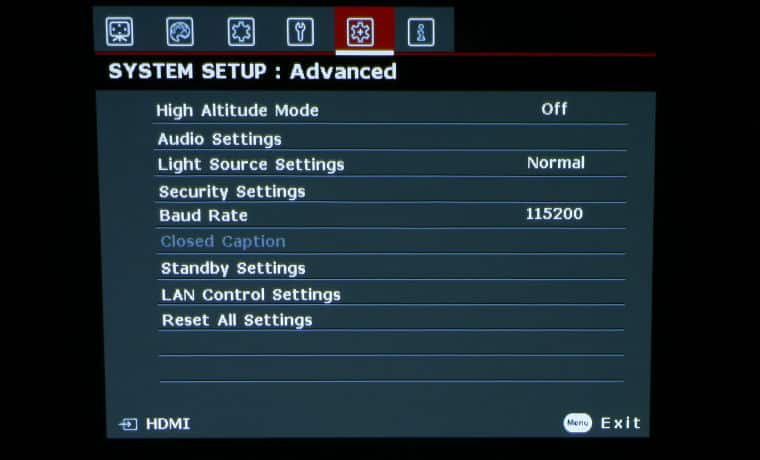
System Setup: Advanced Menu – High Altitude Mode, Audio Settings, Light Source Settings, Security Settings, Baud Rate, Closed Caption, Standby Settings, LAN Control Settings, Reset All Settings
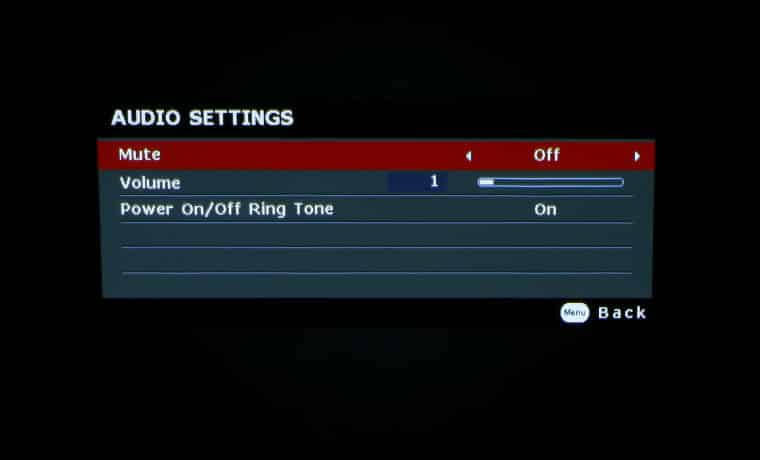
Audio Settings Sub-Menu – Mute, Volume, Power On/Off Ring Tone
Security Settings Sub-Menu – Change Password, Change Security Settings, Power On Lock
Closed Caption Sub-Menu – Closed Caption Enable, Caption Version
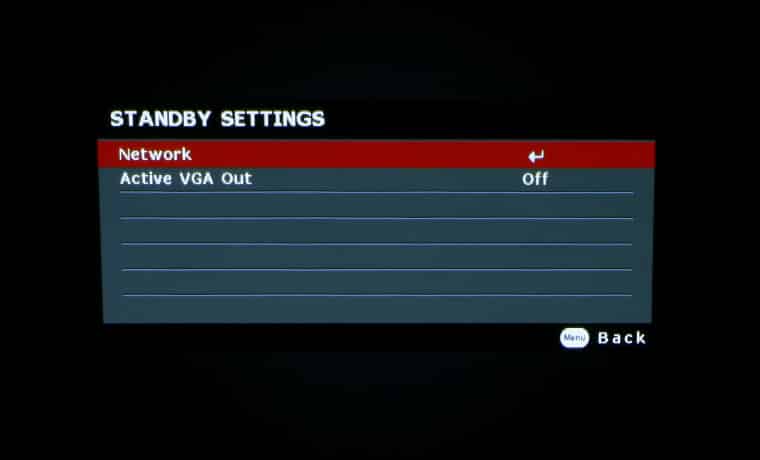
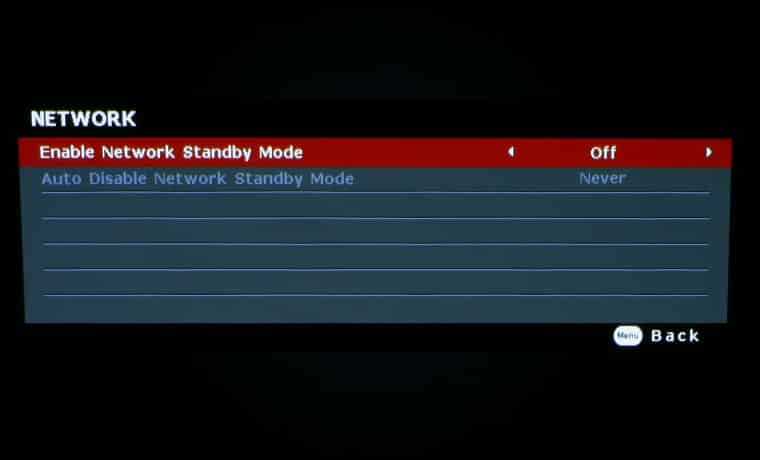
Standby Settings Sub-Menu – Network, Active VGA Out
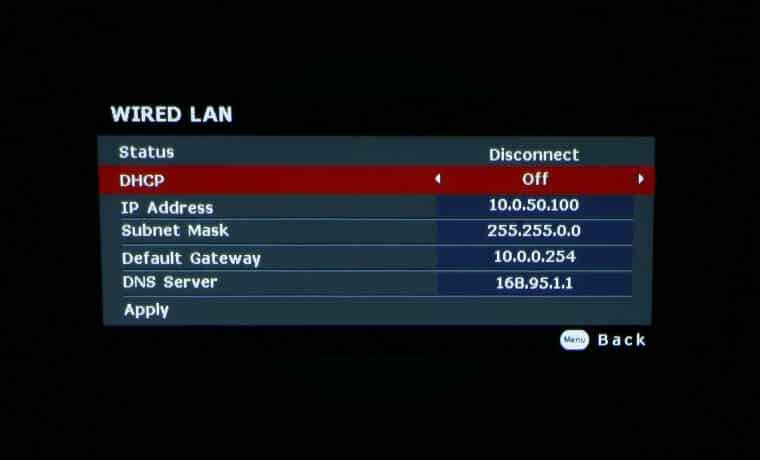
LAN Control Settings Sub-Menu – Wired LAN, AMX Device Discovery, MAC Address
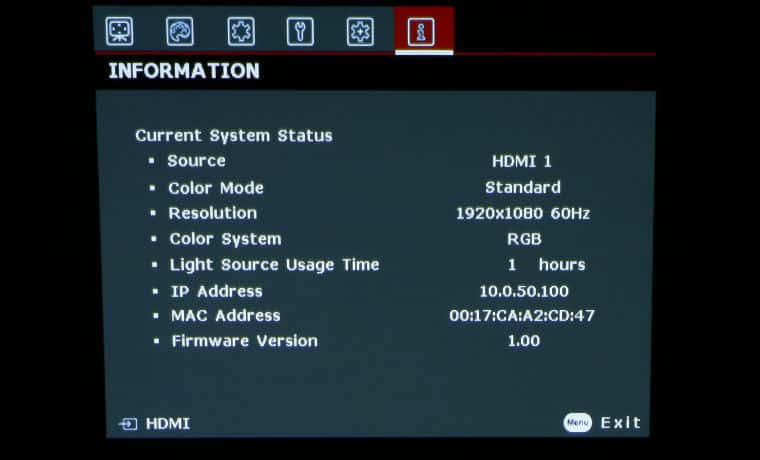
Information Menu – Source, Color Mode, Resolution, Color System, Light Source Usage Time, IP Address, MAC Address, Firmware Version
© 2019 Projector Reviews (V0625)
page-review-child.php