Projector Reviews Images

BenQ MX631ST Short Throw Projector Review - Hardware Tour 2

Posted on November 24, 2015 by Art Feierman
BenQ MX631ST Projector:  Remote Control - Setup - Menus

Remote Control

The BenQ MX6310ST is provided with a moderate size remote control.  The remote has no backlight.

Starting at the top there are power on and power off buttons.  As is typical with many projectors, the user must press the power off button two times to actually turn the projector off.

Next down are 6 buttons to directly select in input signal source.

Next down is a group of 9 buttons that duplicate the projector's built-in control pad, that was described on the previous section of this review.

Below those is a button to use the laser pointer that is built into the remote (a nice feature for when making presentations).

Below that is a group of 6 buttons labeled MHL is are used when the projector is connected to a MHL enabled device (e.g., smart phone or tablet) where these buttons can be used to control selection and playback of audio/video/media files from the attached device.

Next down is a group of buttons that serve double duty as a numeric keypad where each button also supports a 2nd function.  The upper 3 pairs of buttons provide for numeric input 1 thru 6 and are also used to:  (1) operate the projector's digital zoom (enlarge one area of the projected image); (2) to page up and down on a connected PC for presentations with compatible software (e.g., PowerPoint); and (3) the mic/volume buttons are not functional on this projector model.  The next row of buttons (also used for the number keypad numbers 7 thu 9) are used for Freezing the current image on the screen, selecting the aspect ratio of the displayed image, and muting the audio.  Finally, the bottom row of 3 buttons are for displaying the network settings menu (not functional with this projector model), displaying the quick install menu (this button is also used as the number zero input), and to place the projector into Smart Eco power savings mode.

Click Image to Enlarge

Setup

The MX631ST is rather easy to setup and get a image on the screen.  Ideally, when placed on a table it should be located at a height slightly below the level of the bottom of the screen, or when ceiling mounted just slightly above the level of the top of the screen.  The projector-to-screen throw distance will need to be about equal to the width of the projection screen (i.e., to the width of the projected image).  The limited range zoom lens allows the throw distance to be adjusted between 0.9 screen widths to 1.08 screen widths.

The lens focus and zoom mechanical adjustments work well and are easily accessed from the top of the projector.

[sam_pro id=1_104 codes="true"]

Menus

Display Menu -

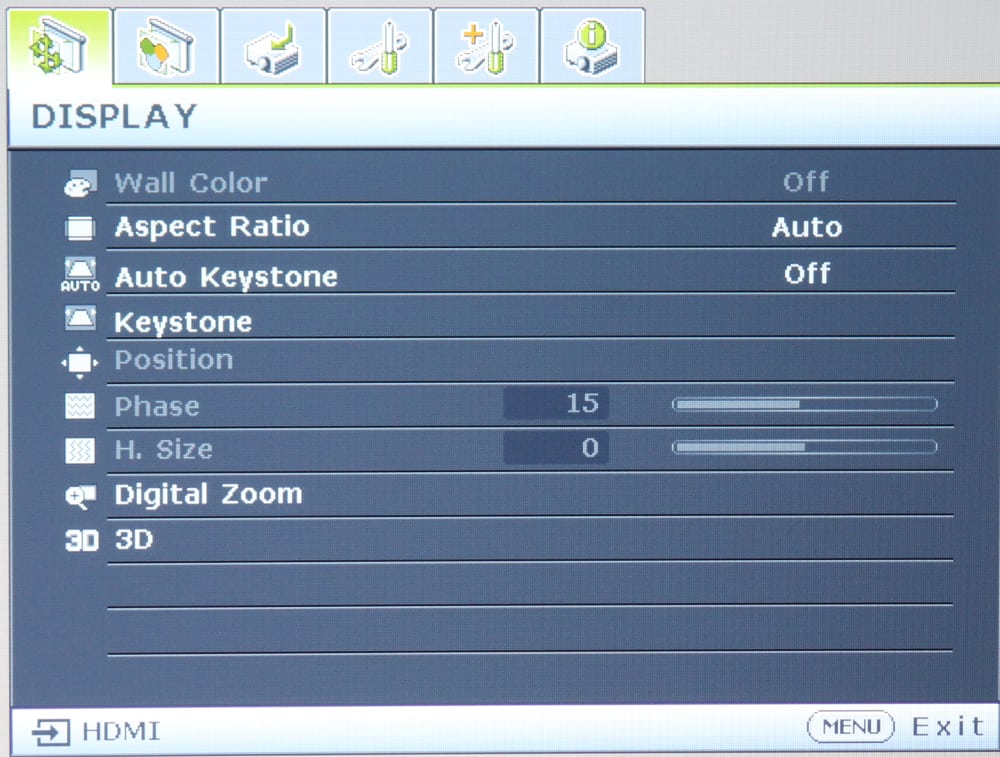
The display menu is shown in the 1st gallery photo above.  This menu is used to provide some of the basic settings for the projector, such as selecting the aspect ratio for the screen/image or turning auto keystone correction on or off.

Picture Menu - 

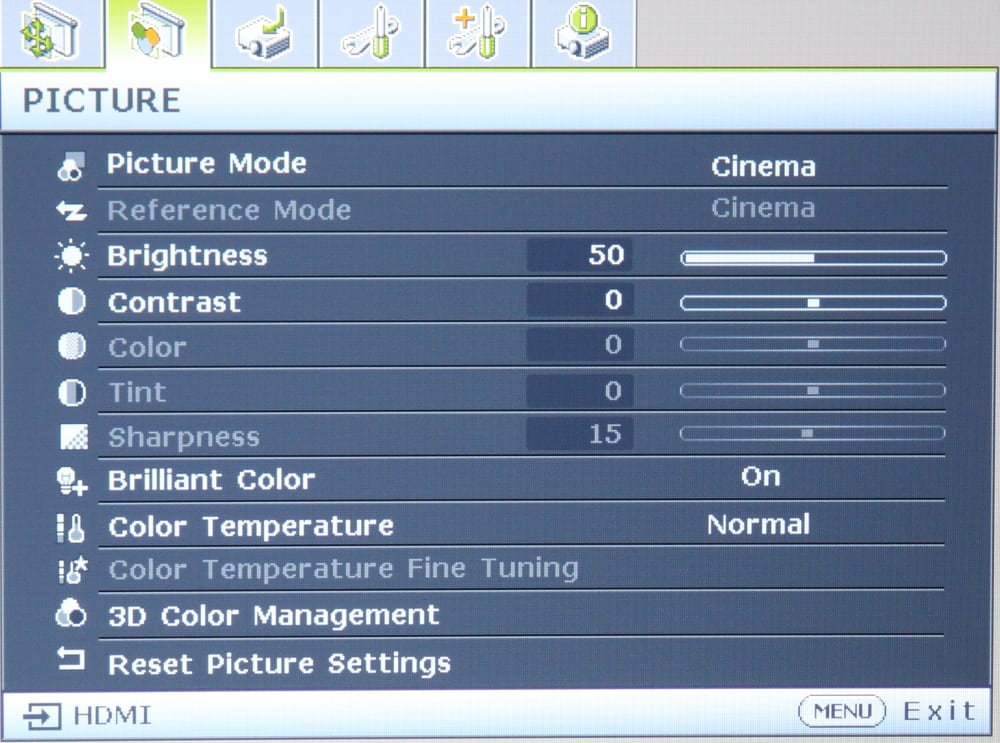
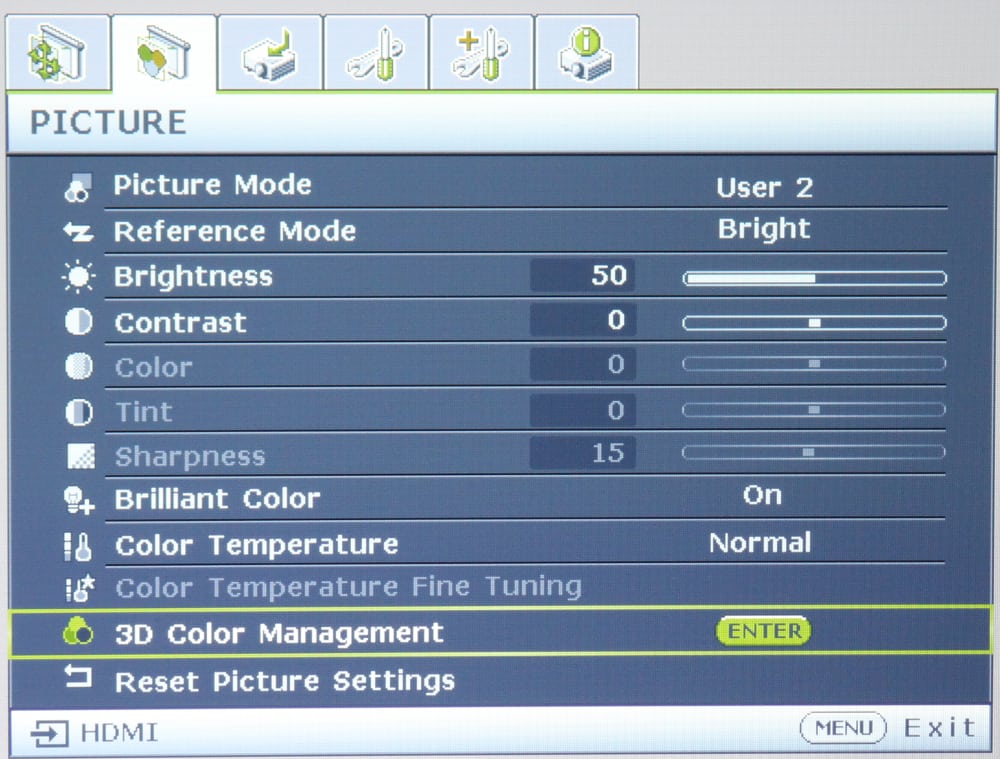
While the terminology and menu structure for the Picture Menu (2nd gallery photo above) is straight forward, I do have issues with some of the choices that BenQ have made as to which settings/adjustment are actually available to the  user at a given time.  For example, the Color, Tint and Sharpness adjustment are not available (i.e., greyed out) with the HDMI or analog computer signal inputs are being used (i.e., only available when using standard definition analog video inputs).  Also the Color Temperature adjustment (Warm, Normal, Cool) is only available when Brilliant Color is turned on.  I also found that the Color Temperature Fine Adjustment was greyed out when I connected the MX631ST to either my laptop PC or may Blu-ray Disc player via HDMI, but was available when using a analog computer connection (i.e., VGA style).  Some of these limitations are mentioned in the user manual, while others are not.  The bottom line is there is very limited ability to adjust the picture for more optimum results, especially when using the HDMI inputs, and I suspect HDMI will be the most common type of connection most users will want to use.

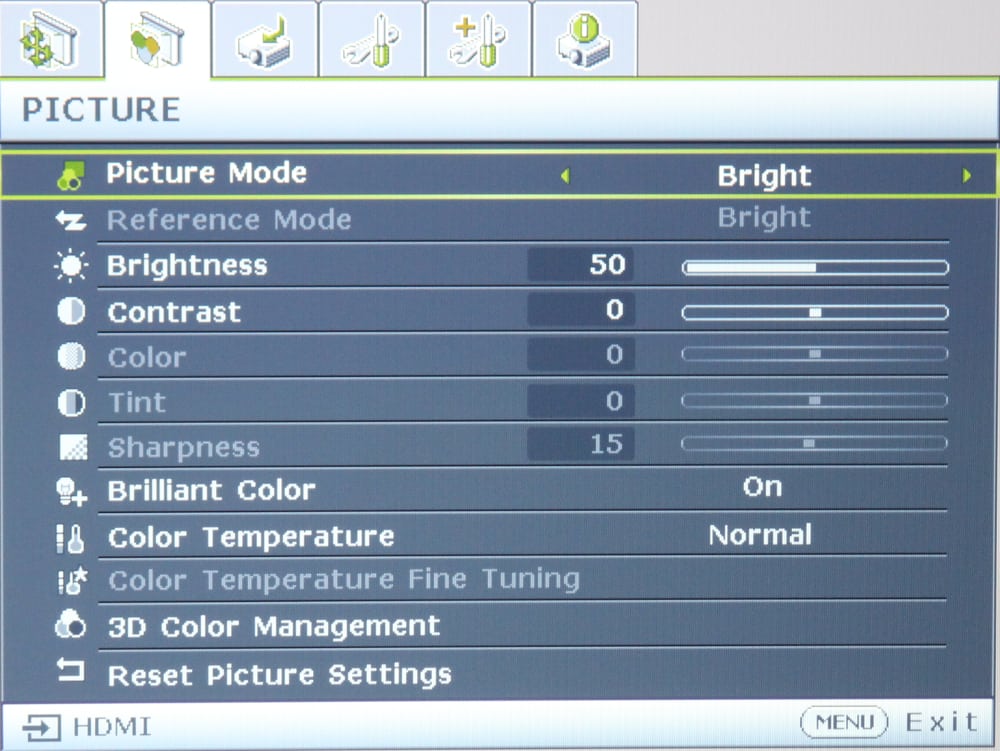
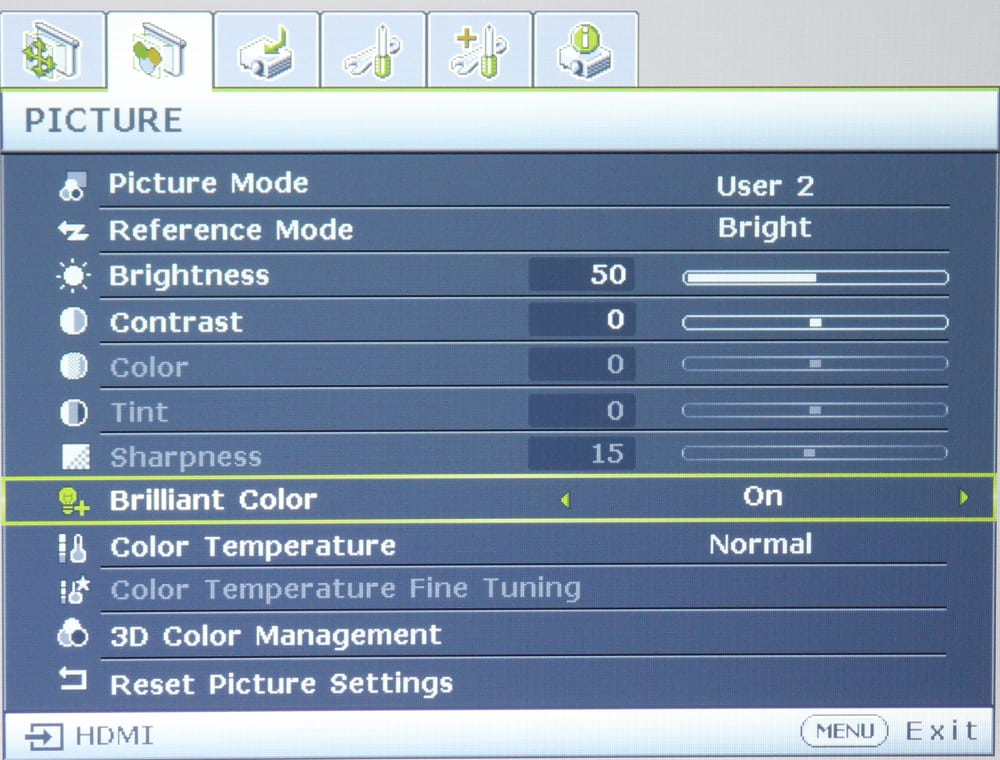
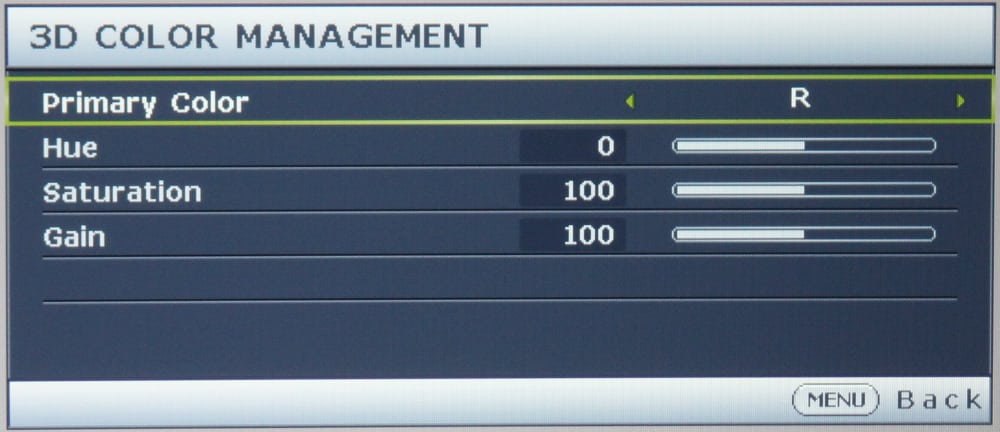
As shown in the 3rd gallery photo above, the desired picture mode can be selected in the first item on the menu.  This if followed by the brightness and contrast adjustments.  The color, tint and sharpness adjustments are available only when an analog video signal is being used (i.e., via S-Video or Composite Video inputs).  As shown in the 4th gallery photo the Brilliant Color function can be turned on or off (on by default).  The 5th gallery photo showx the menu item for 3D then the 6th phone shows the submenu for 3D color management.  This is another rather odd thing about this projector in that the color management adjustments are only offered for 3D mode while no equivalent adjustments are offered for 2D mode.

S

BeneQ-MX631ST-Menu7-Source

Source Menu -

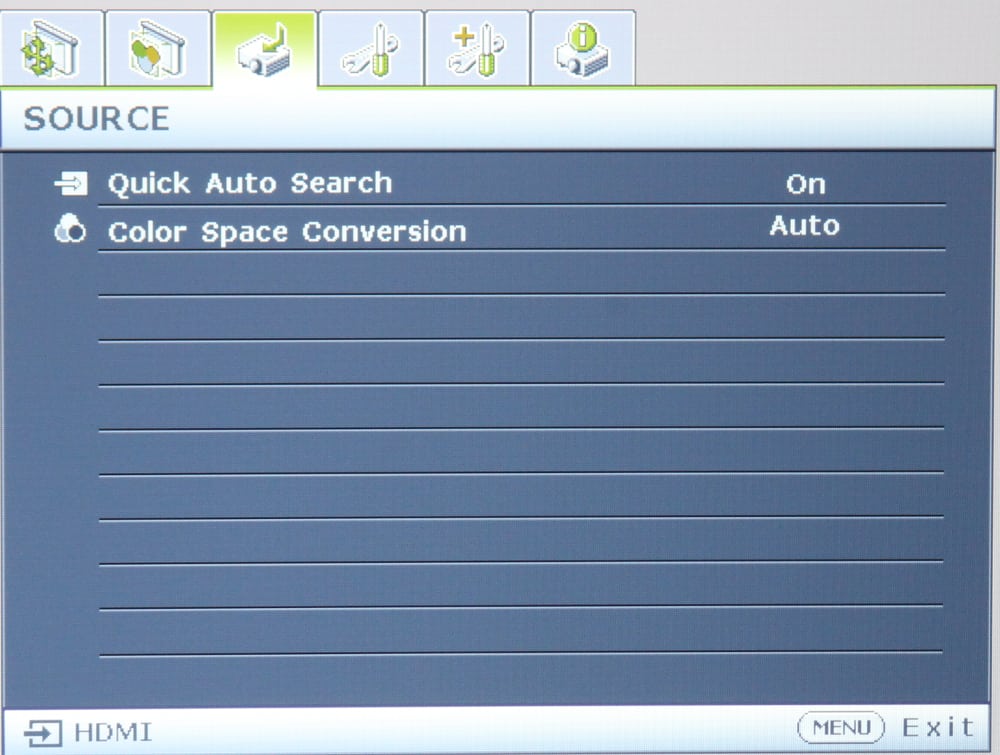
The Source Menu is shown above.  This allow the user to configure the projector to automatically search the inputs to find one where an input signal is present.   The Color Space Conversion allows the user to set for a RGB vs. YUV video input or to have the projector automatically detect the type of input.

System Setup: Basic Menu -

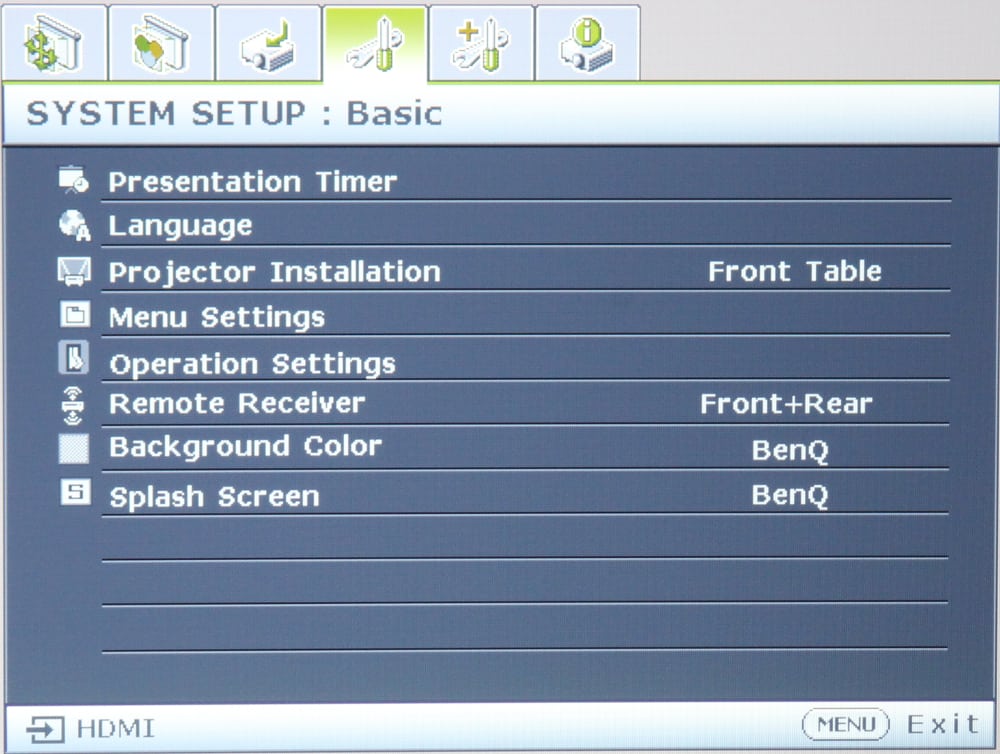
The 1st gallery photo above shows the Basic Setup menu.  This menu provides the configuration items for such things as the menu language, the position of the projector (e.g,, table mounted vs. ceiling mounted), which IR receivers will be used on the projector for receiving the signal from the remote control, the location on the screen where the menus will appear, etc.

System Setup:  Advanced Menu -

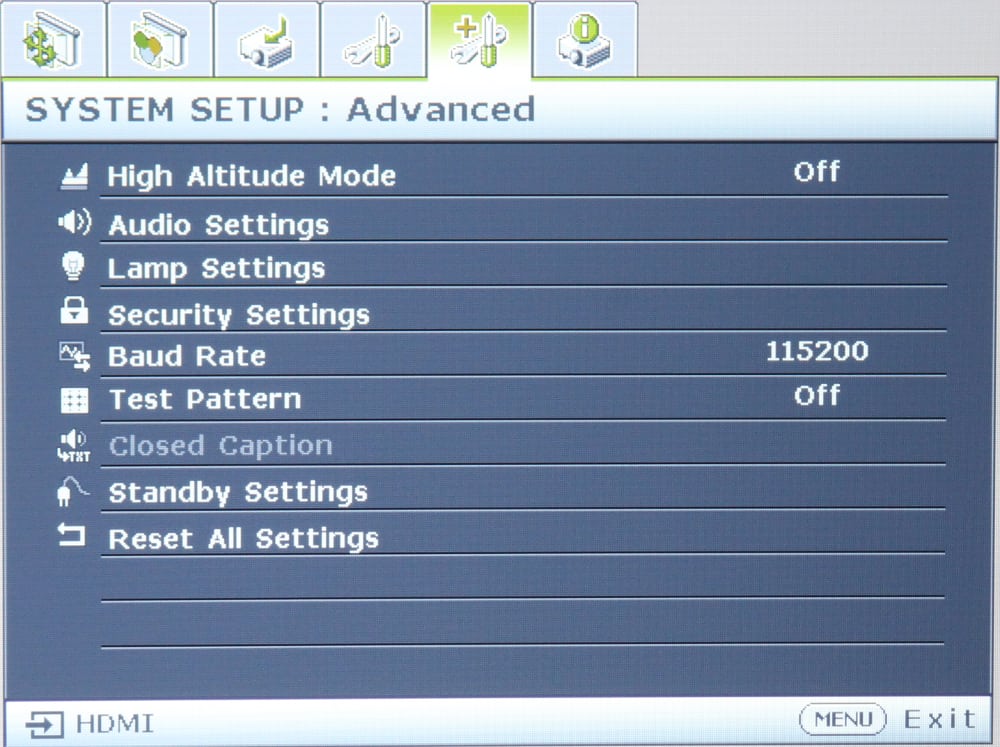
The 2nd gallery photo above shows the Advanced Setup menu.  This menu provides items for such setting as the lamp power mode, security settings, RS232 port baud rate setting, etc.


BeneQ-MX631ST-Menu10-Info

Information Menu -

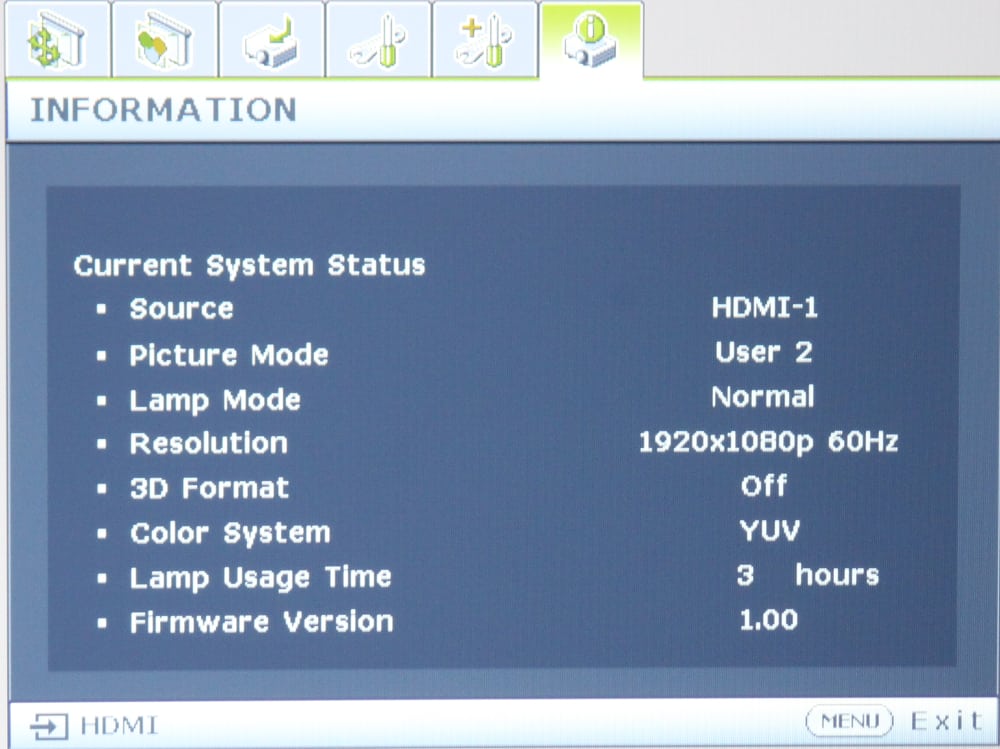
The Information Menu, shown in the photo above, provides the user with information about the signal input being used including the characteristics of input signal, the operating mode of the projector, and other information on the status of the projector.

Latest Reviews

February 25, 2024

Introducing the Hisense C1: A cube-shaped 4K UHD lifestyle projector with an RGB triple laser light source and integrated JBL ...

February 19, 2024

The BenQ X3100i is a 4LED, 4K UHD (3,840 x 2,160p) 0.65" DLP short-throw gaming projector that offers a BenQ-rated ...

© 2024 Projector Reviews

crossmenu linkedin facebook pinterest youtube rss twitter instagram facebook-blank rss-blank linkedin-blank pinterest youtube twitter instagram