Hardware Overview
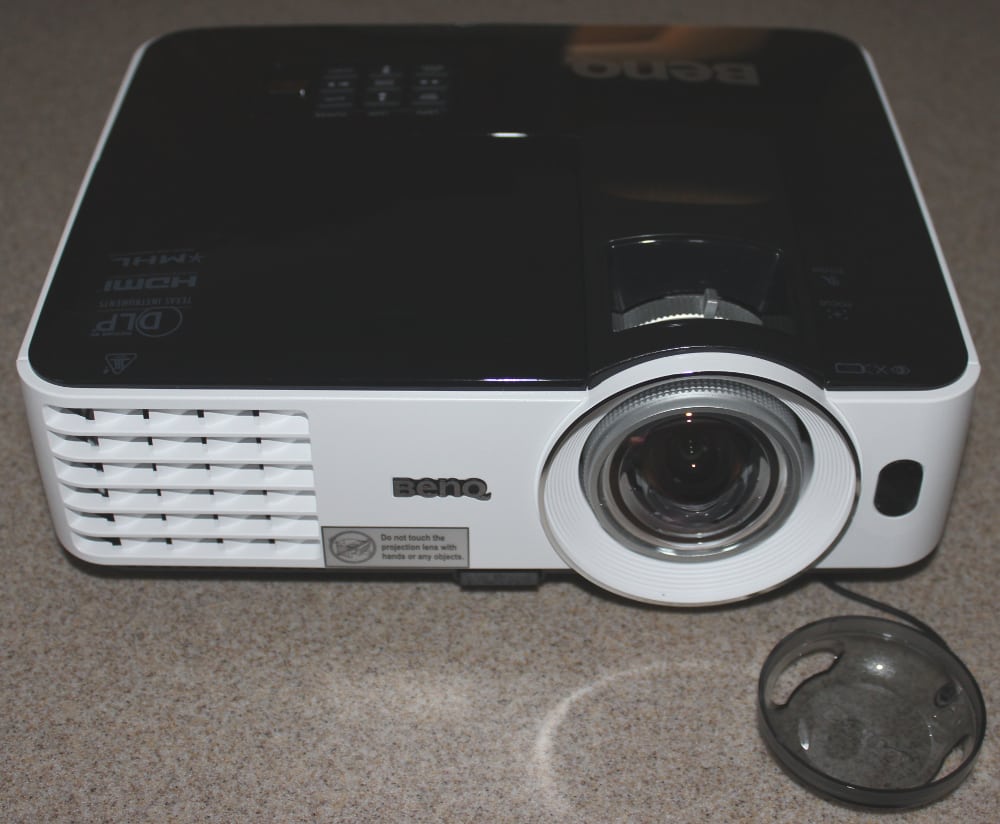
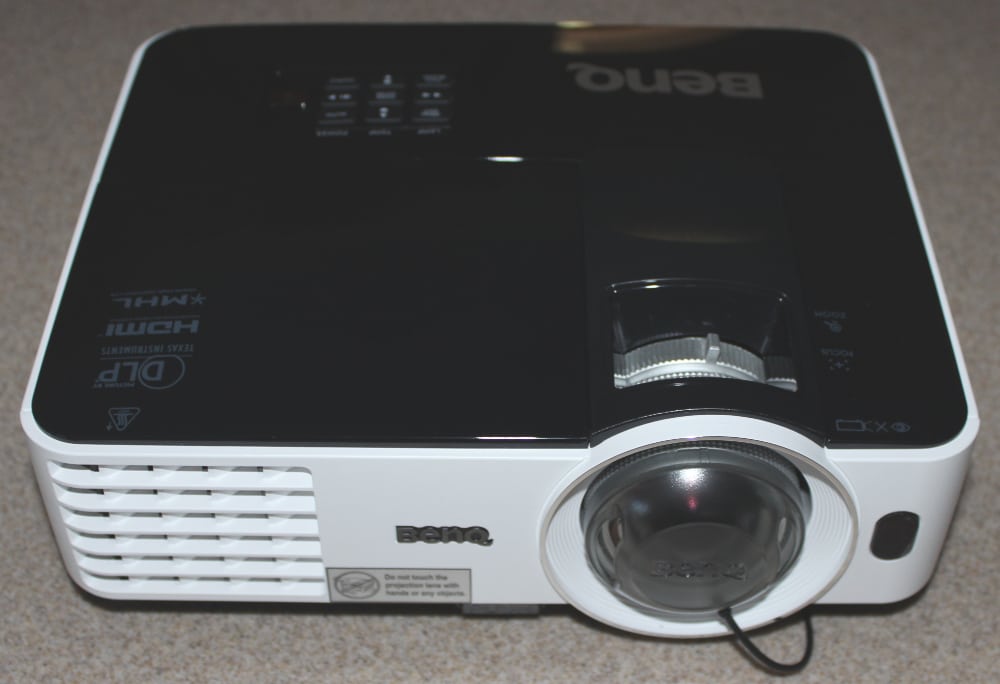
The BenQ MX631ST, is certainly larger than pico and pocket projectors, but it is still a compact portable model that can easily be moved between classrooms or conference rooms. It is a well built portable projector packaged in an attractive case with black top and bottom panels and white on the sides.
As seen in the 1st gallery photo above, the projector’s lens is positioned toward the right side of the projector’s front panel (when the projector is placed on a table and viewed from the front). The front panel also includes a cooling exhaust vent to the left of the lens a IR receiver for the remote control to the right of the lens. There is a slide-on lens cap provided that is attached to projector with a cord to prevent it from being misplaced once removed.
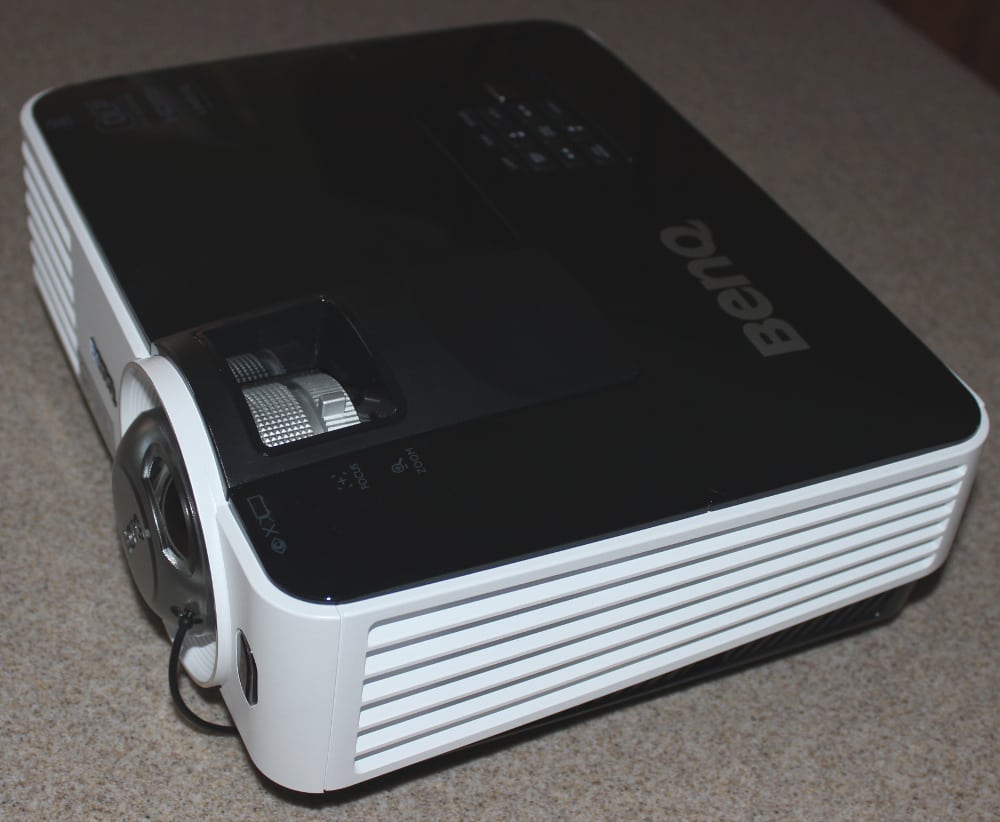
The projector’s air inlet grill is on the right side of the projector, as seen in the 2nd gallery photo above. The projector single speaker is also is located behind the grill on the right side of the projector.
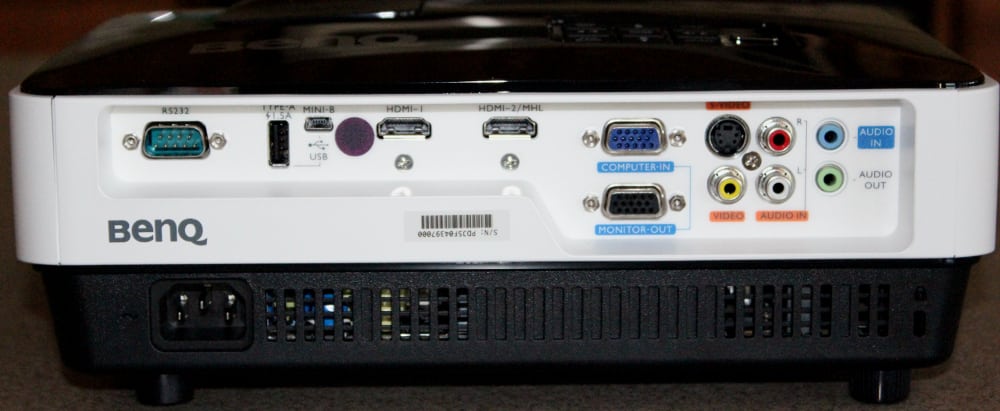
The signal and power connectors are located on the rear of the projector, as seen in the 3rd gallery photo above, and as described in some detail below. A second IR receiver for the remote control is also located on the rear of the projector.
The bottom panel of the projector includes a front foot for adjusting the tilt of the projector when sitting on a table. There are also treaded holes in the bottom of the case that can be used for a permanent installation where the projector can be mounted in the inverted position using a ceiling mount (extra cost optional accessory).
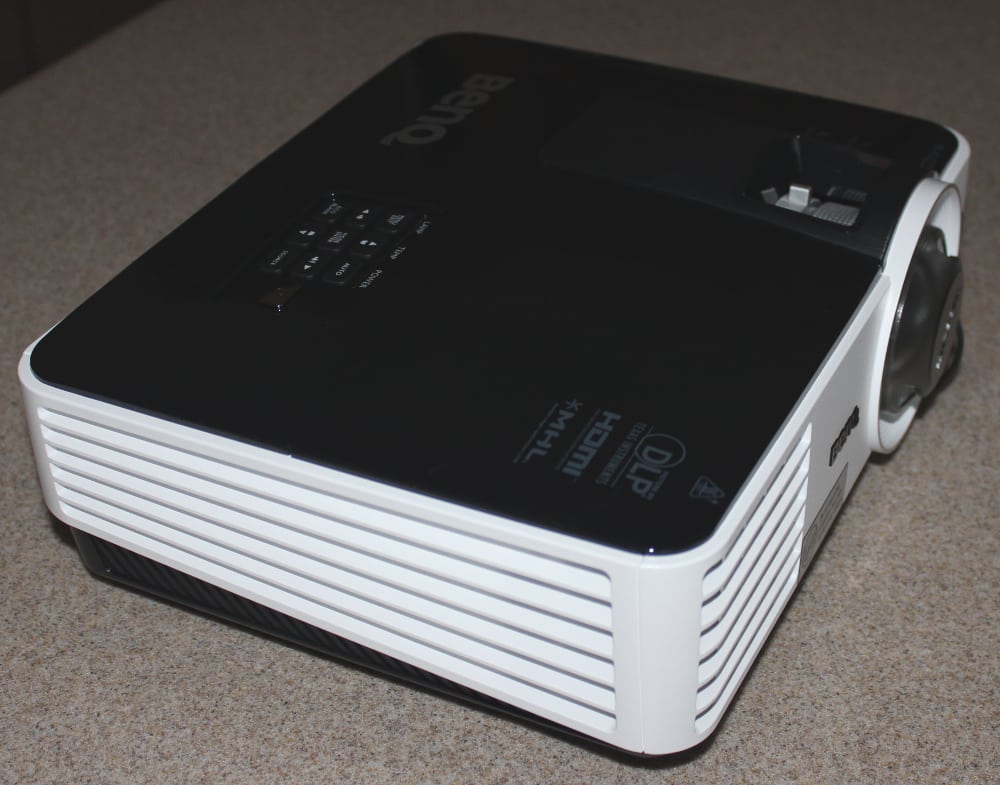
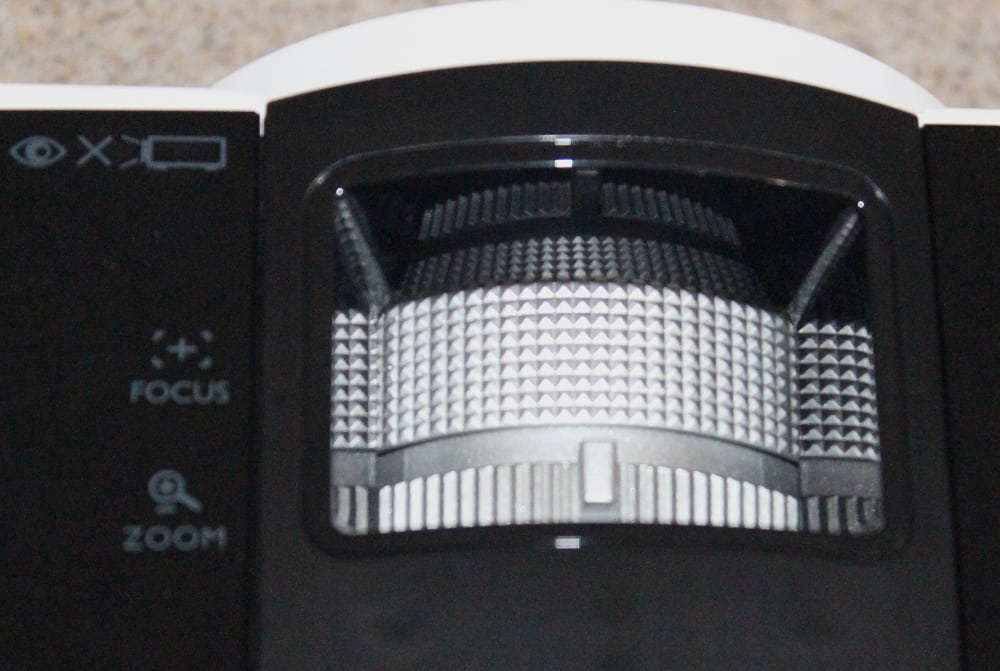
The top panel of the projector includes the control pad and access to the mechanical lens adjustments. These are both described in more detail below.
Lens
[sam_pro id=1_104 codes="true"]
The MX631ST is supplied with a slide-on lens cap, shown installed in the 1st gallery photo above and removed in the 2nd photo.
The projector’s manual lens zoom and focus adjustments are accessed from the top of the projector, as shown in the 3rd gallery photo above. The MX631ST has a modest 1.2X zoom range and lacks any lens shift adjustments. This is typical for business or classroom projectors of this class. This is a short throw model meaning the projector needs to be located relatively close to the screen (or other projection surface). The zoom range support throw distances from 0.9 to 1.08 screen widths. Thus, at the mid-point of the zoom range this works out to a projector-to-screen throw distance that is about equal to the width of the projector image.
Control Pad
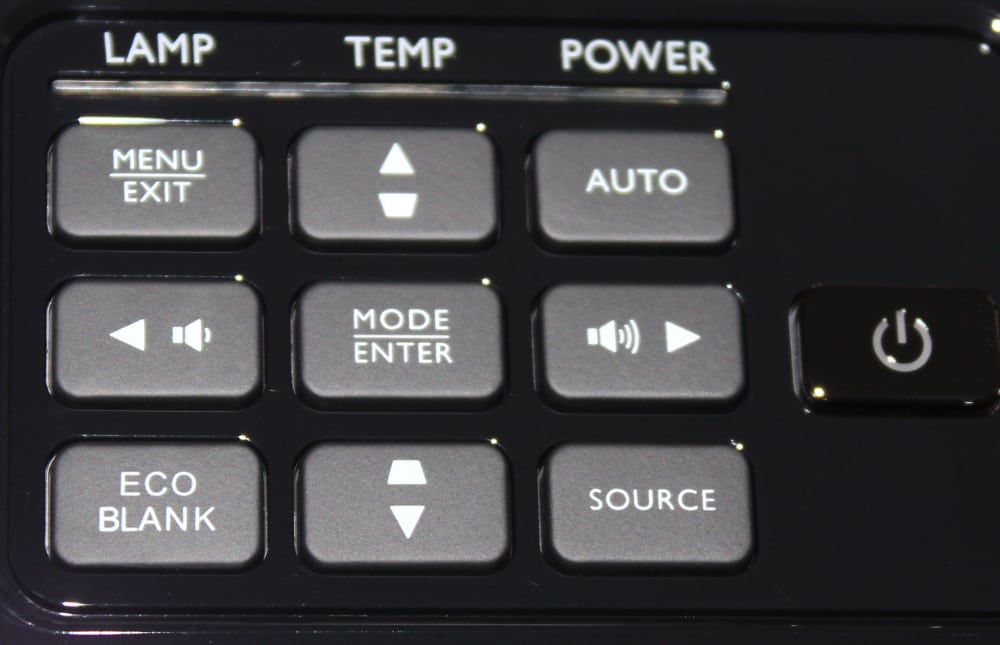
The projector's status indicators and control pad, as shown in the photo above, are located on the top panel of the projector. At the top are status lights for Lamp, Power, Temperature. Below those are 9 buttons that provide access to the projector's basic functions.
At the top left is a button to display the on-screen menu and that is also used to go back one level in the menu structure.
Centered on the pad are the 4-way menu navigation buttons with a enter in the center. The up and down buttons also do double duty for providing digital keystone adjustments of the image (when menus are not being displayed). The right and left buttons also do double duty for adjusting the volume of the projector's internal speaker.
The top-right button on the pad is labeled 'Auto' and this is used only with analog signal inputs to synchronize the projector with the timings of the input signal.
The bottom-left button is used to blank the screen (i.e., not display any image).
The bottom-right button is used select the desired input signal source.
A separate power button is located to the right of the 9-key pad.
Inputs and Connectors
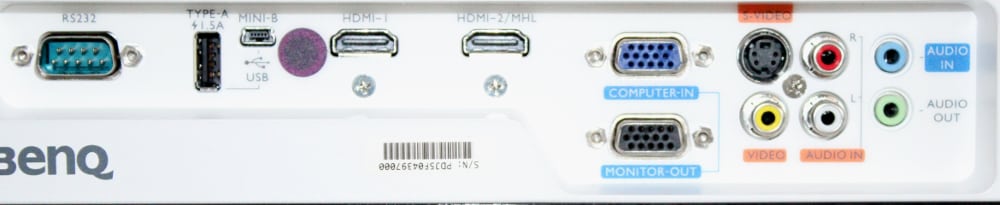
The photo above show the connector panel that is located on the rear of the projector. Going from left-to-right on the rear panel is:
A RS232 serial communications connector, for connector to external controllers;
Next are a USB-A and mini-USB-B connectors (for connection to a computer);
Next are HDMI-1 and HDMI-2 digital video inputs with the HDMI-2 also supporting MHL, for connection to a MHL capable smartphone or tablet;
Next is an analog computer input connector (i.e., VGA style) and below that an analog monitor output connector, so the input signal can be fed thru to another monitor or projector. The input connector is compatible with either RGB computer type inputs or with component video inputs.
Next is a S-Video (standard definition, analog) video input and below that a composite (standard definition, analog) video input connector and to the right of those are right and left audio inputs (standard phono/RCA connectors).
Finally to the far right of the connector panel are mini-phone connectors with the top one being a stereo audio input connector and the bottom one for connection to external power speakers.