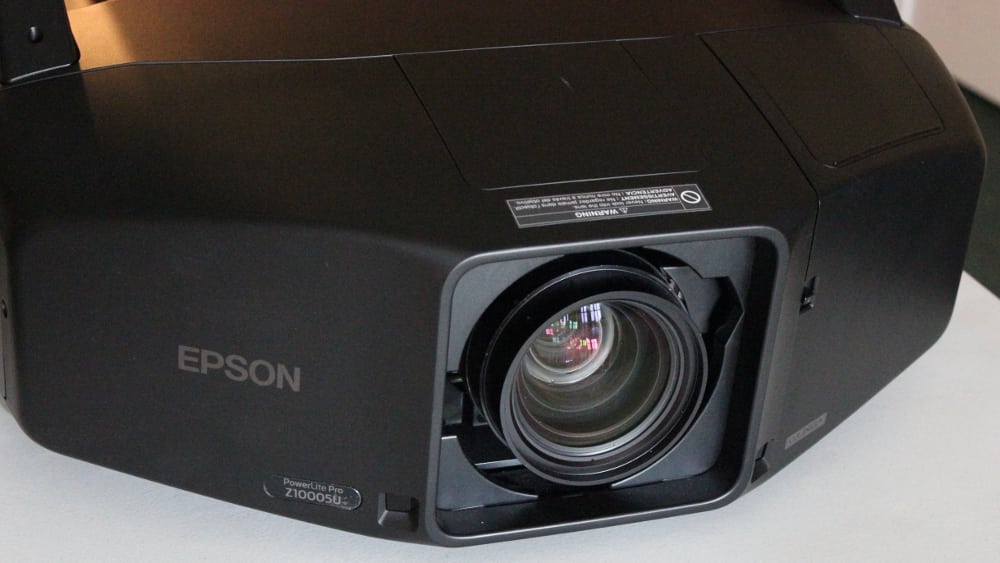
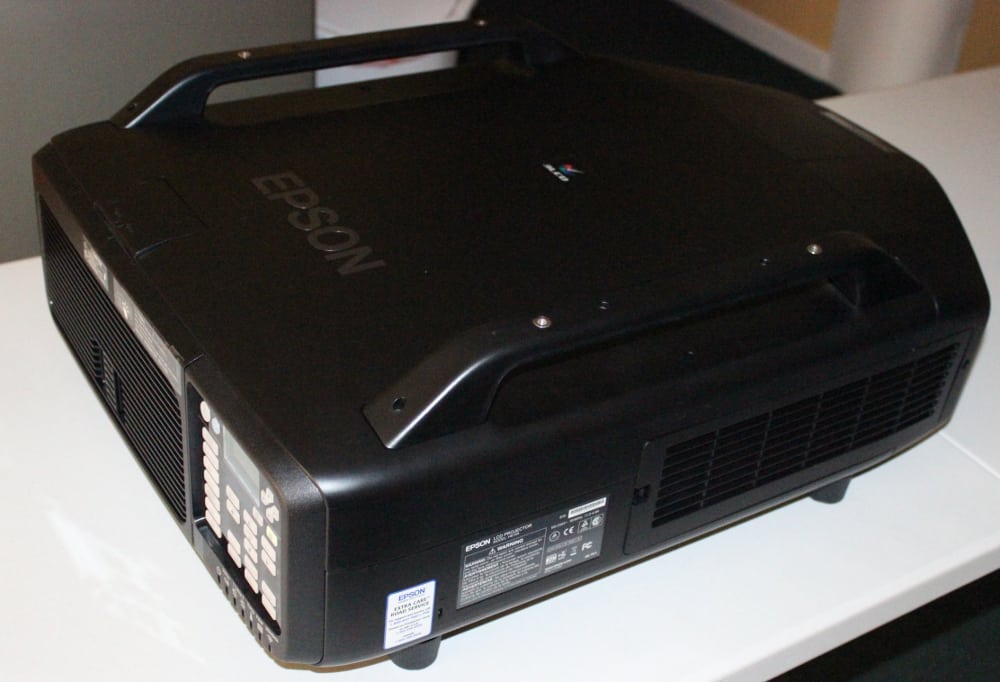
The Z10005UNL is a 58 pound projector (not including the lens) housed in a black case and with rack handles on the top. The control pad is located on the back, while the inputs and other connectors are found on the front (described in detail below), behind a cable cover door, to the right of the center mounted, motorized lens.
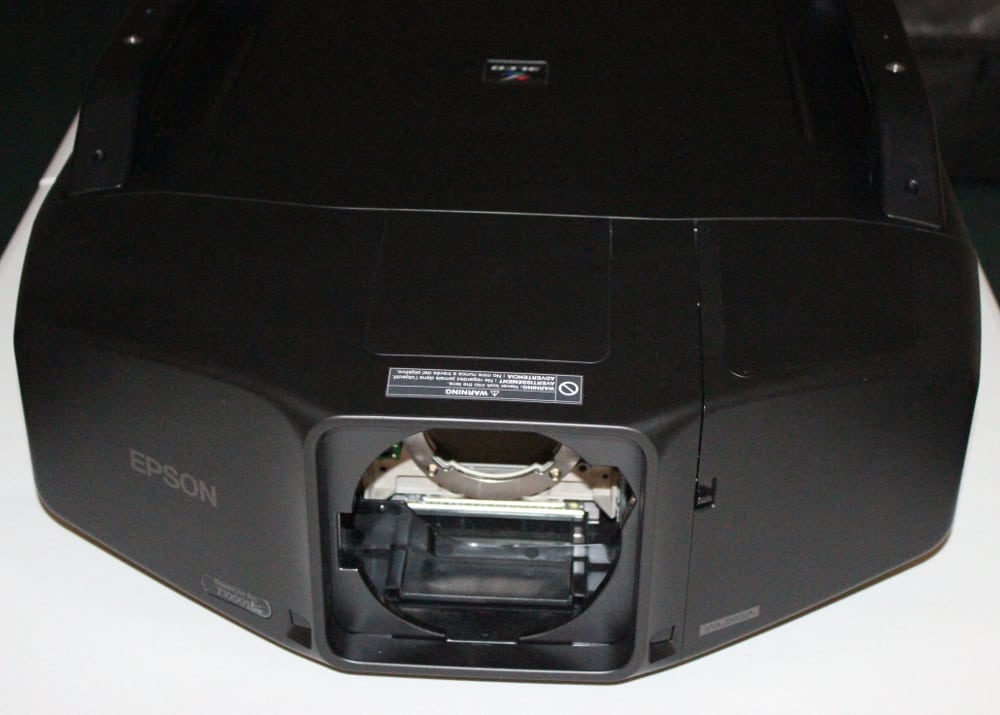
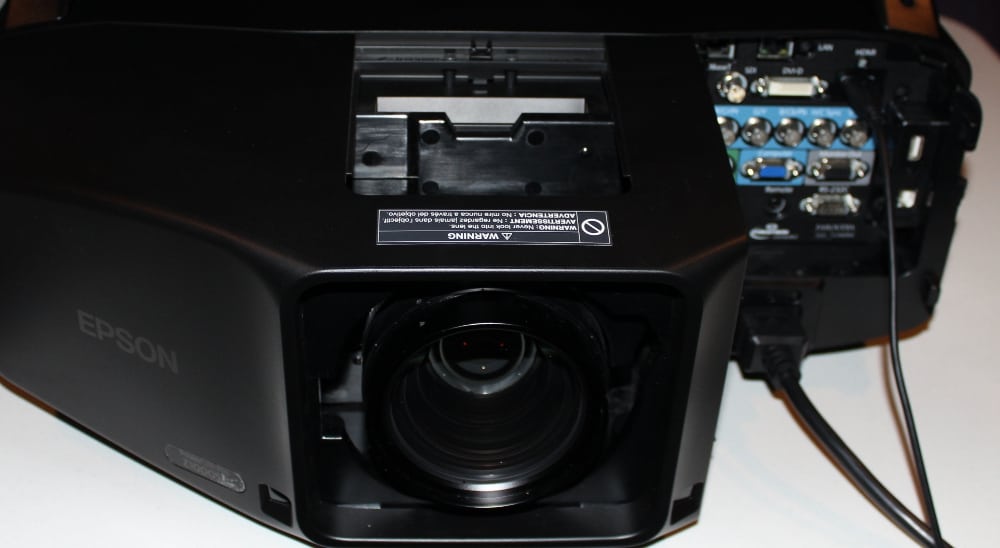
The 1st gallery photo above shows the front of the projector without the lens installed while the 2nd photo shows the front after the lens has been installed. The connector panel is located to the right of the lens, not seen in the 1st and 2nd photos because the cable cover is installed, but seen in the 6th photo with the cable cover removed. The remote control's IR receiver is located next to the bottom left corner of the lens opening.
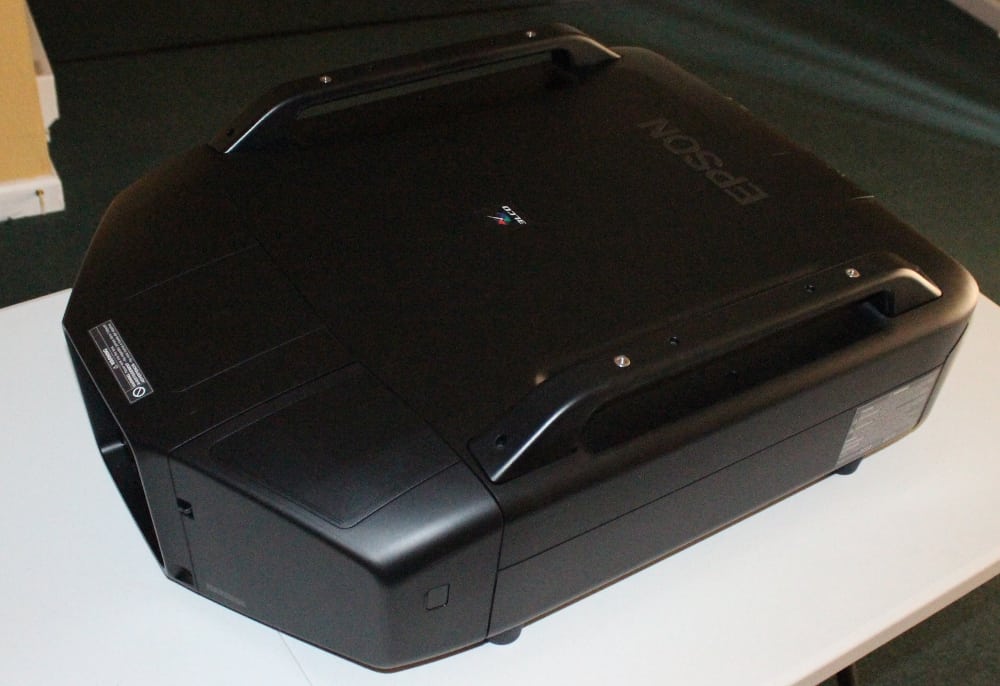
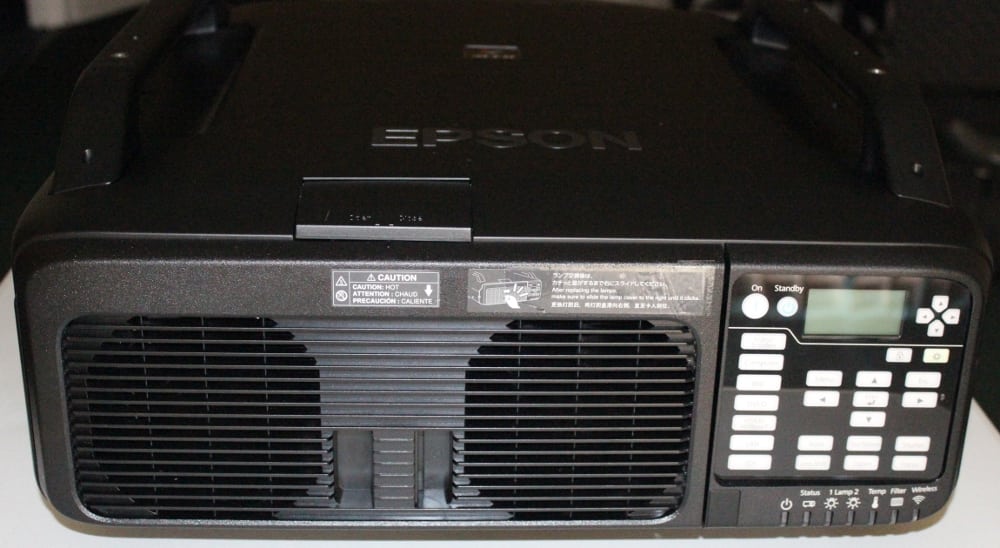
The 3rd gallery photo shows the right side of the projector (as viewed from the front) while the 4th photo shows the rear of the projector. About 2/3 of the rear panel is occupied by two large exhaust fan grills, with a lamp cover release located between the two fans. The control pad is located toward the right side of the rear panel and is described in more detail below. There is also a second IR receiver for the remote control located on the rear panel.
The 5th gallery photo shows the left side of the projector which has a large air inlet vent along with a Kensington security slot.
Connector Panel
The connector panel, as shown below, is located on the front of the projector.
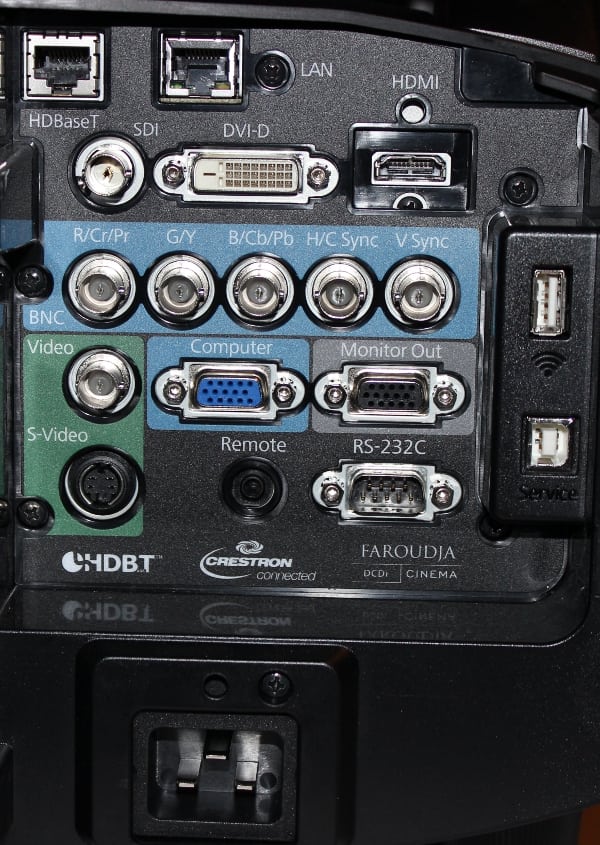
As shown in the photo above, at the top of the connector panel are connectors for HDBaseT and wired LAN. Below those are connectors for SDI, DVI-D and HDMI. Next down and highlighted with blue on the connector panel, are the 5 BNC connectors for analog RGB+Sync or YCbCr inputs. Below that and to the left, and highlighted in green, are a BNC composite video input connector and just below that a S-Video connector. To the right of those are analog computer (VGA style) input and monitor output connectors and just below those are connectors for a wired remote and a RS232 serial connector. Toward the far right are two USB connectors with the upper one being for used with the optional wireless network adapter and the lower one is a service port. Finally, at the bottom of the connector panel is the connector for the power cord.
Control Pad
The projector's control pad is located on the rear of the projector. The Z10005UNL has a very comprehensive control pad, as shown in the photo below, for control/adjustment of the projector's many functions.
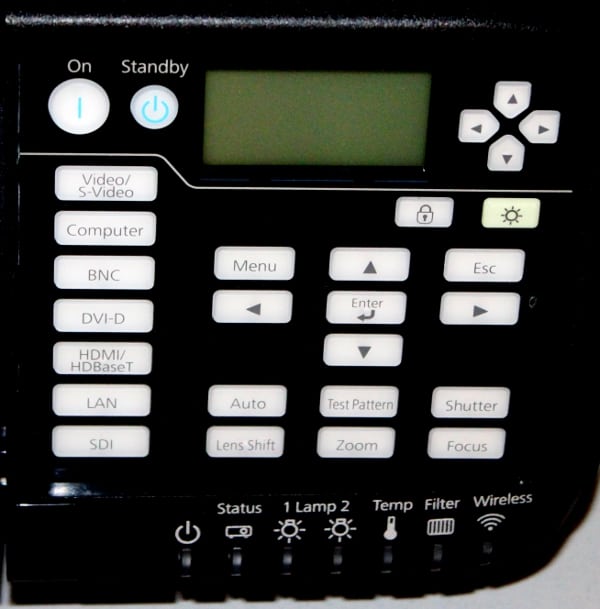
Across the top are the Power On and Standby (power off) buttons, a LCD status display, and arrow buttons for selecting the status settings.
Toward the left side are discrete signal input buttons, and near the center of the control pad is the Menu button, the ESC button and the 4-way navigation buttons.
Below that are 6 buttons for Auto (to sync. with analog inputs), Test Pattern, Shutter (mutes signal), Lens Shift, Zoom and Focus. Finally at the bottom are a series of status indicator lights.
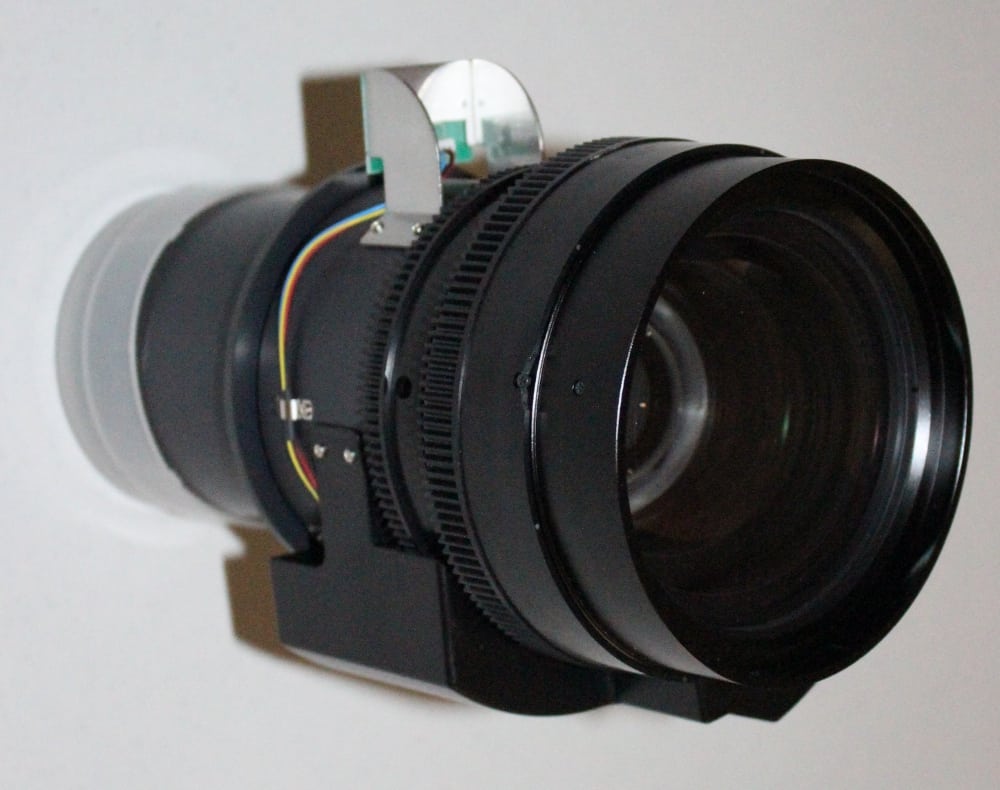
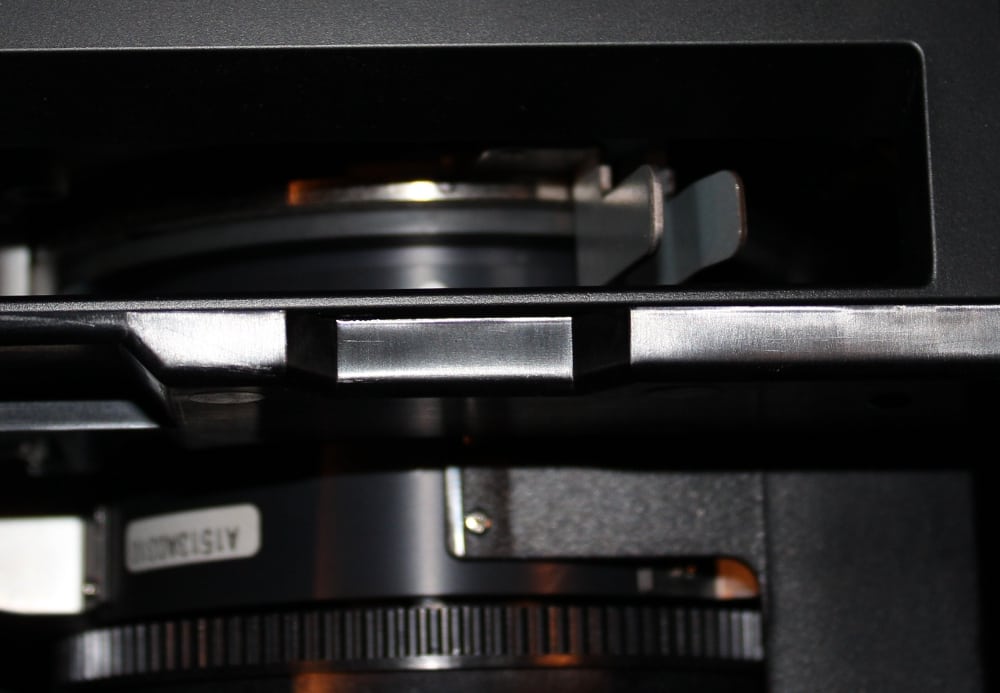
The Z10005UNL can accept any one of 7 different optional lenses offered by Epson. The 'standard' zoom lens, as used with the projector that was reviewed, in shown in the first gallery photo above.
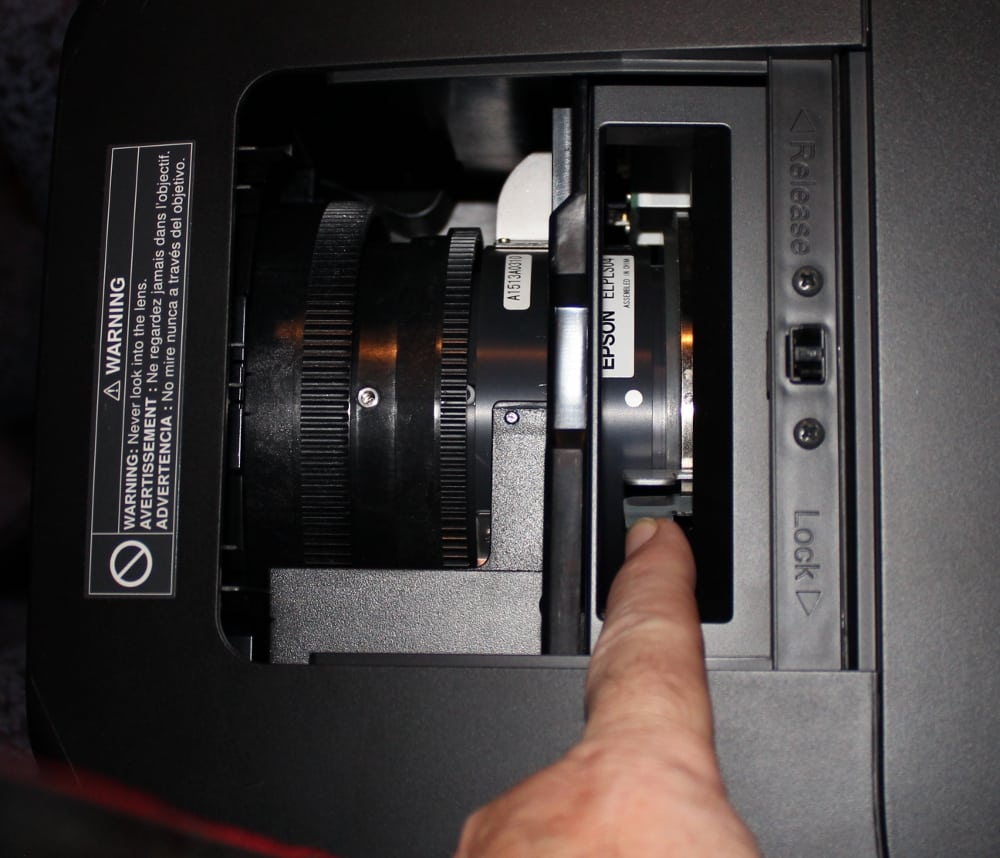
The lens is inserted from the front of the projector and is secured in place by a locking lever located just above the lens and accessible by opening a small door on the projector's case. This is shown in the 2nd and 3rd gallery photos above. Since power zoom and focus are supported, there is an electrical connector on the lens (seen at the top of the 1st photo above) that must be positioned to align with an electrical connector on the projector. just beside the bayonet lens mount.
Remote Control
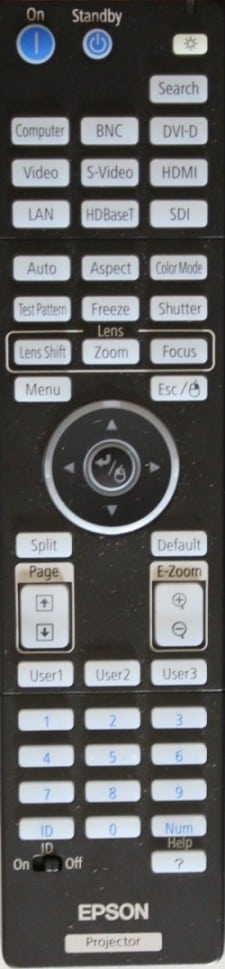
The Z10005UNL comes with a moderate sized remote with a convenient button layout. At the top are the Power On and Standby (power off) buttons along with a button to turn on the backlight for the bottons and a Search button to find the active signal input.
Below those are discrete source input buttons and below those are buttons for Auto (to sync analog input signals), Aspect to change the displayed aspect ratio, and Color Mode to selected the desired color mode.
Next down are 3 buttons to display a Test Pattern, a button to Freeze the current image, and Shutter to mute the display. Below those are 3 buttons to control Lens Shift, lens Zoom and lens Focus.
Below those are buttons display the on-screen Menu and Esc (go back one menu level) and the 4-way Navigation ring.
Just below the Navigation ring are buttons to activate Split Screen mode and for resetting the displayed item to the factory Default value.
Toward the bottom is the numeric keypad.
 Click Image to Enlarge