The row below, provides three savable memories for your favorite Lens Memory settings
Lens is next with three buttons. The left one toggles you between motorized, focus, zoom, and lens shift. The second button lets you adjust the iris operation setting, and the third is labeled Anamo(rphic), and switches into Anamorphic mode which few will ever need.
Two small buttons are next. On the left, Hide – blanks the screen, and on the right, is the backlight button (it glows very slightly in the dark).
Then comes navigation, the four arrows in a round formation, with OK (Enter) in the center. Below on the left is the Menu button to access the menu system, and opposite it, is the Back (escape) button to move you back up one level in the menus.
Picture modes are next – Separate buttons for Natural, Cinema, and HDR. And below those is the general Picture mode button which takes you to the menu with all of those.
To the right of the Picture Mode button are two buttons allowing direct access to the Color Profiles, and to the Gamma settings menu.
Now things get interesting. The left button on the next row down is labeled MPC. This is some smart processing, for example it provides controls to both sharpen very sharp portions of a movie while further softening softer, out of focus areas, to add “Expressiveness” as JVC calls it. I call it another example of advanced processing that may be effective on some content, not on others. Seems the day of the purist – is long gone, CFI, pixel shifting, MPC, and various “Super-Resolutions” dynamic sharpening, etc. now attempt to improve on the source material, to make up for the flaws in the process.
I get that. The photos throughout this review of movies, sports, etc. don’t even come close to reproducing faithfully, or competently what a projector puts up on the screen. To compress a 4K image down to the 100K or so for high quality internet jpgs, we’re taking 8+ megabytes of data, and crushing it down to about 1/80th the original size.
I did not get the time to really play with the feature. I stuck to default values. It’s part of my take on overall picture quality.
Sorry – about going off on a tangent. Next to MPC is C.M.D which let’s you toggle between the different CFI (smooth motion) settings, and turning them off.
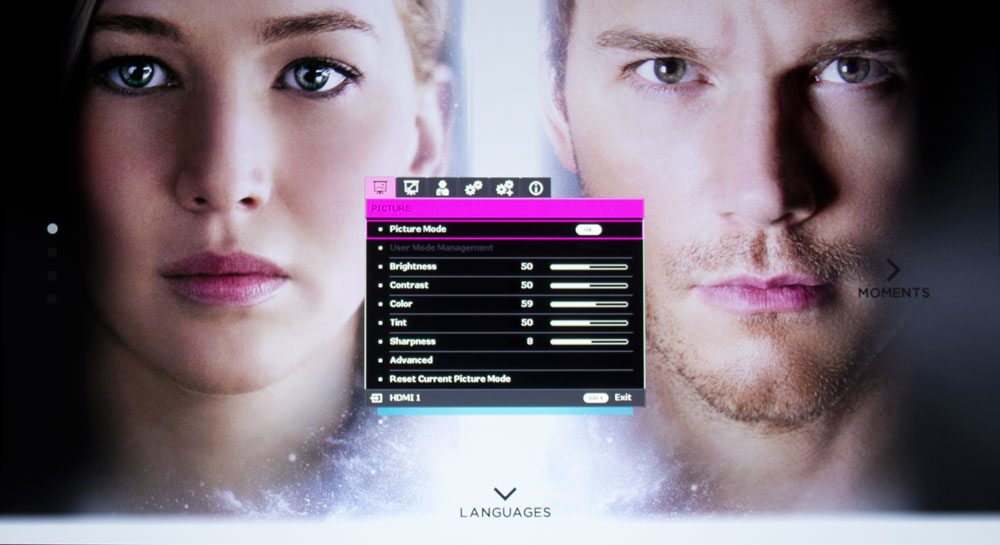
To finish up, near the bottom are four small round buttons. The leftmost is Gamma, that will just let you toggle between different Gamma options. Color Temp – does the same for choosing color temperatures. 3D Format (you guessed it): Manually selecting from different 3D formats, and finally: Pic Adj – it brings up and toggles through each picture control such as brightness, contrast etc., as you repeatedly press the button.
That folks is all the real hardware. Now let’s take a look at those menus, which of course work hand in hand…