The remote control for the Maxell MP-TW4011 is compact, and black in color. I don’t usually prefer dark remotes for classroom environments, as it makes things harder to see, but that’s not really a big deal – though I would have liked to see some backlighting on this remote, since they chose the darker color. Oh well, we’ve been trying to get manufacturers to backlight their remotes for business and education projectors for years, so this is highly typical.
The top section of the remote consists of eight buttons. Starting at the top left, there’s the Input button, followed by two programmable buttons called “My Button” 1 and 2 on its right. The next button in this row is the Power Button, which is red. Below that are four buttons: Aspect, PbyP, Auto, and Freeze.
The next set of buttons are four pairs of two buttons each, stacked. The first pair is for Magnify On/Off, the second for that Powered Focus +/-, Digital Zoom +/-, and Volume +/-. Below the Magnify set is one more pair of stacked buttons. This is for Page Up and Page Down.
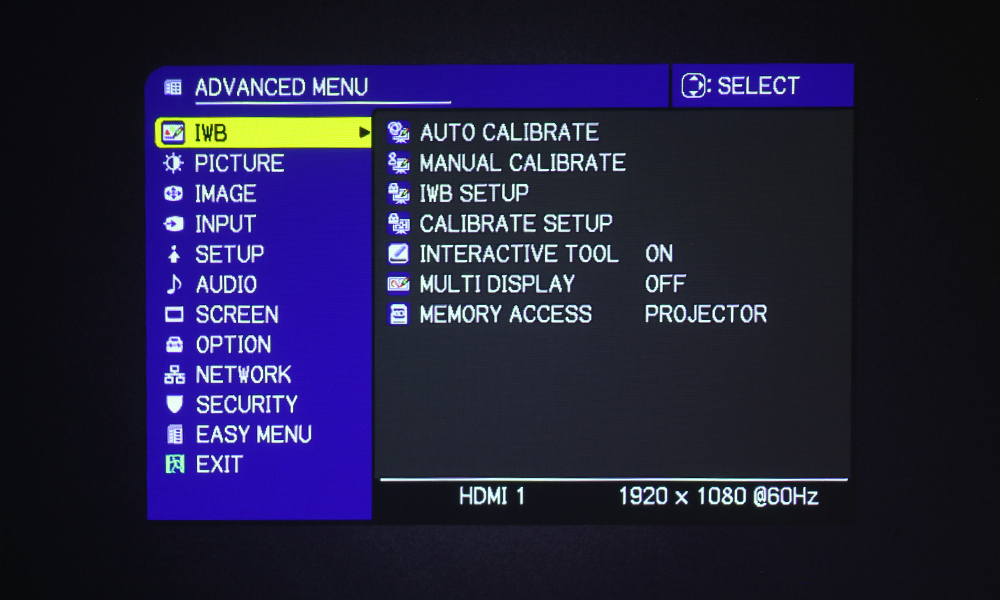
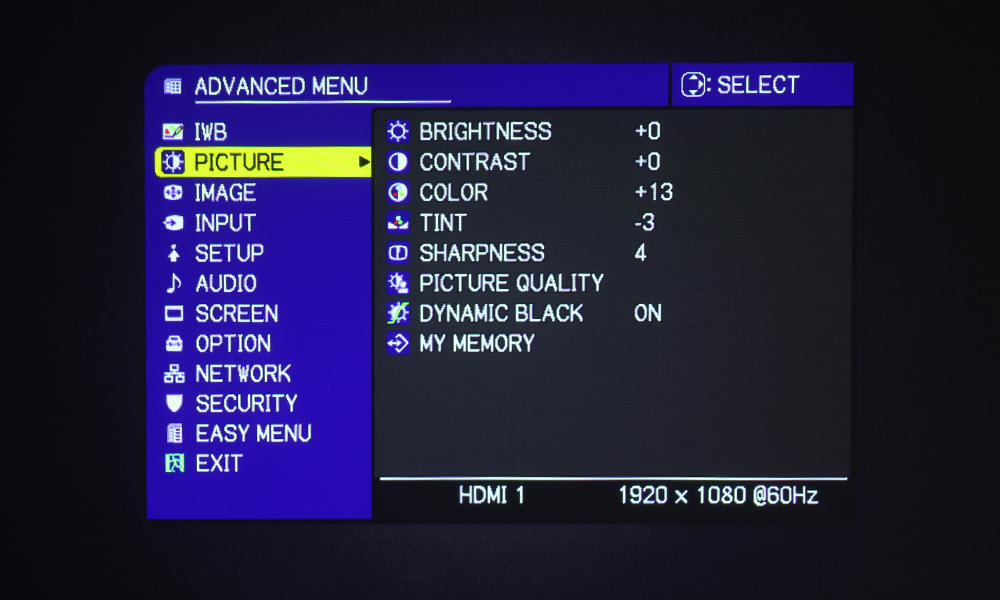
On the same two rows as the Page Up/Down Buttons, there are six more buttons – three on one row, three on the other. The top three are Geometry, which brings up Geometric Correction, Picture, which brings up the Picture Modes to toggle through, and Mute – obviously to mute the volume. Next is the Interactive Button, which brings up the Menu for Interactive Features, Network, and Blank.
The final section of the remote control is navigational controls. That’s your typical four directional arrow keys surrounding an Enter Button, and four buttons located at each corner of the configuration. At the top left, we have Esc, followed by Menu at the top right. At the bottom left, there’s OSD MSG, and the Reset Button at the bottom right.