Projector Reviews Images

Epson BrightLink 696Ui Projector Review – Interactivity

Posted on July 26, 2017 by Art Feierman

Installation

In the photo below, you can see the setup of the Brightlink 696Ui. The projector is wall mounted, which is the typical way to install it, with the Touch Unit mounted just below the projector, with the infrared lasers pointing downward to cover the screen surface below.

Epson BrightLink 696Ui Side Mounted

The Epson Brightlink 696Ui is wall mounted, with the Touch Unit mounted directly below.

The reasons for this projector being wall mounted are twofold. Wall mounting is the most practical way to mount a projector in a classroom setting, as many classrooms have lay-in ceilings with removable tiles, making ceiling mounting impractical. Okay, so, ceiling mounting is out. Secondly, the setup menu for the Touch Unit is not available unless the projector is mounted in the inverted position (as it is when wall mounted), or in a vertical position (used to create an interactive table top). As this projector only had a temporary stay in my home, I did not wall mount it. I spoke with the good people at Epson who demonstrated a workaround for it so that I could test the interactive features.

The Brightlink 696Ui comes with a wall mount for the projector, and one for the Touch Unit. You can also mount the Touch Unit to a magnetic whiteboard. Remember that your screen surface must be rigid – classic whiteboards, hybrid whiteboard/screens, or a hard, white table top (for interactive table tops) will work without sustaining damage to the surface. This is important and worth another mention, because those pen tips will stretch a regular screen surface, and even fingers will damage the screen with their destructive oils and – dare I say it – unintentional grime.

Setup and Calibration

The Extended Menu (first photo)  is where you can access the Easy Interactive Function where you will find the sub-menus for the interactive features’ setup. The first sub-menu is for setting up the interactive light, pen and finger touch features (second photo), and the second is for setting up the Touch Unit (third photo). From the Easy Interactive Function menu, choose Auto Calibration, which will display a series of test patterns to do the initial calibration for the interactive pens.

Epson Brightlink 696Ui Interactive Test Pattern

The Auto Calibration function performs the initial calibration of the interactive pens.

After this initial calibration, select Manual Calibration for a more precise configuration of the interactive pens. This will bring up a series of images with a single target location for the pen tip to touch, which will conclude the pen calibration. Next is the finger touch calibration. During this phase, the Touch Unit must be turned on using the Easy Interactive Function’s Touch Setup menu. The Touch Unit should be centered with the projected image using the test screen pictured below, as well as the first screen you will see to calibrate the Touch Unit.

Epson Brightlink 696Ui Interactive Test Pattern Touch Unit

The Installation Test Pattern for installing the Touch Unit.

Epson Brightlink 696Ui Pen Calibration

The first screen to calibrate the Touch Unit.


Also included in the multitude of items that come with this projector are a pair of “Markers.” These are calibration aids that attach magnetically to a whiteboard, or can be affixed to your hard, non-magnetic “screen” surface using masking tape at the two locations marked on the calibration screen above.

Epson Brightlink 696Ui Touch Calibrate L-Brackets

The small plastic markers are used when calibrating the Touch Unit.


You can see in the images that both the markers and the screen have a t-shape on them. Line up the projected t-shape with the t on the markers, shown first in the slider below.


The next step is to turn each of the two knobs on the Touch Unit to move the displayed circle into the oval, as seen in the second image of the slider. The right knob on the Touch Unit adjusts the calibration position on the right side, while the left knob adjusts for the left. The next calibration screen (third photo) has four more points to work with, labeled #1 and #2 on each side of the screen. Place the marker at the #1 point, and the circle next to it should fill in. Move the marker to the #2 spot, and the same thing should happen. Rinse and repeat for the other side of the projected image.

The final image in the slider shows a series of dots bordering the projected image. Simply move your finger along the green dotted line, from corner to corner until you have reached your starting point. This concludes the calibration of the Epson Brightlink 696Ui’s Easy Interactive Function and the projector is ready to accept and project interactive lessons.

Was that a doozy or what? If you're like me, simply reading about how to perform such a visual task is not enough. Epson has provided a video showing the interactive calibration process in a step-by-step tutorial that you may find helpful. I used the video myself to calibrate the unit being reviewed and found it to be much easier by doing so.

The Bottom Line on Interactivity

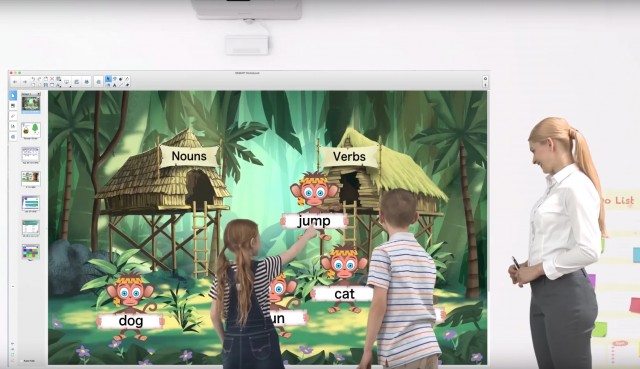
The bottom line? Epson does a great job on interactivity with the Brightlink 696Ui. The calibration is straightforward and well-within a school district’s tech department’s ability to install. The pens and finger touch are accurate. Epson provides their own easy-to-use software for creating interactive lessons, as well as that Smart Notebook subscription, which allows the teacher to create interactive lessons using “gamification.”

A word about that: If you’re an adult human who has eyes, you probably have noticed that video games are a huge part of kids’ lives. With next-gen graphics and the newest virtual reality technology coming to games, who could blame them? Students are inundated with complex situations that require strategic and critical thinking in real-time – sound familiar? The classroom is not much different. The idea behind gamification is to create lessons which stimulate the same satisfaction-emitting neurons in the brain that are excited when mastering a video game, level by level.

When creating an interactive lesson with a program like Smart Notebook, you can create a lesson that unfolds like a game. Each correct answer brings them deeper into the game, deeper into the mastery of that subject. The likelihood of this technology revolutionizing education is absolute – the only limitations being that of your own level of creativity.

The Epson Brightlink 696Ui is targeted toward the higher education market. What my college professors could have done with this projector! They could have gamified screenwriting, production design, art history, math, science, English – the list goes on. Students learn in a variety of ways, often favoring one of the three learning preferences - visual, auditory, kinesthetic (doing/feeling), and interactive lessons address each learning style in a way that stimulates every student in the classroom.

© 2024 Projector Reviews

crossmenu linkedin facebook pinterest youtube rss twitter instagram facebook-blank rss-blank linkedin-blank pinterest youtube twitter instagram