Projector Reviews Images

Epson PowerLite 85+ Projector - Physical Tour

Posted on April 30, 2010 by Art Feierman

Appearance

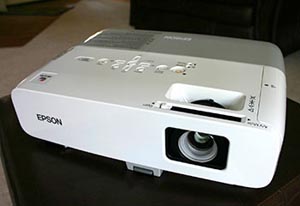
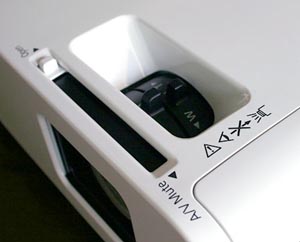
The Epson 85+ was designed to be easy to setup. As you notice the projector has a nice shiny white finish. If you are planning to ceiling mount the projector this will make it a little less noticeable. In the front you will notice the Epson 85+'s lens. It is recessed and enclosed for added protection from objects hitting or scratching the lens. A convenient lens cover is also installed in the projector and simply slides in front of the lens. On top of the lens you will find the zoom and focus knobs. Both are easy to adjust and move very smoothly.

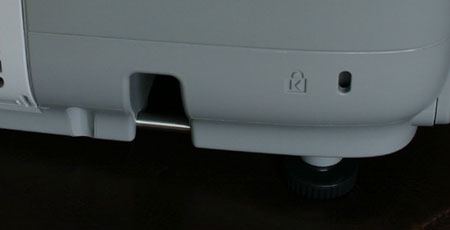
The sides of the projector have two functions. One to bring in cool air from the outside but to exhause it as well. Epson and other manufacturers are also starting to add another layer of theft protection with an strong anchor bar and the typical Kensington lock. For universities and community conference rooms this adds another layer of security.

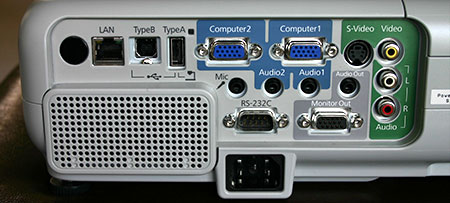
The rear of the projector houses all the inputs.The first thing you will see is not really an input but instead the rear IR sensor. To the right of that is the RJ45 Lan input so you can control the projector from anywhere there is a network connection. The networkability of this projector allows you to also broadcast messages to the projector from a central location and even broadcast the same message to other rooms that have an Epson PowerLite 85+ installed.

It also allows you to present your slides from another location as well. The Type B USB input is another great feature that allows you to use a USB cable instead of the standard VGA cable. This use of the Type B means no more having to hit the Function keys to get your projector to show both an image on the projector and the laptop. The Type A USB port to the right is used for PC-free presentations. Simply plug in your USB drive with Jpeg slides and you are ready to present without a laptop.

In the blue area of the input panel are the two inputs for VGA cables. You can hook up two sources at a time. If you plan to show high definitiion video, a special cable can be purchased so you can input a component signal through the Computer 2 VGA input. Also there are two audio inputs that are associated with each VGA input. One additional audio input is the Mic input so you can utilize the projectors on-board 10 Watt speaker. The speaking is located on the far left under the plastic screen.

The projector can also be controlled via RS-232. If you want to hook up a monitor to the projector, it conveniently comes with a monitor out and if you need a lot more sound than the Epson 's 10 Watt speaker can provide, then you have a mini dim audio out. And finally, you have two inputs for standard definition signals. A S-video and a Composite input. And of course a L/R input for sound.

Epson PowerLite 85+ Lens Throw

Before I get into the setup process and all the features, let me first give you some basic numbers to help you get a sense of the 85+'s placement flexibility. You might have a certain size image you desire and it will be important that the projectors optics can achieve that size image. For this example we will assume you would like a 100 inch diagonal image or 80 inches wide by 60 inches high.

The Epson 85+ with its 1.39 to 2.26 optical zoom lens has to be mounted between 9 feet 3 inches and 15 feet 1 inches from the screen to achieve the 100 inch diagonal. Always confirm with your sales representative if the projector you plan to purchase will work given your placement options. Now on to more about the setup of the 85+.

Epson PowerLite 85+ Setup and Menu

Physically setting up the Epson 85+ is pretty straightforward. The projector comes equipped with a nice wide front foot that is adjustble. The rear of the projector has two rubber feet that are both adjustable by unscrewing them to achieve a nice true squared image. The projector affords about +-30 degree of keystone correction, but we recommend you make every effort to set it up without using it since it will degrade the image quality slightly.

Epson PowerLite 85+ Menu

Epson PowerLite 85+ Menu

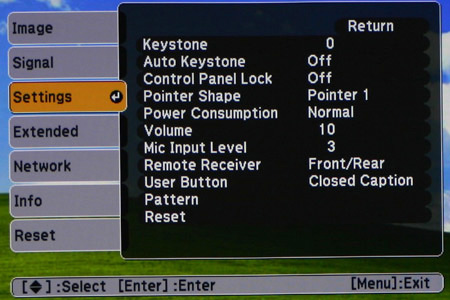
Settings

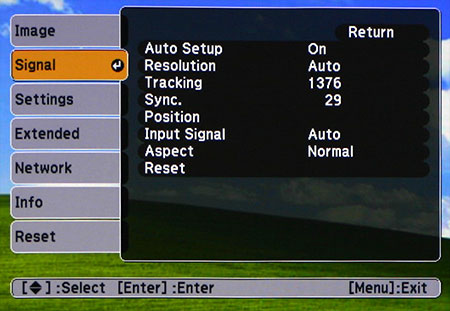
Signal

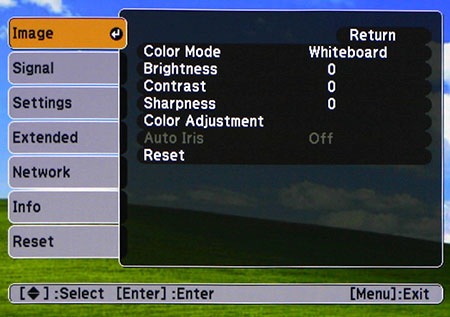
Image

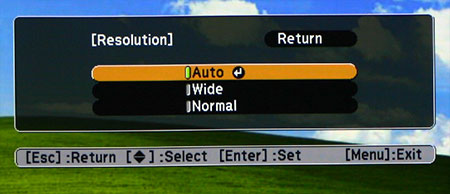
Resolution

Out of the box, the projector will try to automatically give you a perfect image using auto keystone, so you will want to go into the menu system and turn that off. A picture of that is illustrated below, along with some other shots of the menu system. Overall this Epson's menu system is easy to use and won't take any time at all to master.

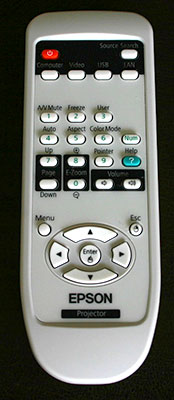
Epson PowerLite 85+ Remote Control

The Epson remote is typical of all the remotes Epson produces. I have found them to be very ergonomically friendly. All the projectors functions can be controlled through it and it allows you to use it as a mouse pointer. Particularly nice when you want to point out certain areas of the presentation.

The buttons are all laid out and shaped in such a way that just touch alone can help you navigate your way around. The only time you will need to look at the remote is to use features in the black area, but other than that, most functions are controlled by the circular navigation pad at the bottom of the remote.

Other notable features that can be controlled by the remote are zooming in close to areas on the screen, PageUp and PageDown and the ability to freeze or mute the image. Overall, one of the best remotes in the industry.

Click Image to Enlarge

Latest Reviews

February 25, 2024

Introducing the Hisense C1: A cube-shaped 4K UHD lifestyle projector with an RGB triple laser light source and integrated JBL ...

February 19, 2024

The BenQ X3100i is a 4LED, 4K UHD (3,840 x 2,160p) 0.65" DLP short-throw gaming projector that offers a BenQ-rated ...

© 2024 Projector Reviews

crossmenu linkedin facebook pinterest youtube rss twitter instagram facebook-blank rss-blank linkedin-blank pinterest youtube twitter instagram