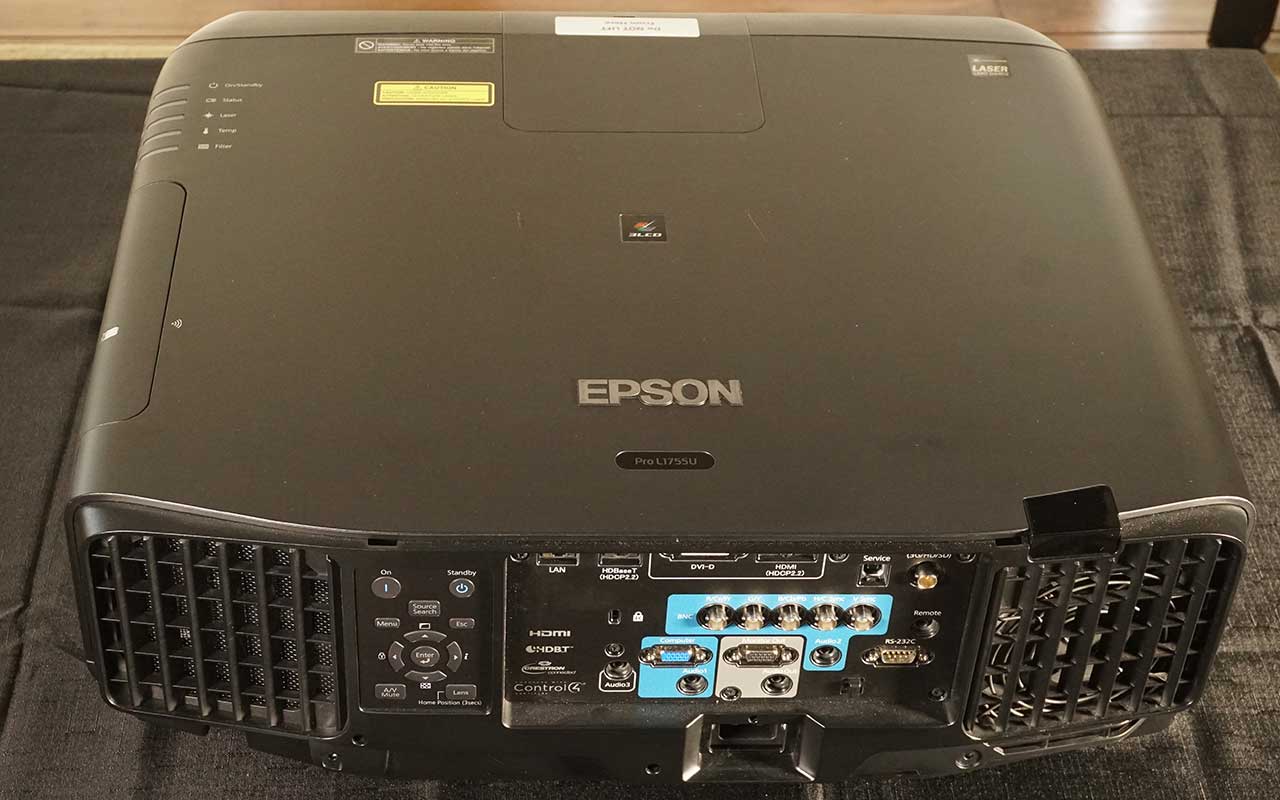
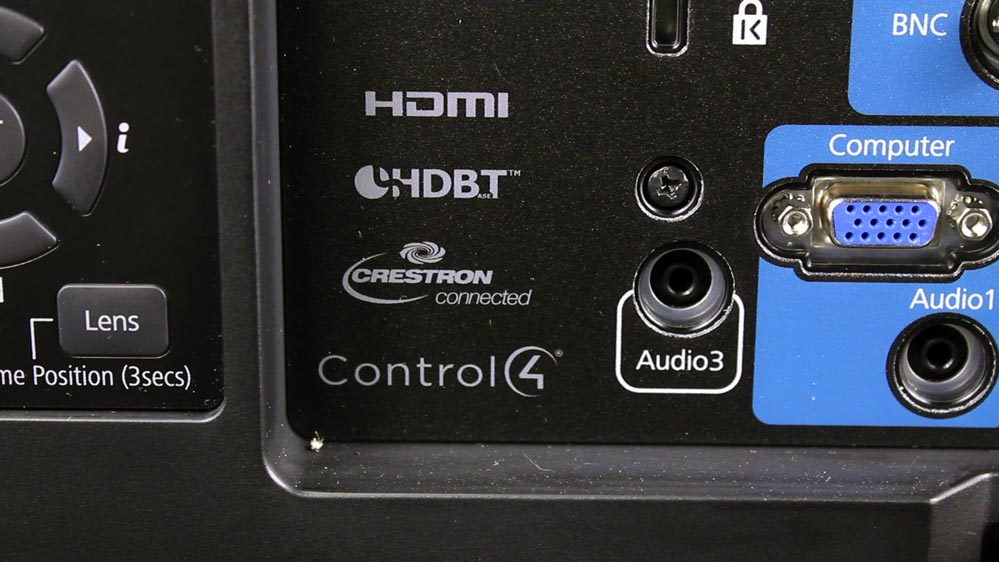
Starting from the top left, there is a standard RJ45 ethernet LAN (local area network) connector. Beside it is the HDBaseT connector (also RJ45) for running HDMI over CAT6 cabling up to 100 meters. Next to the HDBaseT is the DVI-D connector. The DVI-D has no analog compatibility, so you can’t utilize it as an extra component video or analog computer input. Beside the DVI-D is the HDMI input (with HDCP 2.2 copy protection needed for the new 4K standards like Blu-ray UHD). My only criticism is the lack of an additional HDMI input. While DVI-D is a viable alternative, it is not compatible with a lot of 4K sources, especially those that require HDMI 2.0 and HDCP 2.2 for compatibility. The DisplayPort that is found on most of the Epson G series projectors has been removed. Moving further to the right is a USB service port, and lastly, the 3G-SDI coaxial input for running long lengths (up to 100 meters) of live video.
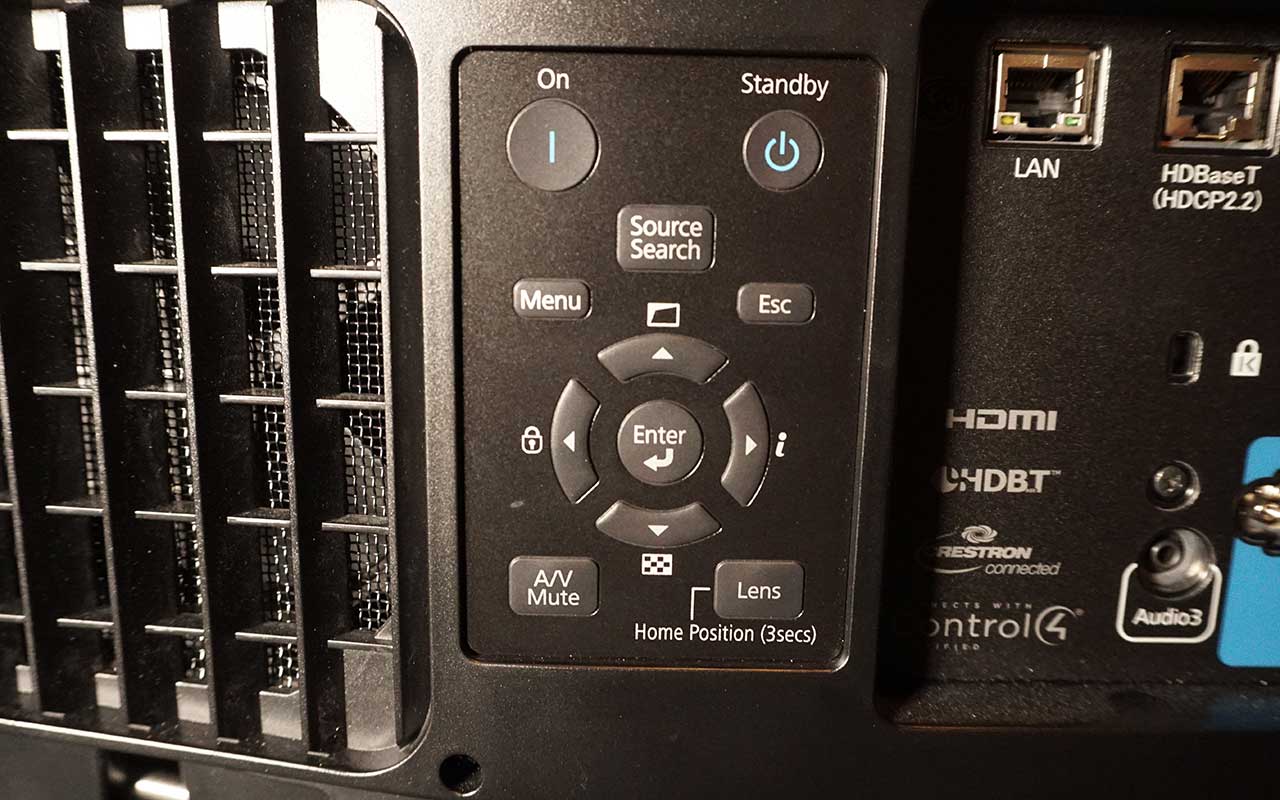
On the second row of connectors, from the left you’ll find a small Kensington Lock slot for security, then the five BNC connectors, for component video (or other compatible sources). To the right, is a small jack labeled “Remote”, for hard wiring the remote when range or location makes the infra-red unreliable.
The third and fourth rows are a cluster containing an analog computer input and a monitor out – both with standard HD15 connectors, surrounded by 3 stereo audio inputs and one stereo audio out – all using the usual stereo-mini connector. That leaves only the “old school” RS-232C serial port of command and control.
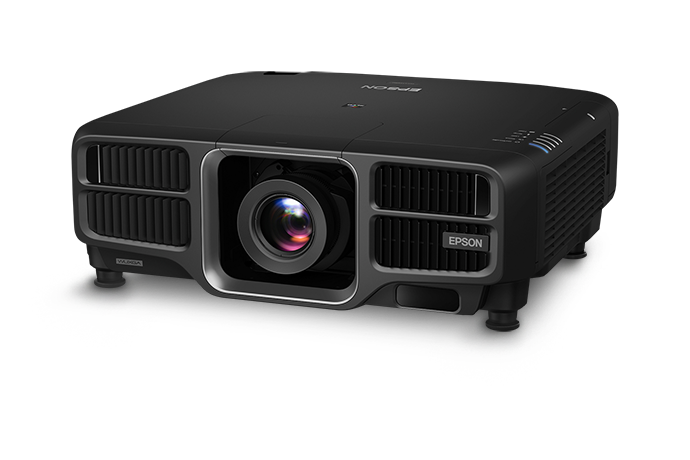
Bottom Line: Overall, the L1755UHL is well equipped, with my only complaint being that there should be one or two additional HDMI inputs. While you can convert a HDMI source to HDBaseT, it would definitely be beneficial to have at least two HDMI inputs.