Picture Adjust Menu
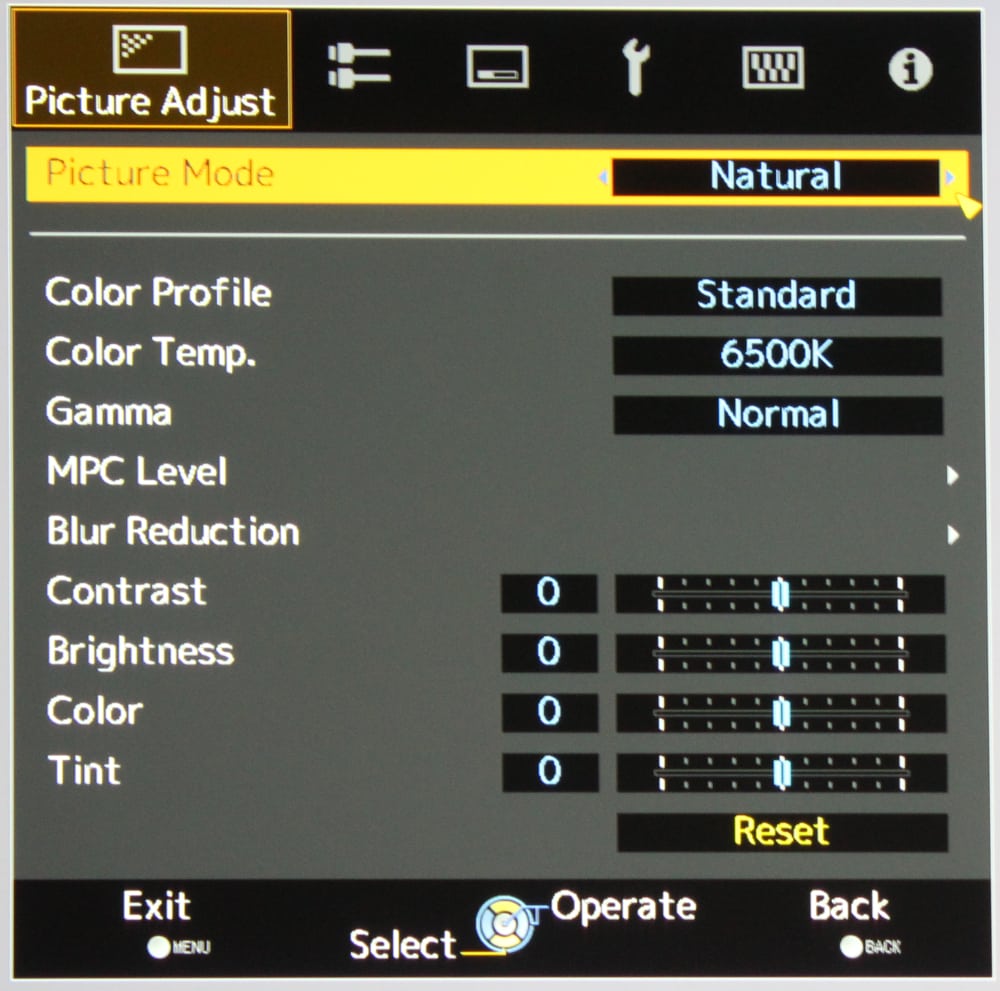
When the Menu button is pressed the top-level menu shown in the 1st gallery photo above is displayed. Available major menus are listed across the top while the Picture Adjust menu is the first one displayed, as shown in the 1st photo. The Picture Adjust menu itself contains the most common picture adjustments and provides access to the associated sub-menus.
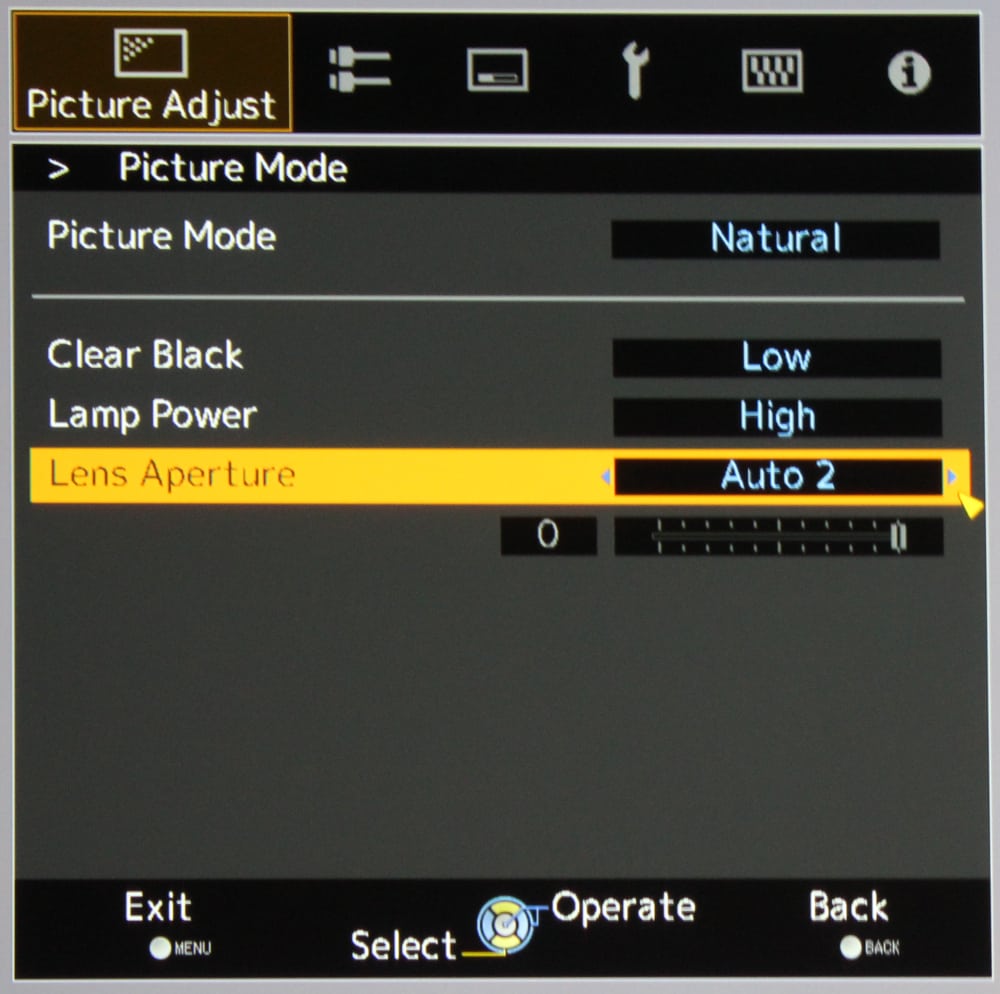
The first item is for Picture Mode where the options includes picture modes for natural, cinema, film, animation, THX and 6 user defined modes. For a given selected picture mode there is a sub-menu available, as shown in the 2nd gallery photo above. This sub-menu includes the adjustments associated with the projector's lens aperture. This allows the user to set the manual iris (i.e., the lens aperture) where a value is 0 sets the projector's dual irises to fully open (brighter picture) while a setting of -15 sets them to max. closed (dimmer picture) positon. There is also a setting for the dynamic iris (DI) where it can be turned off (i.e, where only the manual iris setting would apply) or for Auto 1 or Auto 2. When set to either DI Auto mode the maximum the iris will open will be whatever value the manual setting is at. In this photo the manual iris setting is at zero, or fully open, but if set to a negative value then the iris will not fully open when the DI is being used (i.e., in Auto 1 or Auto 2). Thus the user has some control over the range of movement of the dynamic iris and this can be useful in avoiding any excessive 'pumping' when the DI is engaged. Also the Picture Mode sub-menu has the setting for high vs. low lamp mode and for a video enhancement feature called "Clear Black", which when used emphasizes fine details in the dark areas of the projected image.
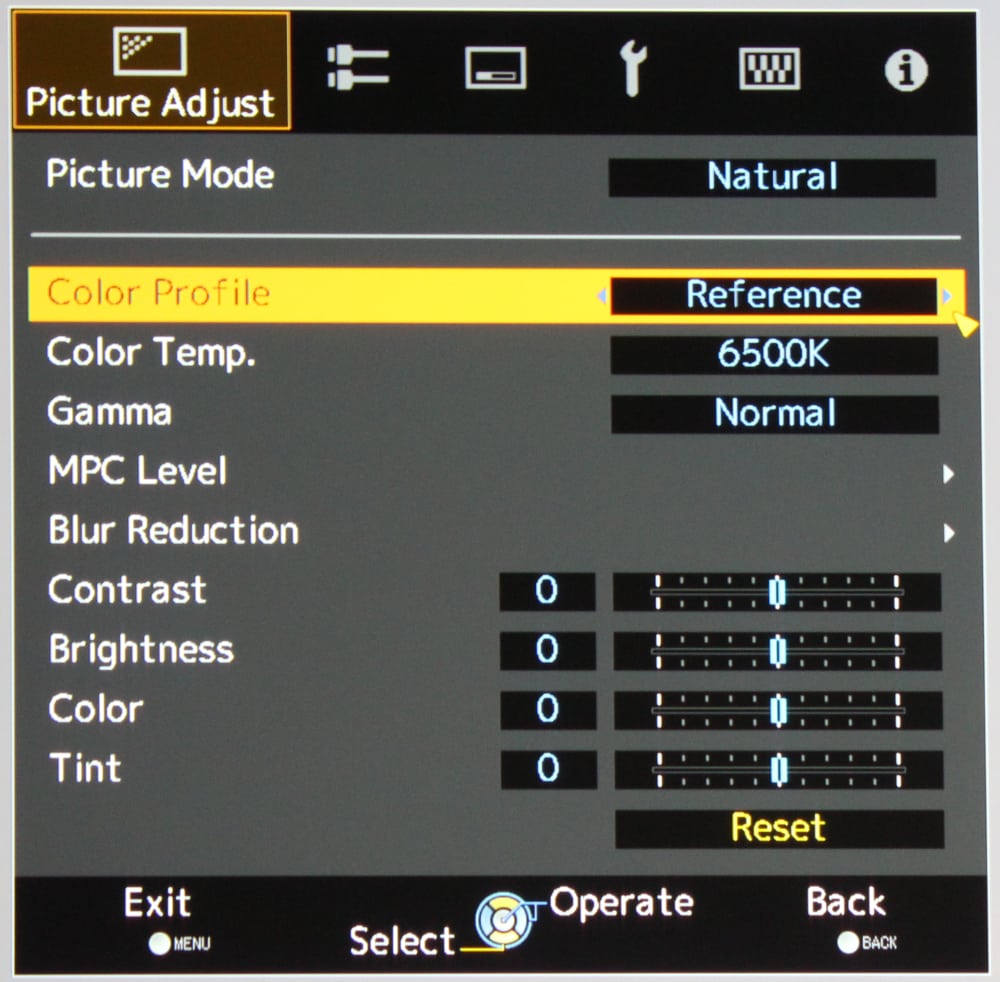
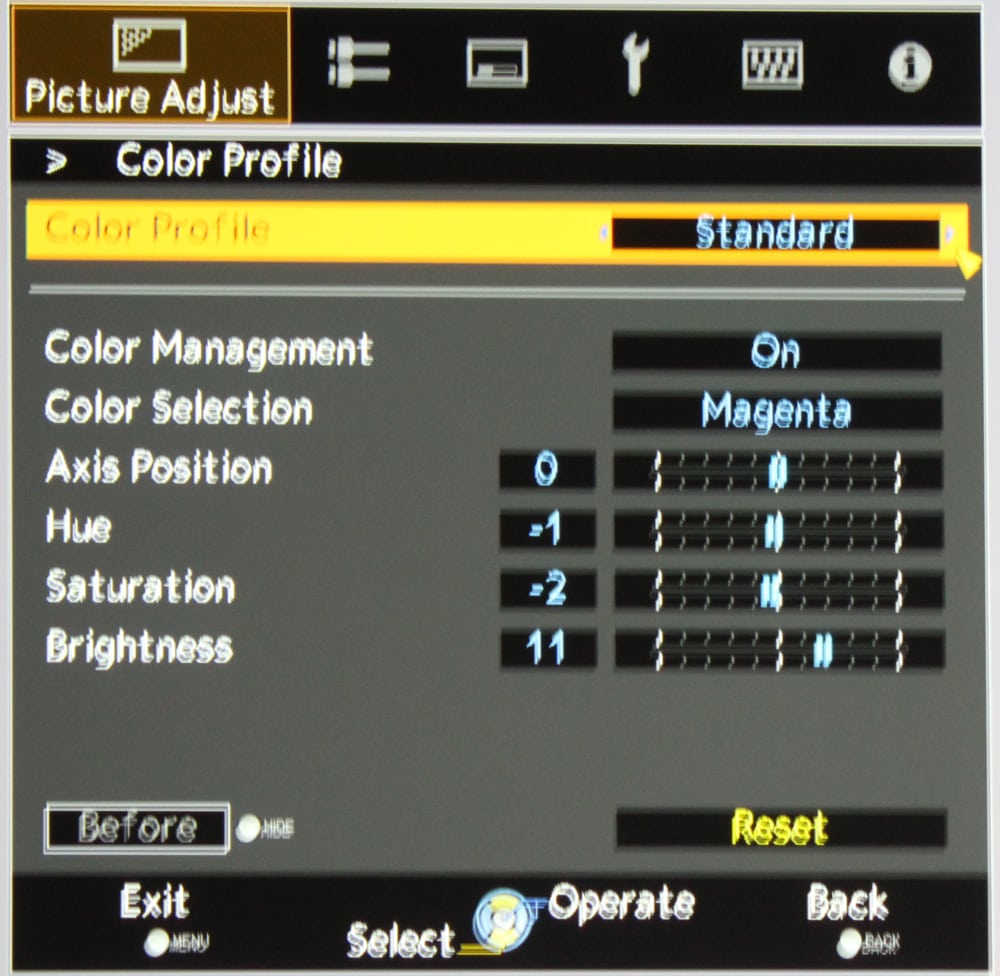
Once the Picture Mode is selected then there are multiple Color Profiles available, see the 3nd gallery photo above. These range from a single Color Profile available when THX Picture Mode is selected, up to 12 preset Color Profiles plus 6 Custom Color Profiles offered when you have selected any of the 6 available User Picture Modes. These custom Color Profiles provide access to the Color Management System (CMS) functions to adjust the individual color points, as shown in the sub-menu in the 4th gallery photo above. Also the available preset Color Profiles will change with a 3D vs. 2D input signal. Very flexible, but complex and not all that well explained in the Instruction Manual. But that probably OK since these CMS adjustments are intended for use by professional calibrators.
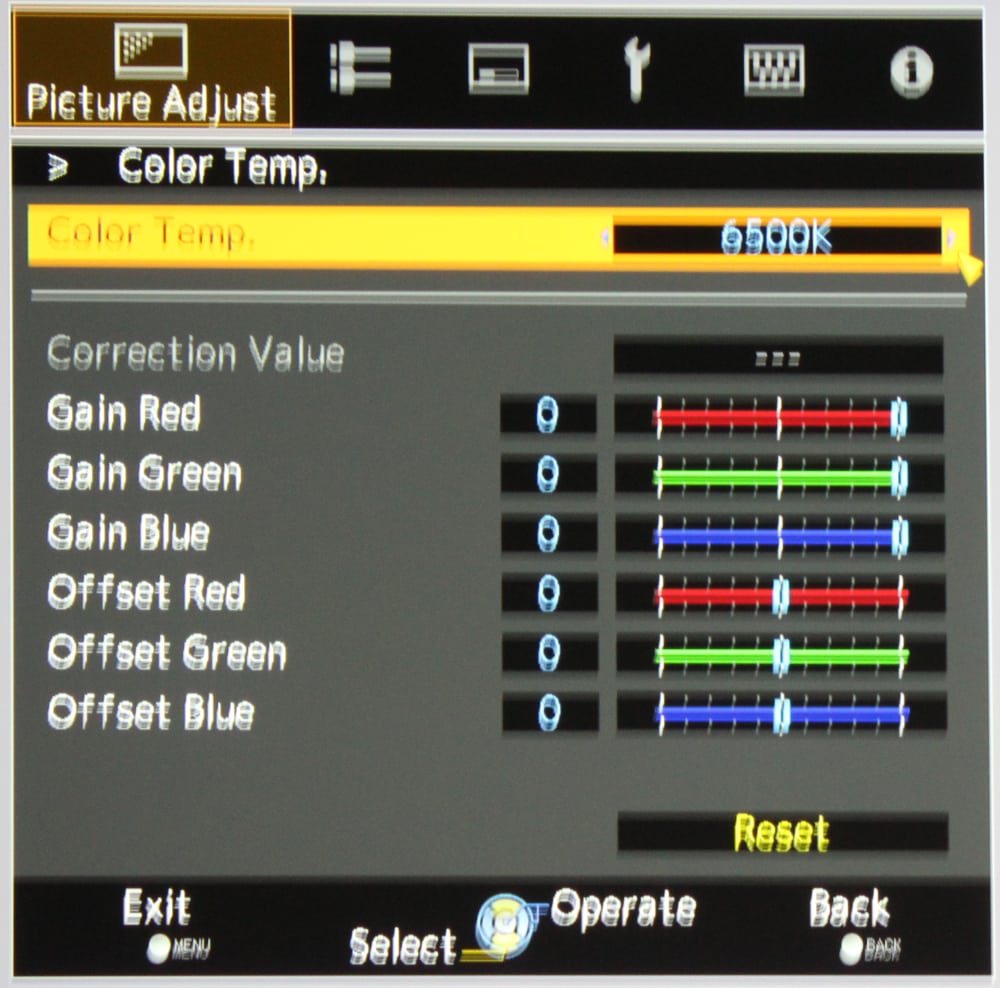
Next down on the Picture Adjust menu is an item to select the desired Color Temperature. In addition to be able to select a preset specific color temperature values from 5500K to 9300K, there are persets for Xenon 1, 2 or 3 (when in Film or Cinema Picture Modes only) as well as a preset for High Bright mode, which gives maximum brightness but sacrifices color accuracy. Finally, are there 3 available Custom settings where you have access to the color temperature/grey scale calibration adjustments. When creating a custom/calibrated color temperature you can select a starting point, such as 6500K, as shown in the 5th gallery photo, then adjust the individual gain and offset values for each of the three primary colors in order to achieve a constant color temperature across the grey scale.
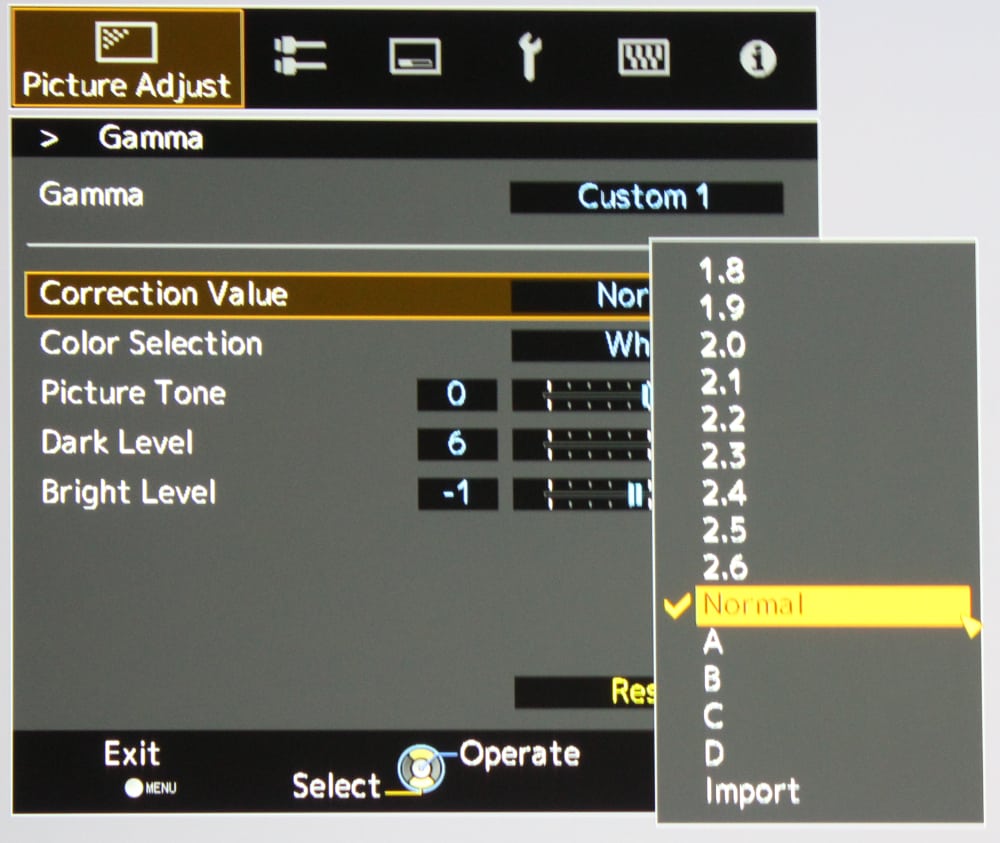
The next item down on the Picture Adjust menu is for selecting the desired gamma. The 6th gallery photo shows the gamma sub-menu and the 7th photo shows the available preset gamma options. The available gamma adjustments are not as complete as found on many mid-to-high end home theater projectors in that they only allow the user to select a starting gamma value then adjust the lower and upper ends of the gamma curve. This menu does allow the user to adjust for white or the individual red, blue and green gamma curves. JVC does offer Auto Calibration software for PCs, as a free download from the JVC web site, that when used with a Spyder 4 probe (Spyder 5 support is supposed to be coming soon) provides access to more complete adjustment of the connected projector's gamma settings. However, I found that the projector's built-in gamma adjustments worked fine to produce an appropriate gamma curve for the RS600U that I was reviewing.
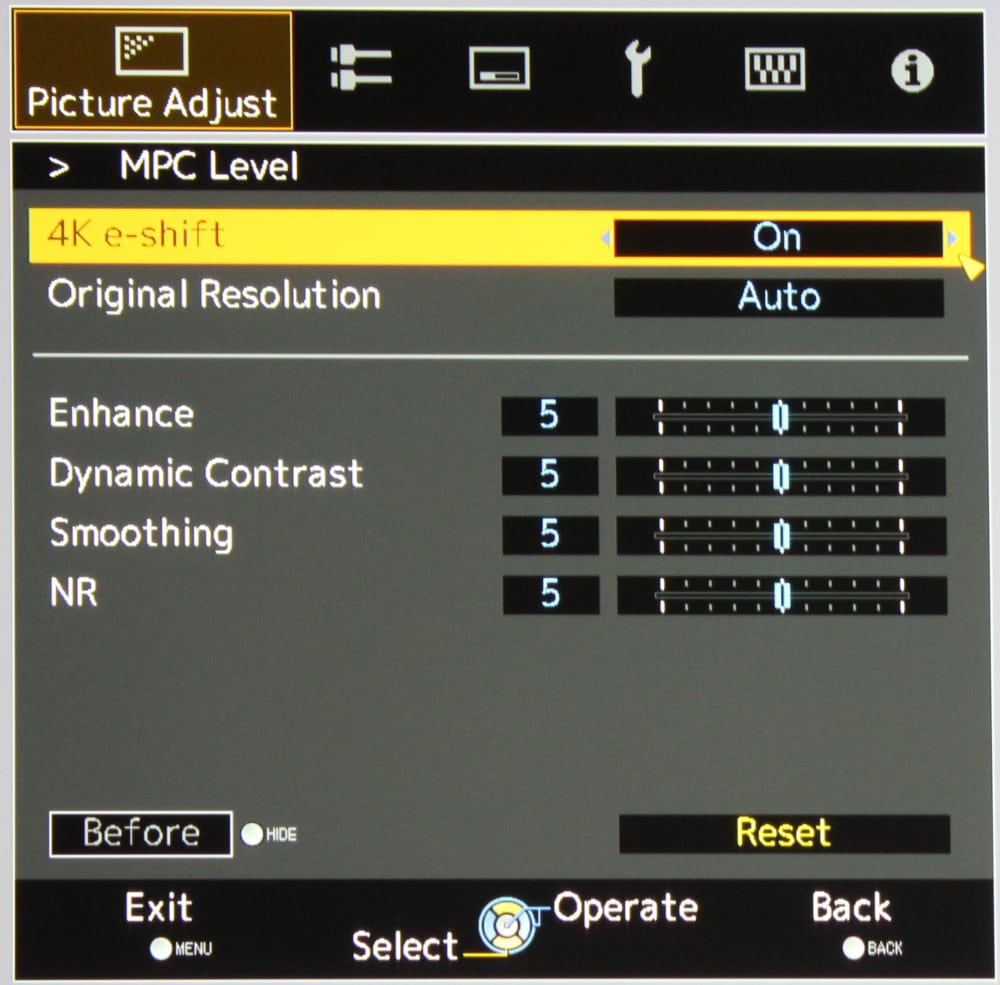
The 8th gallery photo shows the MPC (Multiple Pixel Control) sub-menu. MPC is the home for most of the picture enhancements offered on the RS600U. If the 2D input signal is not 4K/UHD, the e-Shift/upscaling to 4K can be turned on or off. When off, the video is displayed as 1080p and when turned on it is upscaled to 4K/2160p. The adjustments for Enhance, Dynamic Contrast, Smoothing and NR (noise reduction) combine to produce a set of enhancement tools (and along with the Clear Black adjustment on the Picture Mode sub-menu) similar to Sony's Reality Creation or Epson's Super Resolution features. The MPC plus Clear Black functions in this year's JVC projectors are more effective than what JVC has offered in the past and more directly compete with the video enhancement functions found in the competition from Epson and Sony or the Darbee outboard video processors.
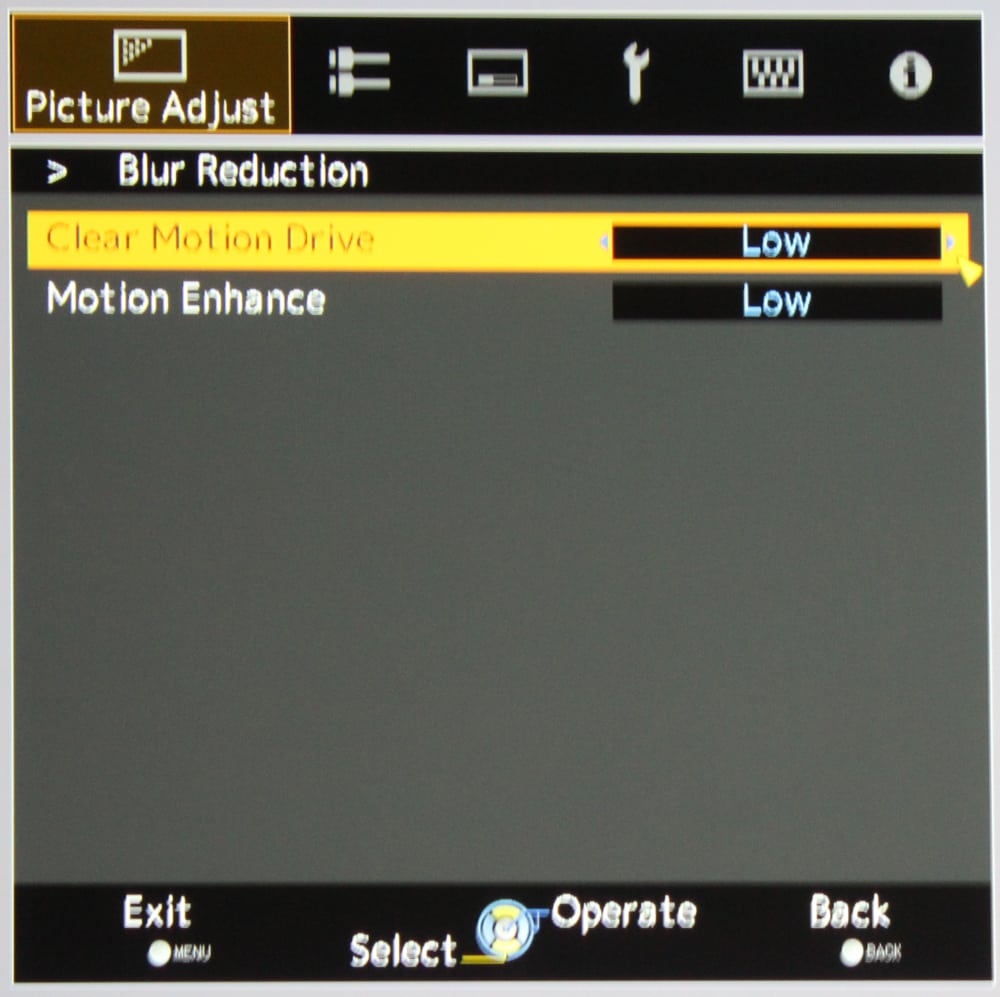
The 9th gallery photo shows the sub-menu for CMD (Clear Motion Drive). There are 2 CMD adjustments with the first being for the Clear Motion Drive (frame interpolation) to create smoother motion (a fairly standard feature on mid-to-higher end home theater projectors). CMD is now available in both 2D and 3D modes where in the past JVC models it only worked in 2D mode. The second adjustment is for Motion Enhance which is said to reduce motion blur.
The remaining items on the Picture adjust menu (1st gallery photo) are the usual brightness, contrast, etc. adjustments.
There is a button on the remote control for Advanced Menu than when pressed displays a series of sub-menus, including those that offer the same adjustments that are buried a level or two down in the Picture Adjust menus.
The above covers the highlights of the Picture Adjustment settings.
Signal Menu
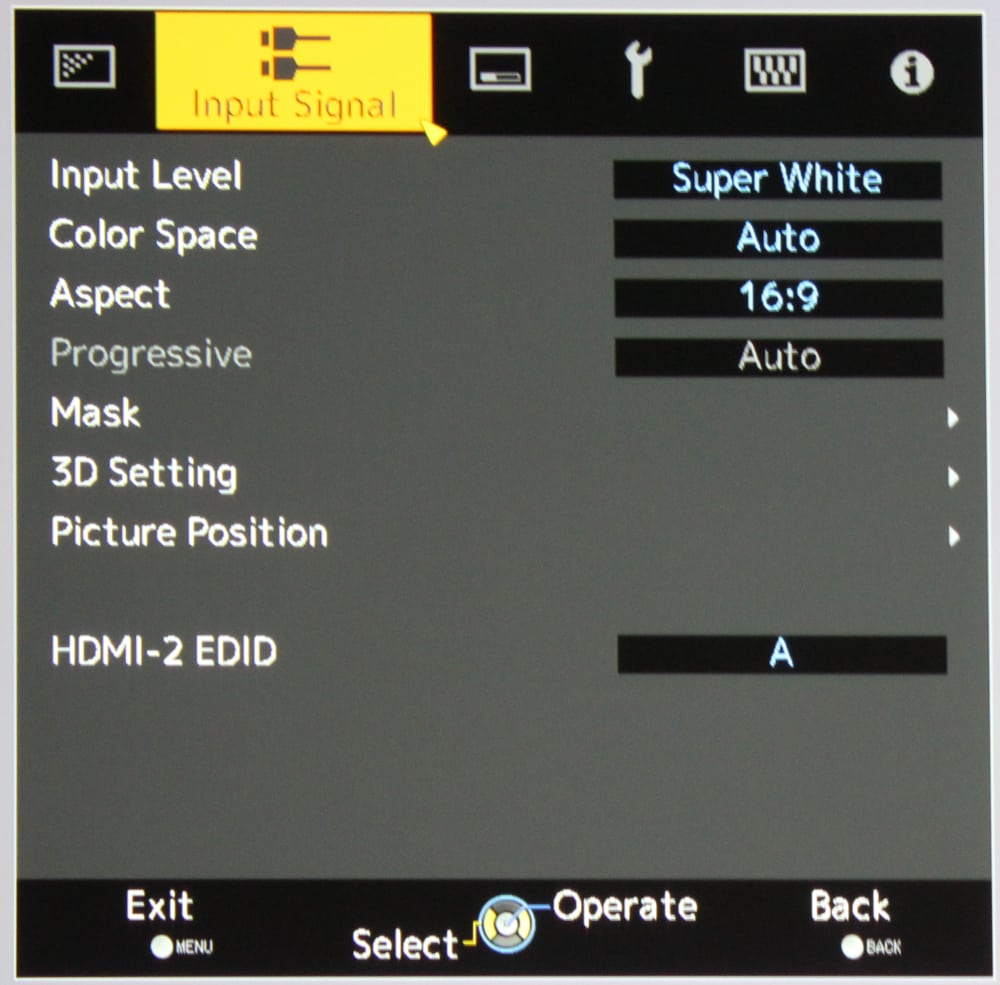
The 1st gallery photo above shows the Input Signal menu. The first item on this menu is for selecting the HDMI input level where there are 3 options. For a typical home theater user, the two options of interest are the 'Standard' setting, where only video levels from 16 to 235 are to be displayed, and the 'Super White' setting, where video levels from 16 to 255 are displayed. An input range of 16 to 235 is the official standard range of levels for normal 8-bit digital video signals, where a value of 16 represents reference Black level and 235 represents reference White level. The other useful setting is 'Super White' where instead of cutting off all levels above 235, the range is extended to 255. This mode can be useful as some occasional video material will include "whiter-than-white" content (above level 235). THX Picture Mode sets this to 'Super White' by default, while the other modes use 'Standard' by default. By setting this to 'Super While' then increasing the Picture Adjustment for Contrast, the user has the ability to set just how far above the 235 level they want to allow to be displayed.
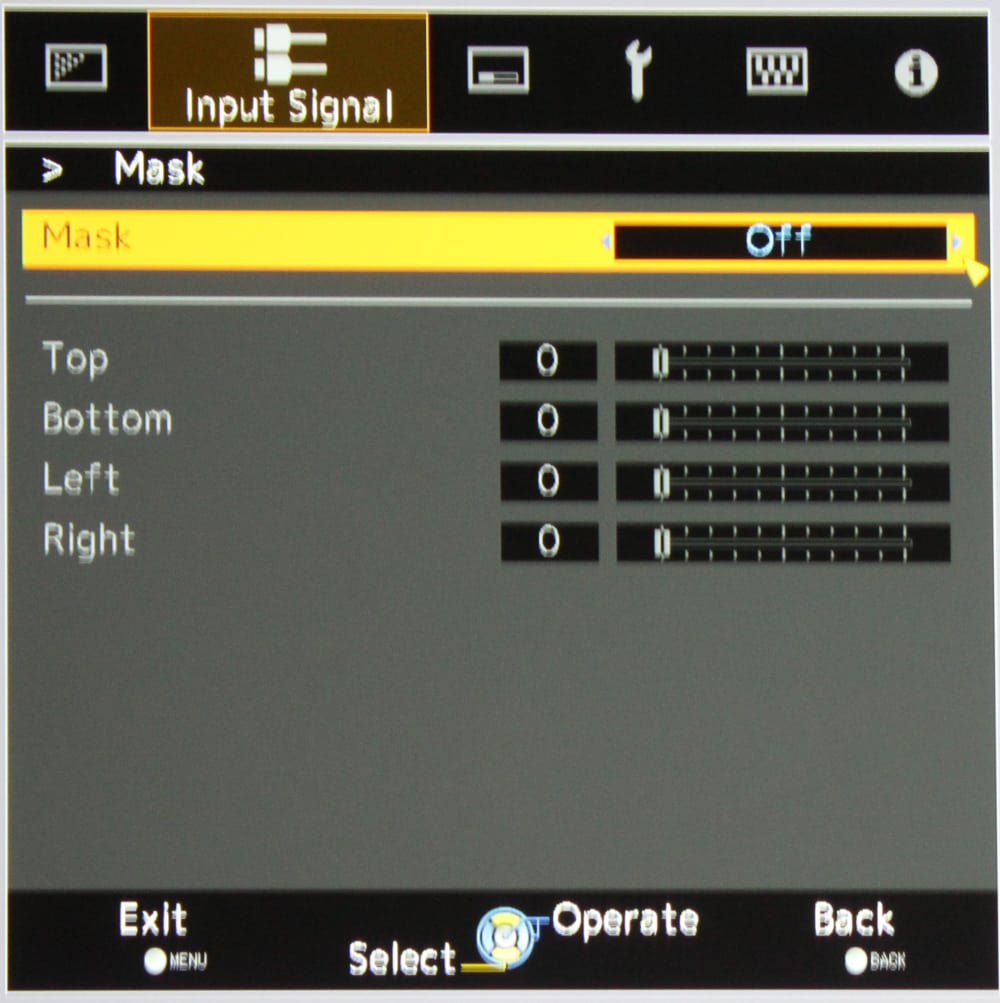
The 2nd gallery photo above shows the sub-menu for the Mask adjustment. This allows the user to blank out/darken an area along the 4 edges of the projected image, such as the narrow strip of the projected image that falls just beyond the edge of the screen.
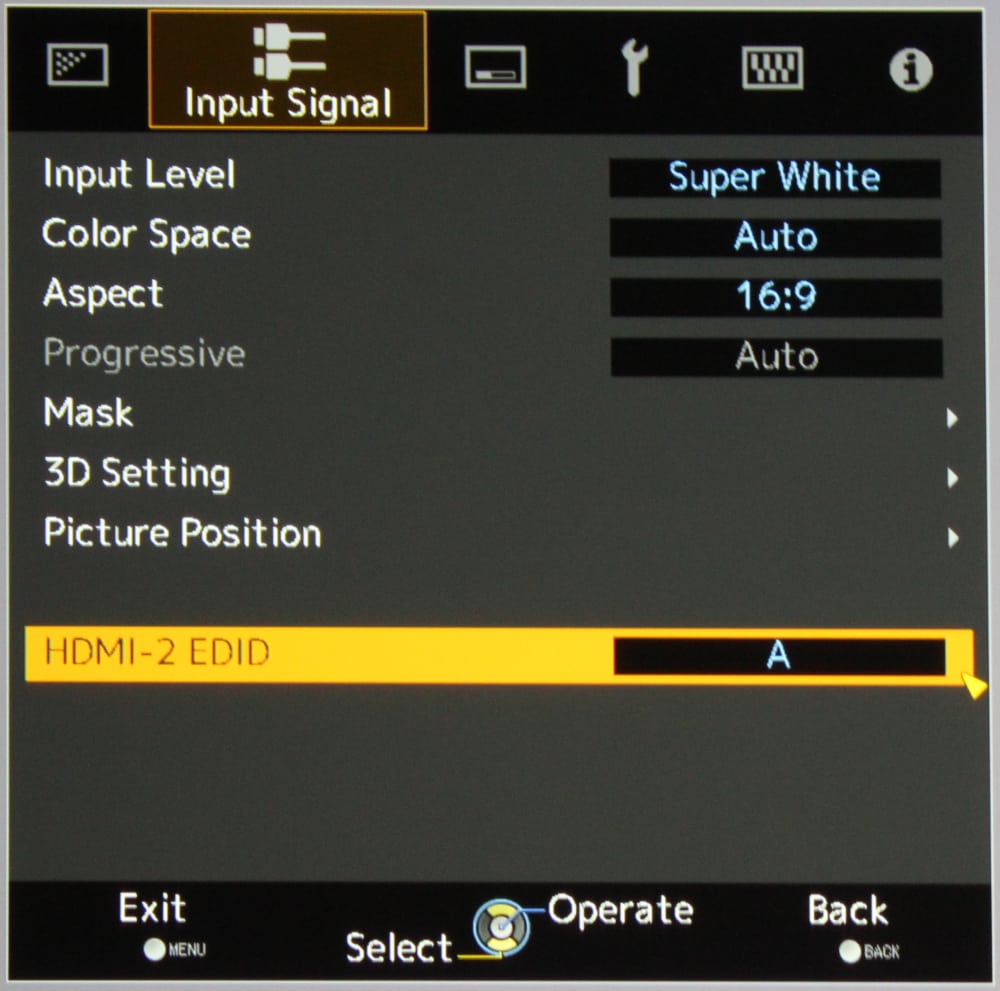
The 3rd gallery photo shows a item that allows the user to configure the 2nd HDMI input port to handle certain legacy signal sources. the normal setting would be with EDID set to "A" when connecting most recent video components to HDMI #2 input. However, video with resolution of 1080p or lower may not be displayed when some older devices are used. In that case, connect to the HDMI #2 input on the projector and set “HDMI2 EDID” to “B” for improved compatibility.
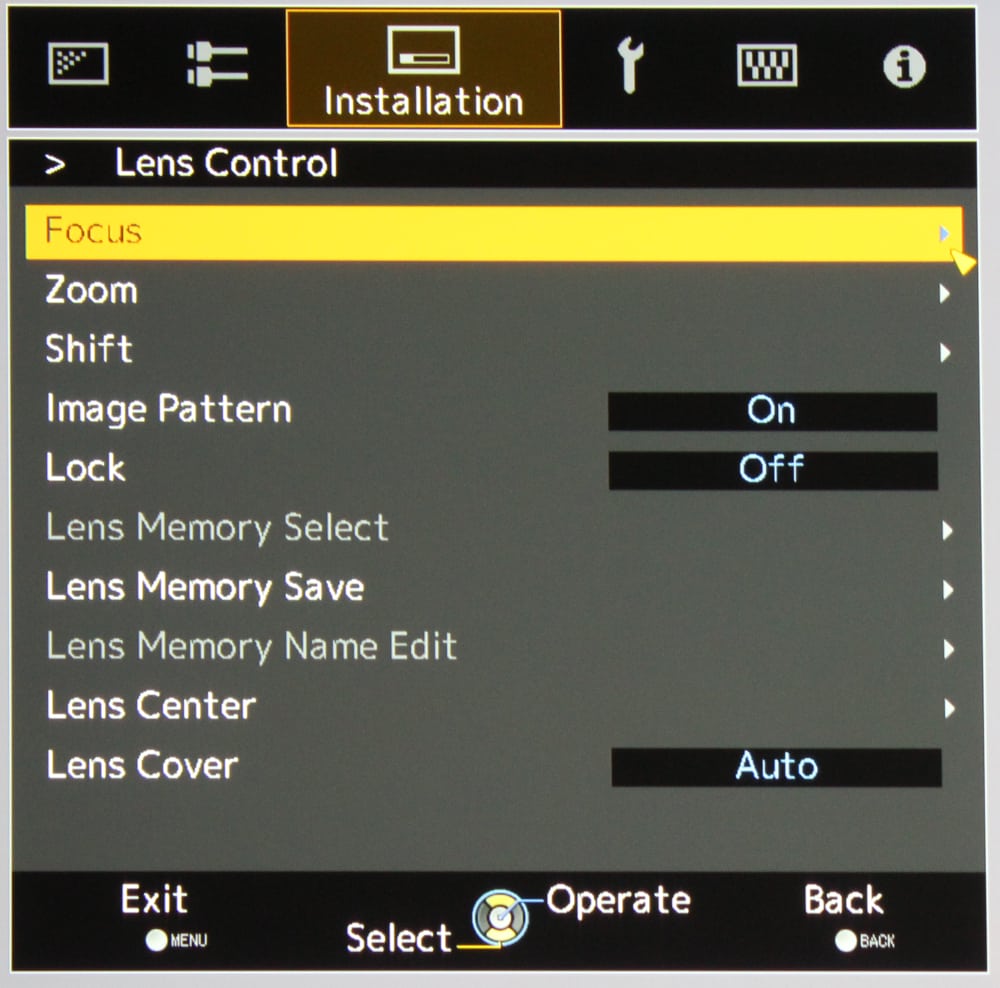
Installation Menu
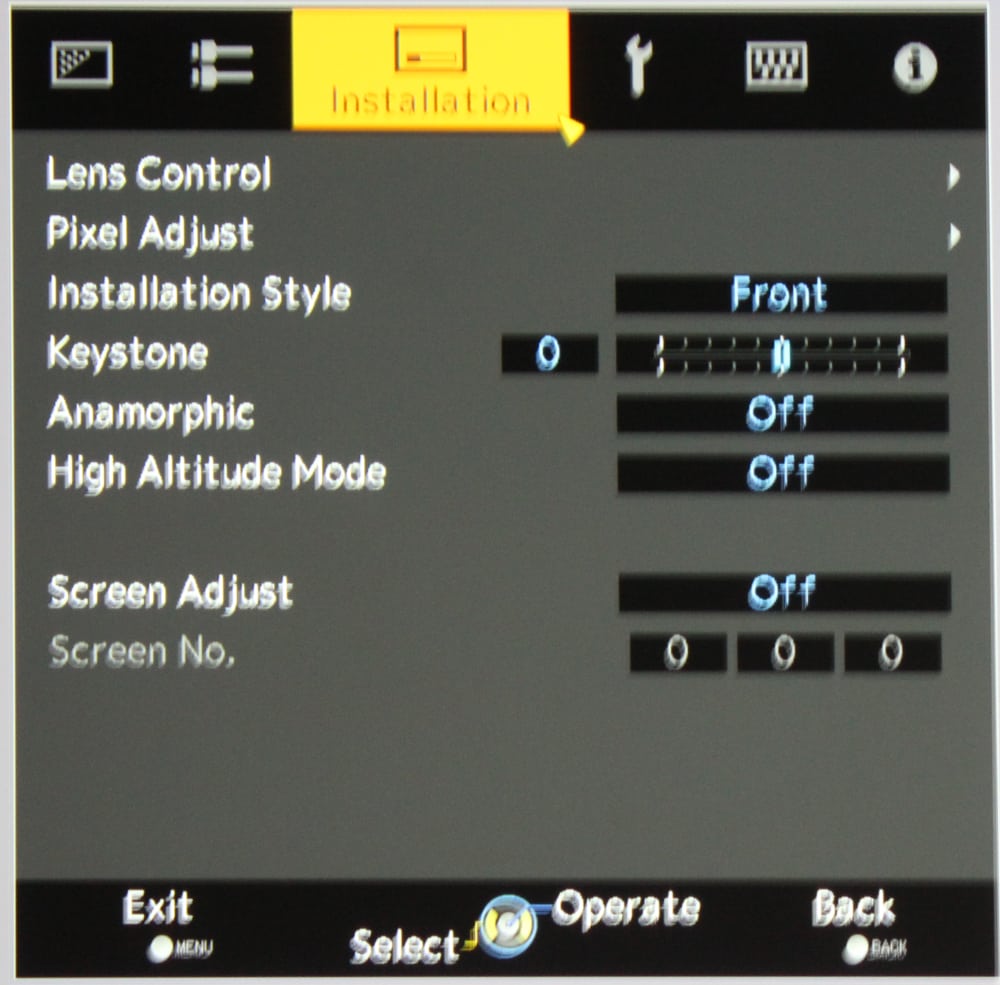
The top-level Installation Menu is shown in the 1st gallery photo above. The first item is for 'Lens Control' and the sub-menu for this item is shown in the 2nd gallery photo. It offers the usual power focus, zoom and lens shift adjustments plus also the setting for the projector's lens memory and lens cover.
The 3rd gallery photo shows the Pixel Adjust sub-menu. This is used, if needed, to correct for any misconvergence/misalignment of the red, blue and green component colors projected onto the screen.