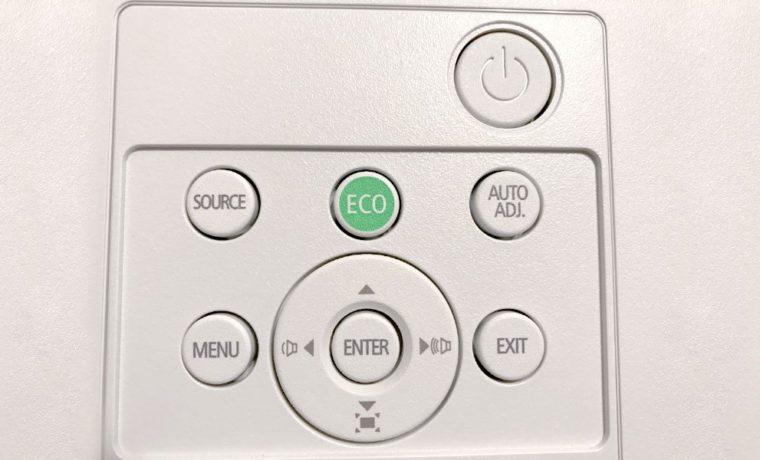
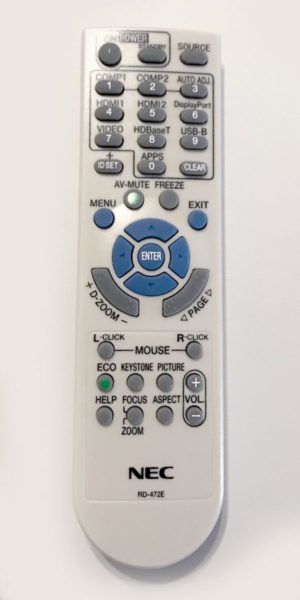
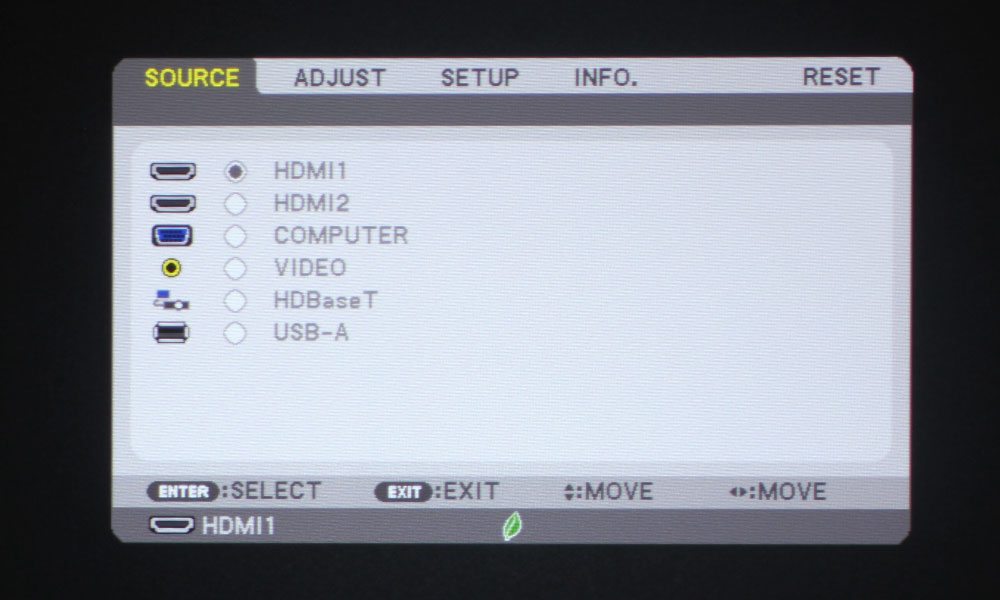
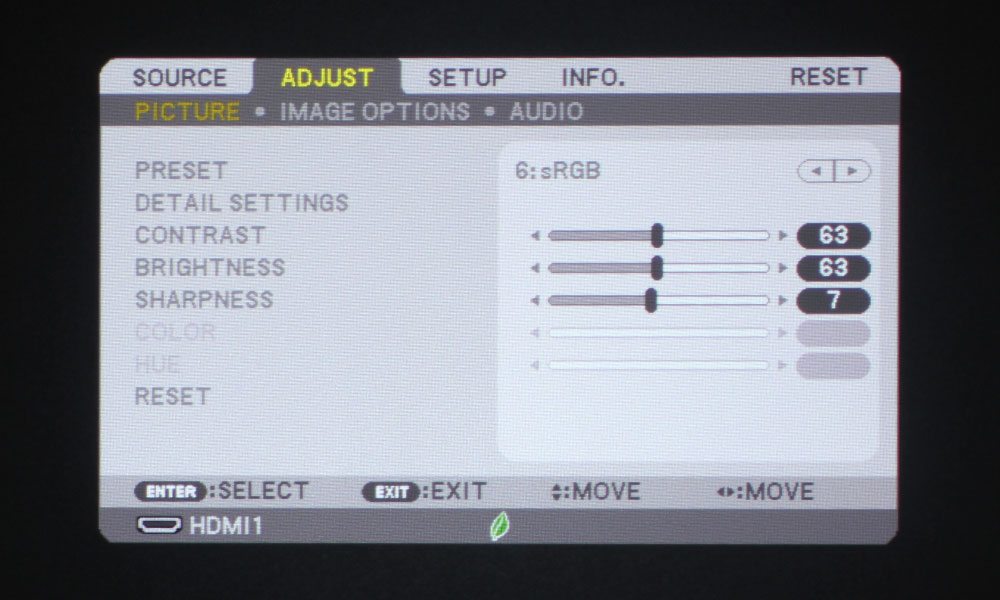
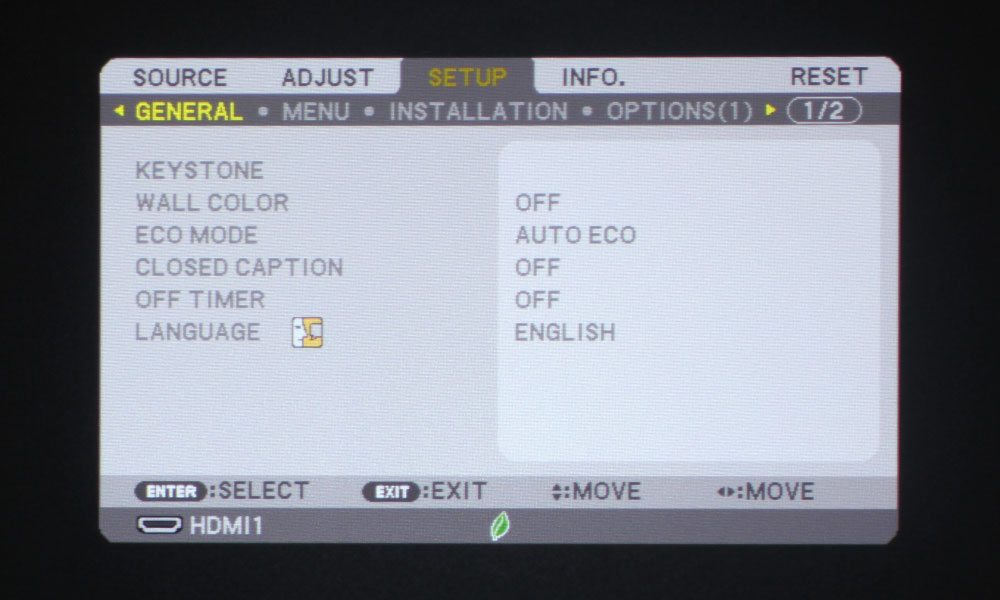
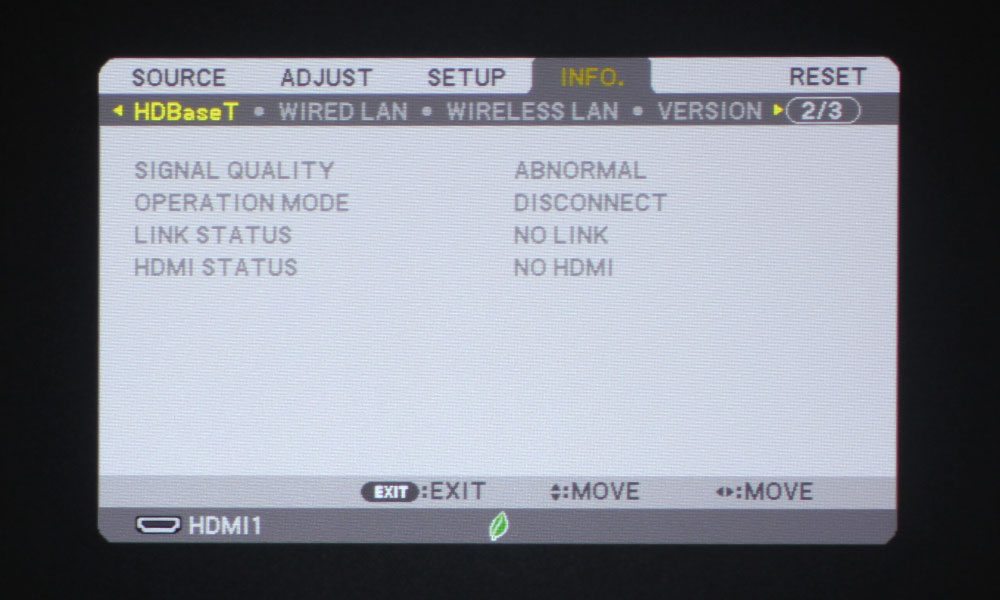
NEC NP-P474U Business and Education Projector Review – Hardware 2 Posted on February 16, 2018 By Nikki Zelinger 1. NEC NP-P474U Business and Education Projector Review - Overview - Highlights2. NEC NP-P474U Business and Education Projector Review – Special Features - Image Enhancement - Advanced Networking - Wireless Networking via Optional Multi-Presenter Stick - Star Student Education Program - Warranty3. NEC NP-P474U Business and Education Projector Review – Hardware - Overview - Inputs and Connectors - Lens and Lens Controls4. NEC NP-P474U Business and Education Projector Review – Hardware 2 - Control Panel - Remote Control - Menus5. NEC NP-P474U Business and Education Projector Review – Picture and Sound Quality - Color Modes - Video Image Quality - Text and Presentation Quality - Audio Quality6. NEC NP-P474U Business and Education Projector Review – Performance - Brightness - Contrast - Audible Noise7. NEC NP-P474U Business and Education Projector Review – Summary - Summary - Pros - Cons8. NEC NP-474U Business and Education Projector Review – Specifications NEC NP-P474U Business and Education Projector Review – Hardware 2: Control Panel, Remote Control, Menus Control Panel The NEC NP-P747U's control panel is simple and well laid out. Once the projector is set up, the least used piece of it becomes the control panel. Still, it’s useful for installation, and for moments when the remote control goes missing – we all have those. It’s pretty typical. The Power button is in the top right, above all the other buttons. There are three buttons below that – Source, ECO, and Auto Adj., which is a function that automatically optimizes a computer image. Below that is the Menu button to the left of the usual four directional arrow keys surrounding an Enter button, and the Exit button to exit the menus on its right. Those arrow keys serve dual functions – left and right adjust volume, while up and down control keystone correction. Remote Control NEC provides a nice, lightweight remote control for the NP-P474U. It’s got a pretty typical configuration, and can be broken up into sections. The very top section is comprised of three buttons, two of which are for power – On and Standby. The Source button is to their right. Just below that is the numerical keypad, with numbers 1-9 plus 0. Each button serves a dual function: 1 = Comp 1 2 = Comp 2 3 = Auto Adj. 4 = HDMI 1 5 = HDMI 2 6 = DisplayPort 7 = Video 8 = HDBaseT 9 = USB-B 0 = Apps On either side of the 0/Apps button are the ID Set button (left) and the Clear button (right). Below these is the section containing the directional arrow keys and Enter button configuration. Above that, though, are four buttons: Menu, AV-Mute, Freeze, and Exit. Then, as mentioned, we have the navigational arrows and the Enter button. Below that is a long, rounded button for Digital Zoom +/-, and the Page forward/backward button. Those two buttons frame the round navigational buttons nicely. In the section below, the final section, there are a total of ten buttons. The top two are the Left and Right Click buttons that act as a mouse. Under those, starting at the left, is the button to kick the projector into ECO mode. Next to that is the Keystone Correction button, followed by the Picture button, which brings up the Picture Menu, and the + Volume, with the – Volume button being underneath. To its left is the Aspect button to control aspect ratio, then the Focus/Zoom button, and finally, a Help button. This remote is used across multiple projectors, and, as such, there are a couple buttons that do nothing. The L-Click and R-Click buttons, for example, do not work on the NEC NP-P474U (nor the other projectors in this series). The Focus/Zoom button is also null, as this projector does not have a motorized lens. I should also mention that the remote is not backlit, which is more of a minor nuisance than a real con. The Menus The Source Menu is the first to pop up when you hit the Menu button on the remote control. It allows you to cycle through the inputs. The Adjust Menu allows for the adjustment of Picture, Image, and Audio settings. The Setup Menu has sub-menus that allow access general settings like keystone correction, Eco settings and language, menu, fan, installation and LAN related settings. The Info Menu consists of several sub-menus relating to information: Usage, Source (1 & 2), HDBaseT, Wired LAN, Wireless LAN, Version, and Others (Projector Name, Model Number, Serial Number, etc.) That does it for our tour of the NEC NP-P474U’s hardware! Next up is our discussion of the projector’s picture and sound quality. 1. NEC NP-P474U Business and Education Projector Review - Overview - Highlights2. NEC NP-P474U Business and Education Projector Review – Special Features - Image Enhancement - Advanced Networking - Wireless Networking via Optional Multi-Presenter Stick - Star Student Education Program - Warranty3. NEC NP-P474U Business and Education Projector Review – Hardware - Overview - Inputs and Connectors - Lens and Lens Controls4. NEC NP-P474U Business and Education Projector Review – Hardware 2 - Control Panel - Remote Control - Menus5. NEC NP-P474U Business and Education Projector Review – Picture and Sound Quality - Color Modes - Video Image Quality - Text and Presentation Quality - Audio Quality6. NEC NP-P474U Business and Education Projector Review – Performance - Brightness - Contrast - Audible Noise7. NEC NP-P474U Business and Education Projector Review – Summary - Summary - Pros - Cons8. NEC NP-474U Business and Education Projector Review – Specifications NEC NP-P474U Business and Education Projector Review – Hardware NEC NP-P474U Business and Education Projector Review – Picture and Sound Quality