Menu
Main

Main
Picture
Family Room Mode

Display
Advance

Advanced RGB
ISF
Since the W10000 has basically the same menus as my PE-8720, this section is easy.
The BenQ has lots of goodies on their menus, and it is time to explore some of the more interesting features that can impact the overall image quality.
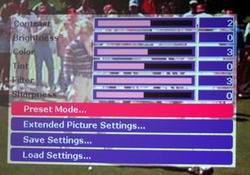
Hitting the Menu button brings up a rather plain looking bar with 5 main menu options:
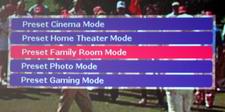
Picture Menu has all the usual settings, brightness, contrast, etc., but also the Preset modes (Cinema, Home Theater, Family Room, Photo, and Gaming), which you can see on the next image.
Below the Preset Mode sub-menu, is the the Extended Picture Settings sub-menu, which brings up separate color controls for Red, Green, Blue, Yellow (and in some modes, White).
You can also save user settings or load them from the Picture menu.
The second major menu choice on the Main menu, is the Display menu. As you can see, you can choose the aspect ratio as well as change sources (and in some cases change source configurations). This menu also controls Picture in Picture, and Picture On Picture (which gives you two side by side images of the same size).
I may have mentioned this elsewhere, but with a 1080 source, the Anamorphic setting defaults to a slight amount of overscan. I recommend using the Real setting instead which will give you one for one pixel matching.
The Options menu (not shown) lets you pick the background color, if there is no source - default purple, blac or whitek, and it allows you to control where the menus appear on the screen. It also let's you set a sleep timer for powering off the projector, and how long menus appear on the screen before they turn themselves off.
The Setup menu (also not shown) is next. It starts with language choice for the menus. Orientation is next: Floor Front, Ceiling Front (inverted for ceiling mount), Floor Rear, and Ceiling Rear.
You can also choose between 0 or 7.5 IRE for black levels (7.5 is standard for the US, I believe, while 0.0 is normally used for PAL and Japanese setups.
There is also Keystone correction (avoid - that's why you have lens shift), Patterns (choice of a grid, or an RGB+White with horizontal bands, with gradations for different brightness levels (very handy).
The Setup Menu also provides access to Lamp settings (full power - 250 Watt, or low power - 200 watt, as well as the lamp counter (in hours) and lamp hour reset, when you change lamps. A separate sub-menu is there for the dust filter as well. The projector will insist that you change the filter at 1000 hours. Here is where you can also reset that counter.
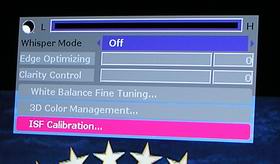
First of all, you will find control of the manual iris. you can open or close it in any of 20? steps (documentation says 20 most places, but 30 steps one place?) If you are doing a basic user calibration, much of the "action" is here, most notably the white balance fine tuning which provides separate contrast and brightness controls for each of Red, Green, and Blue, and a choice of Warm, Normal, or Cool color mode, plus two user definables, and Native Lamp color temperature modes.
To the right is a shot of the White Balance menu, with it's access to the RGB gains and offsets, and the ability to save your changes at this level (which will be incorporated into the master 3 user savable memories.
Back to the main Advanced menu. There is a 3D Color Mangement menu, which provides very sophisticated six color adjustments. Access is to the ISF Calibration area (password protected to keep end users out).
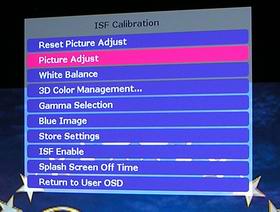
Here is a look at the first level of the ISF menu, which, has many of the same color controls that are availble to end users, such as the white Balance and 3D Color Management, plus additional capabilities. . ISF calibration also provides two modes - ISF Night, and ISF Day, for your calibrator to target different ambient light situations.
OK, we should all be menued out at this point. Want more - the BenQ site has the full user manual posted, and it has the full menu tree displayed.