Menus
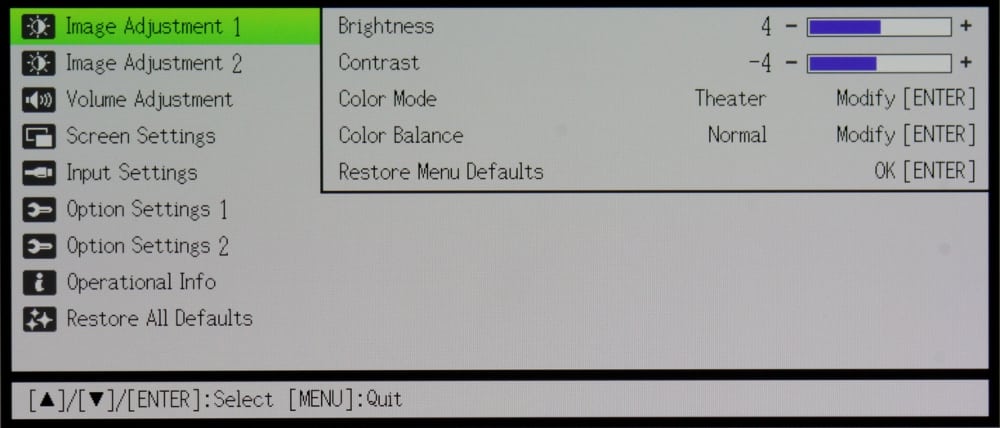
IMAGE ADJUSTMENT 1 Menu
When the remote's Menu button is first pressed the "Image Adjustment 1" menu is displayed, as shown in the 1st gallery photo above. The available menus are displayed in the left side of the screen while the adjustments and information for the selected menu (the one highlighted in green) are displayed on the right side. From the Image Adjustment 1 menu the brightness and contrast can be adjusted as well selecting the desired Color Mode and Color Balance.
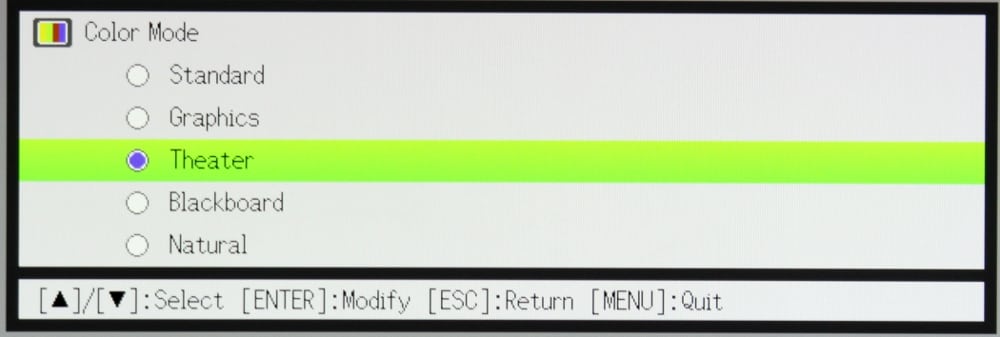
The 2nd gallery photo shows the sub-menu with the available choices for Color Mode. The projector uses the Eco power setting as the default for all of the preset color modes and there appears no way to switch to a higher power (brighter) mode when using any of these presets. See more on this under the "Option Settings 1" menu description below.
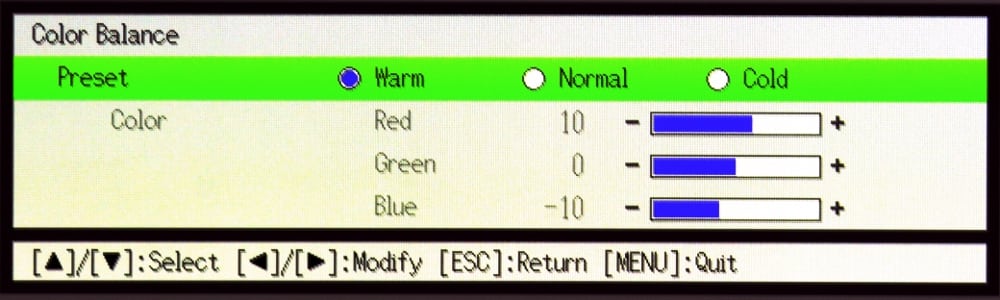
The 3rd gallery photo shows the submenu with three choices for Color Balance. The default Color Balance is "Normal" and for this choice the individual red, blue and green gain settings can be adjusted by the user, while in the "Warm" and "Cold" color balance settings the RGB gain settings are fixed and cannot be changed by the user.
When Eco power mode is turned off, the Color Mode option is removed from the Image Adjustment 1 menu and instead replaced with item for "Eco Off Mode" brightness setting with only two options, for normal and bright, as show in the photo below:
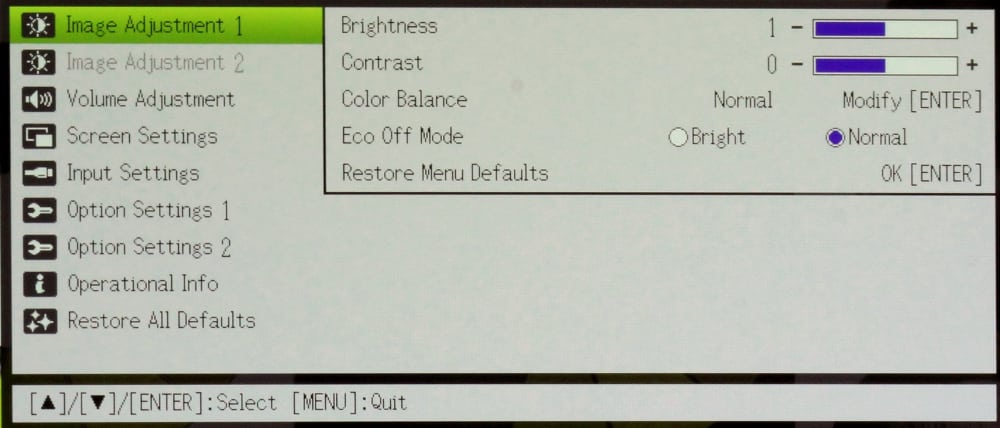
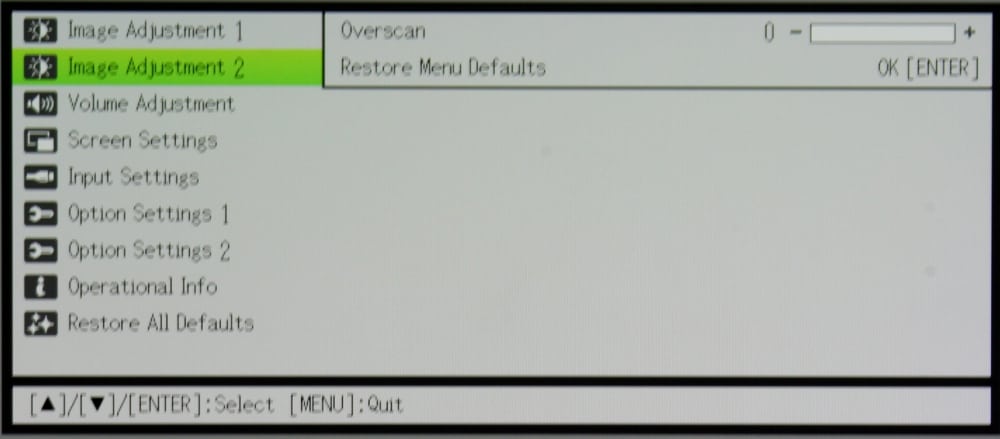
IMAGE ADJUSTMENT 2 Menu
The 4th gallery photo above shows the Image Adjustment 2 menu. This menu has a single adjustment for image overscan. I found the default setting to produce obvious overscan where some of the image was cut off on all four side of the image. Changing this setting to the minimum value (0) eliminates overscan and should work best in most situations.
[sam_pro id=1_83 codes="true"]
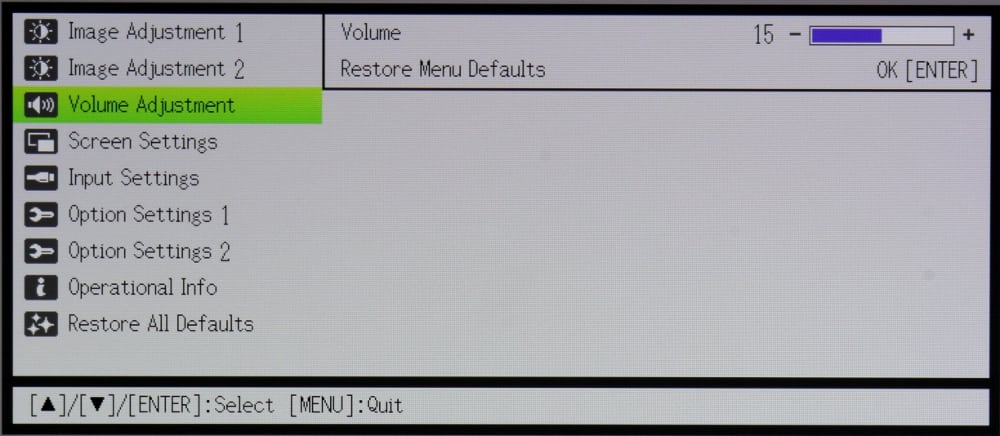
VOLUME ADJUSTMENT Menu
The 5th gallery photo shows the Volume Adjustment menu, which only one item. Since this projector has no internal speaker, this adjustment only controls the audio volume when an external powered speaker(s) is connected to the projector's audio output connector.
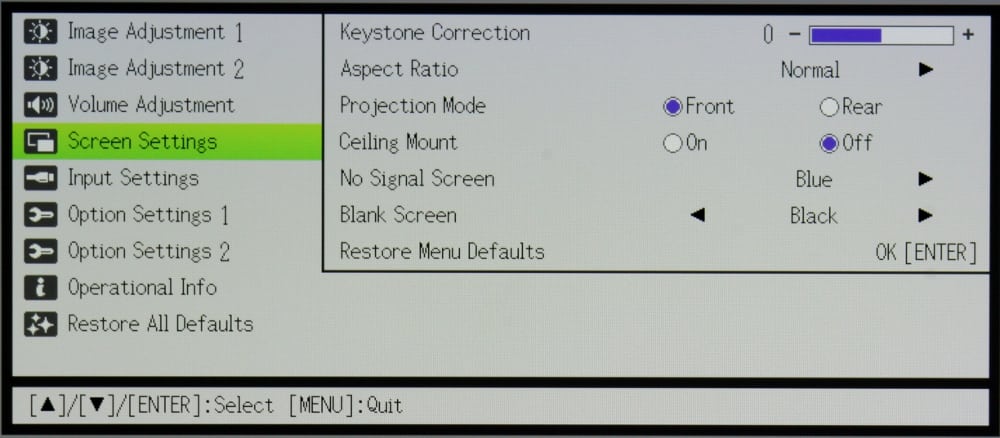
SCREEN SETTINGS Menu
The 6th gallery photo shows the Screen Setting menu that includes a several items for configuring the projector. Included are adjustments for digital Keystone correction and for selecting the Aspect ratio to be used for the displaying the image. There are also settings to configure the projector for front vs. rear projection and for ceiling vs. table mounting of the projector. The user can also select the color to be displayed when there is no input signal present and also the color for when image Blanking is selected.
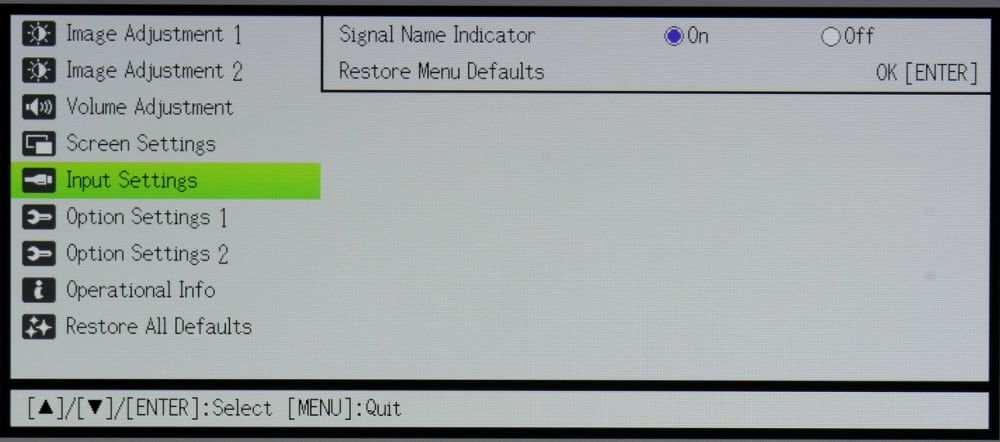
INPUT SETTINGS Menu
The 7th gallery photo shows the Input Settings menu. This menu has only a single setting for either showing an on-screen display of the input being used, on not.
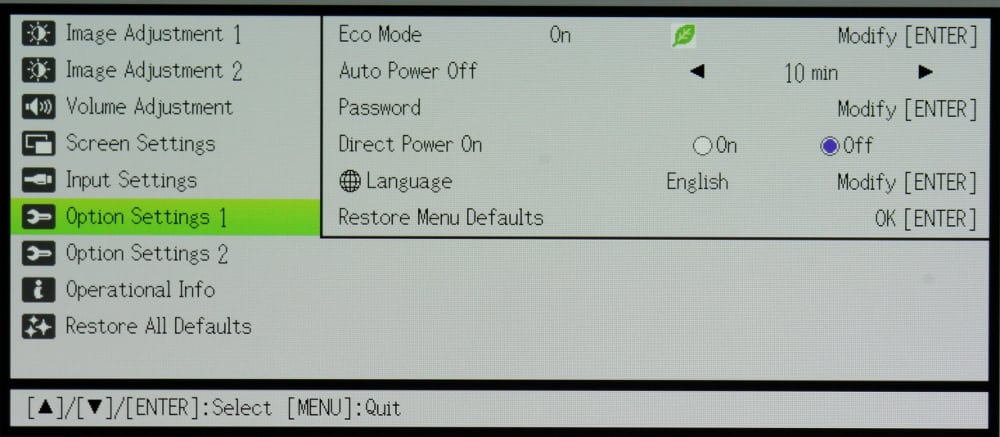
OPTION SETTINGS 1 Menu
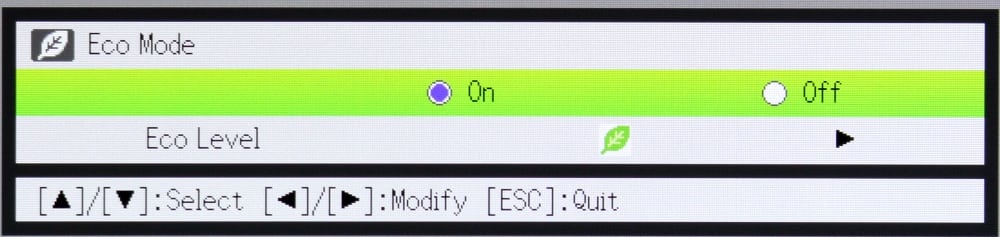
The 8th gallery photo shows the Option Settings menu. The first item on this menu is for turning the Eco mode on or off. The Eco submenu is shown in the 9th gallery photo. This projector handles the Eco, power saving, mode differently from what I have seen on other, non-Casio, projectors. By default, Eco mode is turned on and there is no other option if you want to use any of the preset Color Modes, as found on the "Image Adjustment 1" menu. When you turn Eco mode off then the projector goes into a higher power, and higher light output, mode and back on the Image Adjustment 1 menu the Color Mode options are no longer displayed and instead two different higher brightness levels are offered. The lower brightest of these two non-Eco modes produces better colors than the higher brightness setting. Thus, the projector has 3 power levels with the lowest, Eco, used with all preset Color Modes, then two higher brightness levels are availably only when Eco mode is turned off (though Casio does not name these non-Eco modes, I will call the lower light output mode "Bright Color" mode and "Max. Bright" mode for the higher of the two options). There is more information on this in the Picture Quality and Performance sections of this review.
The Option Settings menu also offers user settings for:
- Automatic power off after after a selected time following loss of input signal
- Adding a password to limit access to the projector
- Configuring the projector to directly turn on when power is applied (i.e., without the need to use the projector's or the remote control's power button)
- Configuring the projector for the desired menu language
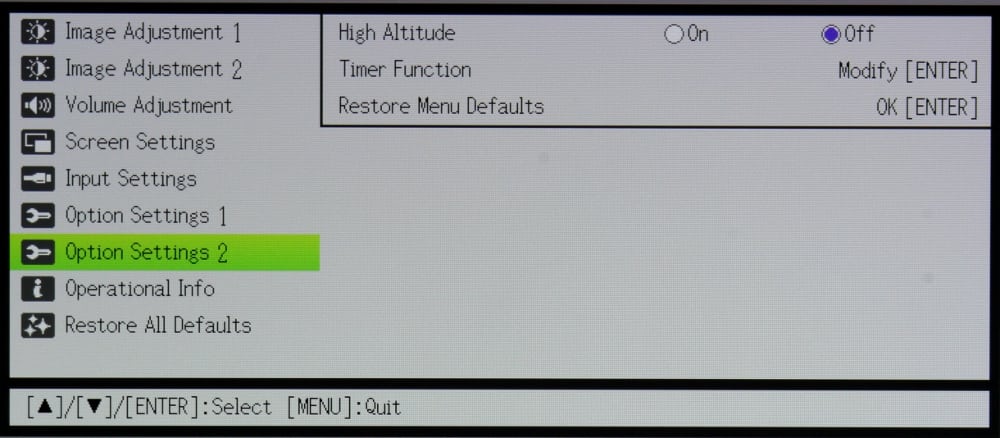
OPTION SETTINGS 2 Menu
The Option Settings 2 menu, shown in the 10th gallery photo above, offers settings for high altitude mode (which runs the fan at a higher speed for improved cooling) and offers a setting for the projector's timer function.
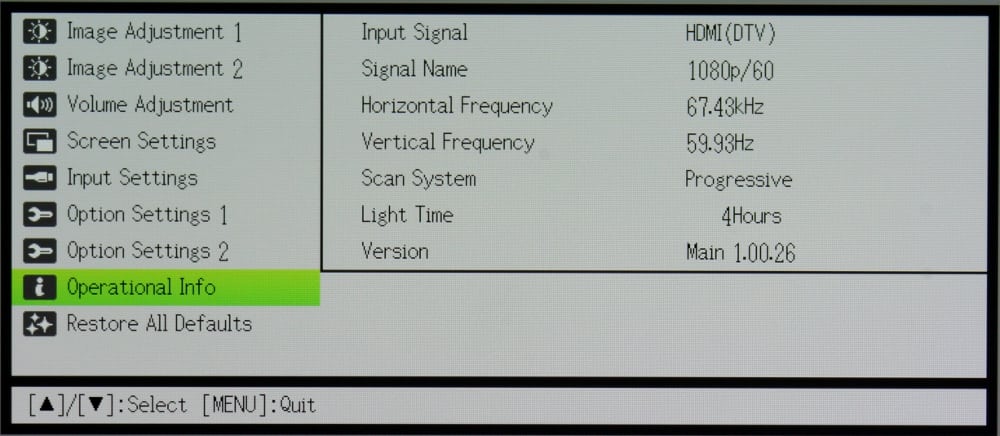
OPERATIONAL INFO Menu
The Operational Info menu, shown in the 11th gallery photo above, provides information on the status of the projector, including information on the input signal, the number of hours of operation for the projector's light engine and the projector's firmware version number.