Basic Menu
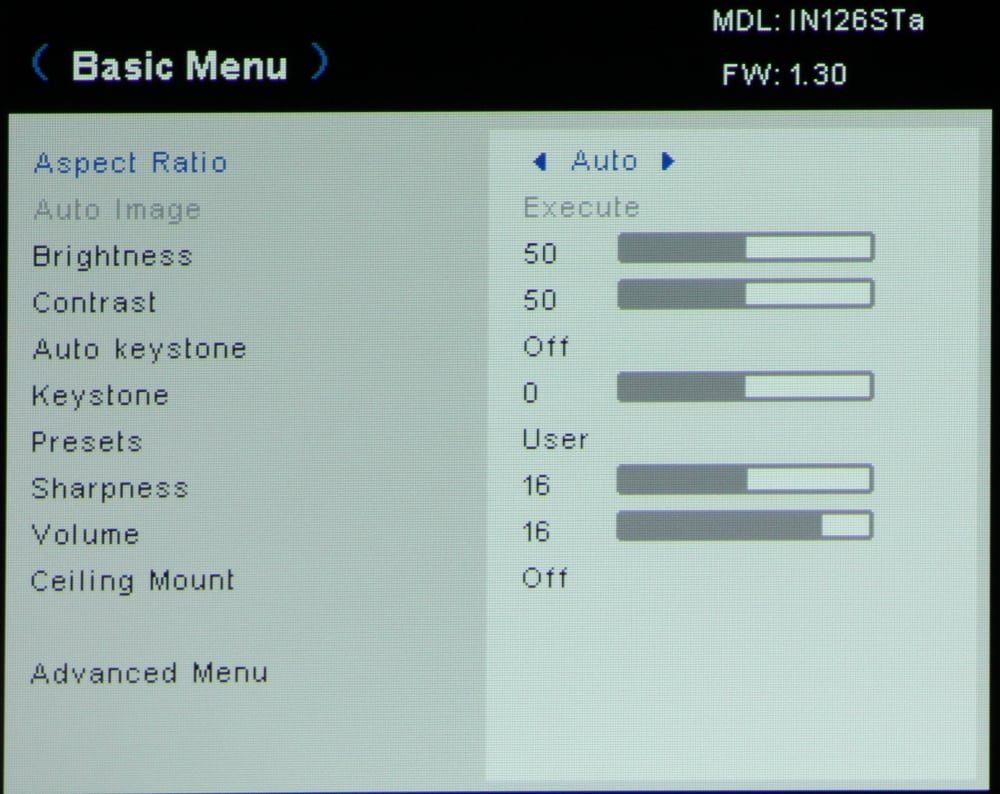
The "Basic Menu", shown above, is the menu is that first displayed when the menu button is pressed. From this menu most of the basic picture adjustments (e.g., brightness, contrast, etc.) can be made. Also the digital keystone adjustment is available and the setup for ceiling vs. table mounting can be selected. When the Auto Keystone setting is turned on, digital keystone correction will automatically be applied to the image when the projector it tilted from the horizontal position.
The adjustment for "Presets" shown above image, is for selecting the desired preset picture mode (i.e., Bright, Presentation, Video, User, Whiteboard, Blackboard or Beige Wall).
[sam_pro id=1_116 codes="true"]
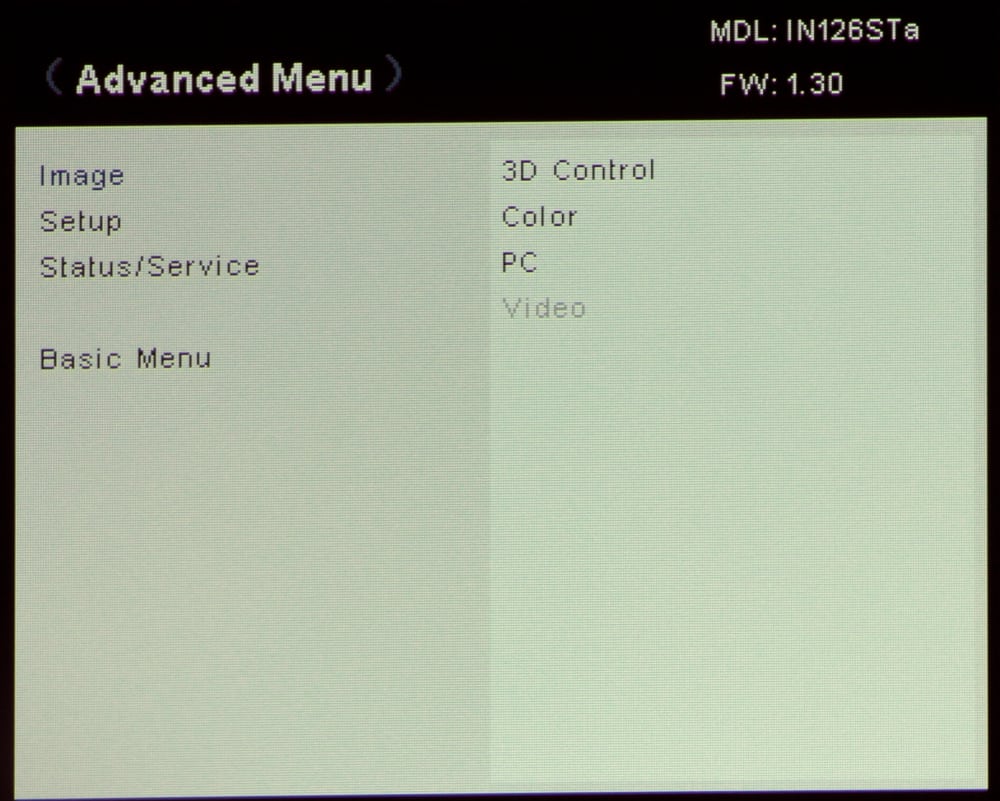
Advanced Menu - Image
The top-level Advanced Menu is shown in the 1st gallery photo above.
IMAGE MENU
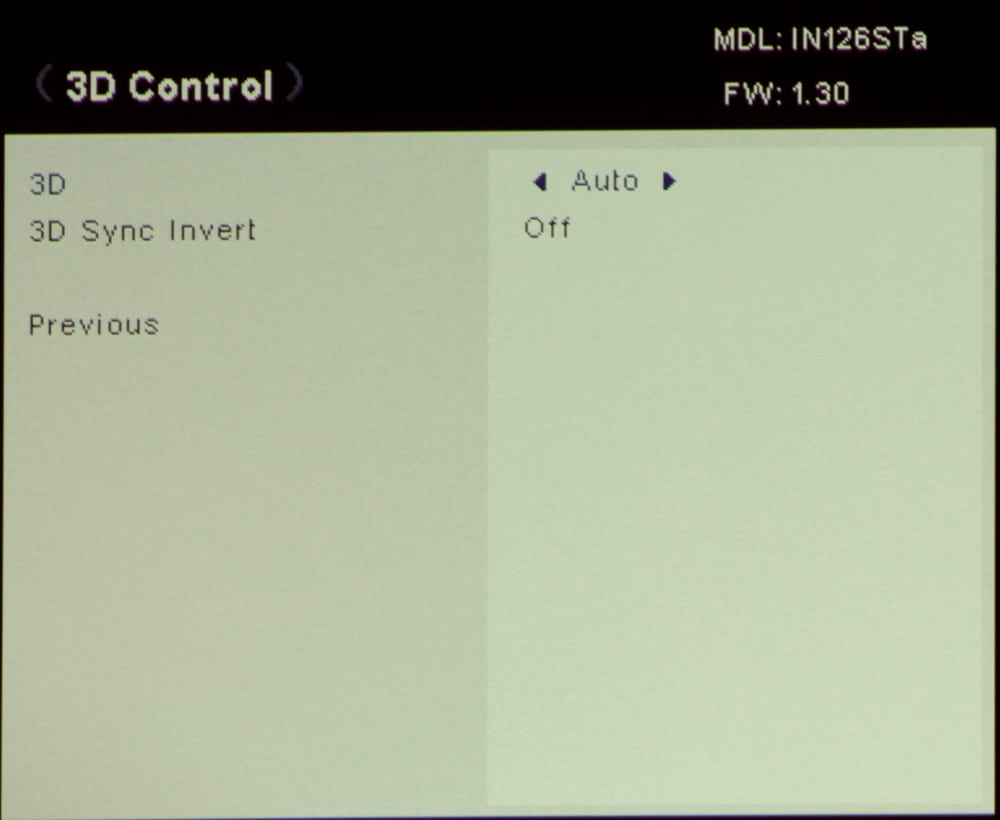
The first item on the Advanced Menu is for "Image" (shown on the left side of the menu) and the first Image item (shown on the right side of the menu) is for the settings associated with 3D. When this item is selected the menu shown in the 2nd gallery photo is displayed. This lets you select the 3D format of the incoming 3D signal or have the projector automatically detect the 3D format. It also lets you reverse the right and left images, as may be needed with certain 3D active glasses.
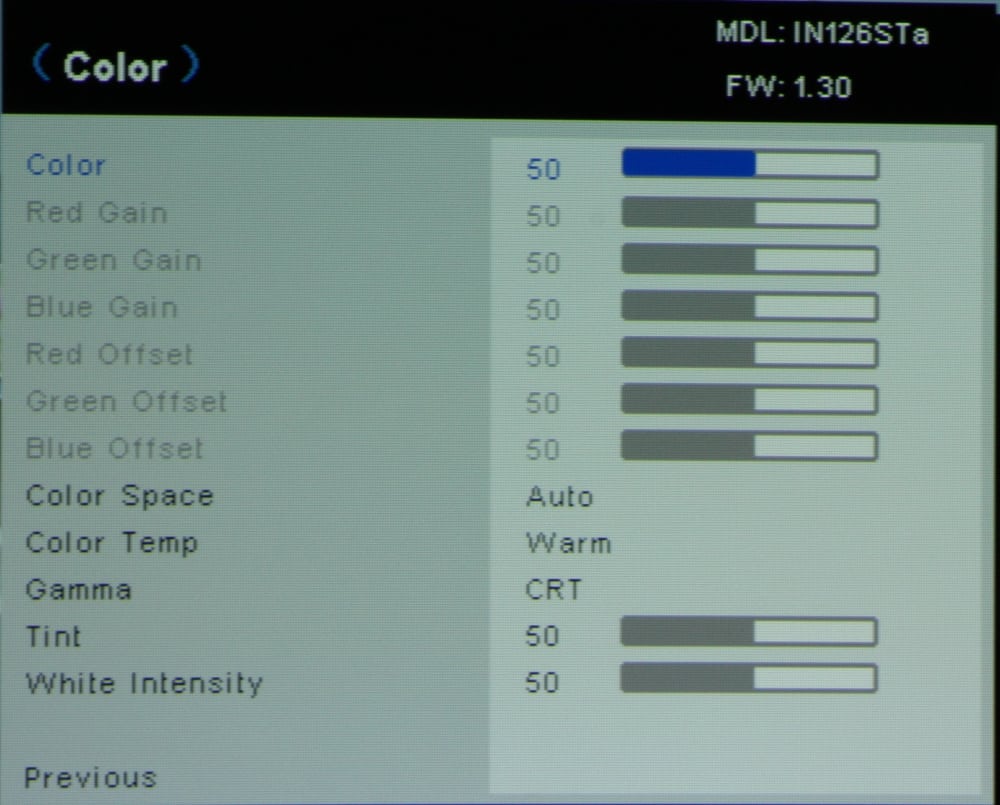
COLOR MENU
The second item on the Image setting menu is for "Color". When "Color" is selected the Color Menu shown in the 3rd gallery photo is displayed. This first item on the Color Menu is for color intensity and this works as it does on other projectors, monitors and TVs.
The next group of controls are gain and offset adjustments for calibrating the grey scale/white balance of the image. In other projectors these adjustments would be available regardless of the type of signal input being used, but not so with the IN126STa. Specifically, I found these controls greyed out and not available to be adjusted when using a HDMI input, with either a RGB or YCbCr signal format. In this day and age HDMI will likely be the most used type of input, but you cannot calibrate the grey scale when it is used. I did check using an analog, VGA style, connection from my laptop PC to the projector and these adjustments were available for this type of input. This will not be a serious omission for many users that are satisfied with the out-of-the-box color performance, but for some this could be a real shortcoming for this particular model.
Below those controls are settings for Color Space (i.e., Rec 709, Rec. 601, RGB) and for Color Temperature. Below those are controls for Gamma and a conventional Tint control.
Finally. under the Color Menu is a control for White Intensity. This is an adjustment (under this or some other similar name) that you will only find present on certain single chip DLP projectors. These projectors use a color wheel that contains optical filters for at least the red, blue and green primary colors plus a clear segment. This White Intensity control adjusts the extent to which the white light from the projector's lamp that passes thru the clear segment of the color wheel will be used to create the final projected image. Use of this additional white light will increase the brightness of some portions of the image (white and lighter color shades) but at the cost of an overall less accurate image.
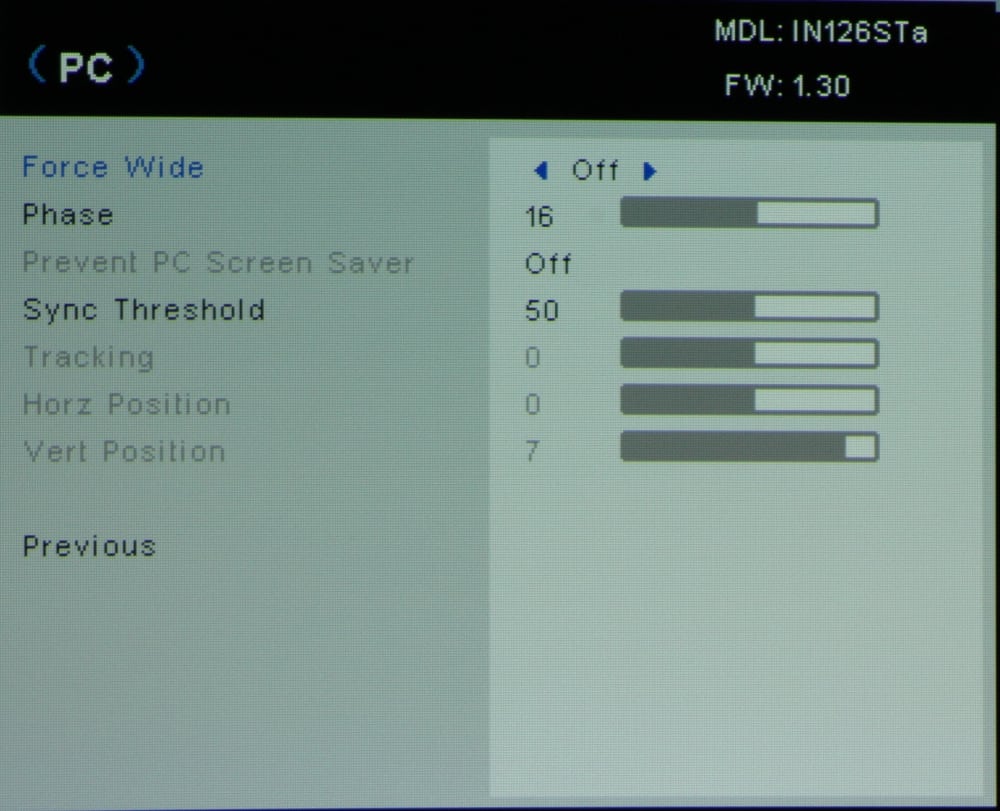
PC MENU
Selecting the third item on the Image Menu displays the PC Menu, shown in the 4th gallery photo above. The adjustments in this menu will only be needed when using an analog PC input (e.g., VGA) and does not apply for a digital input via the HDMI connector.
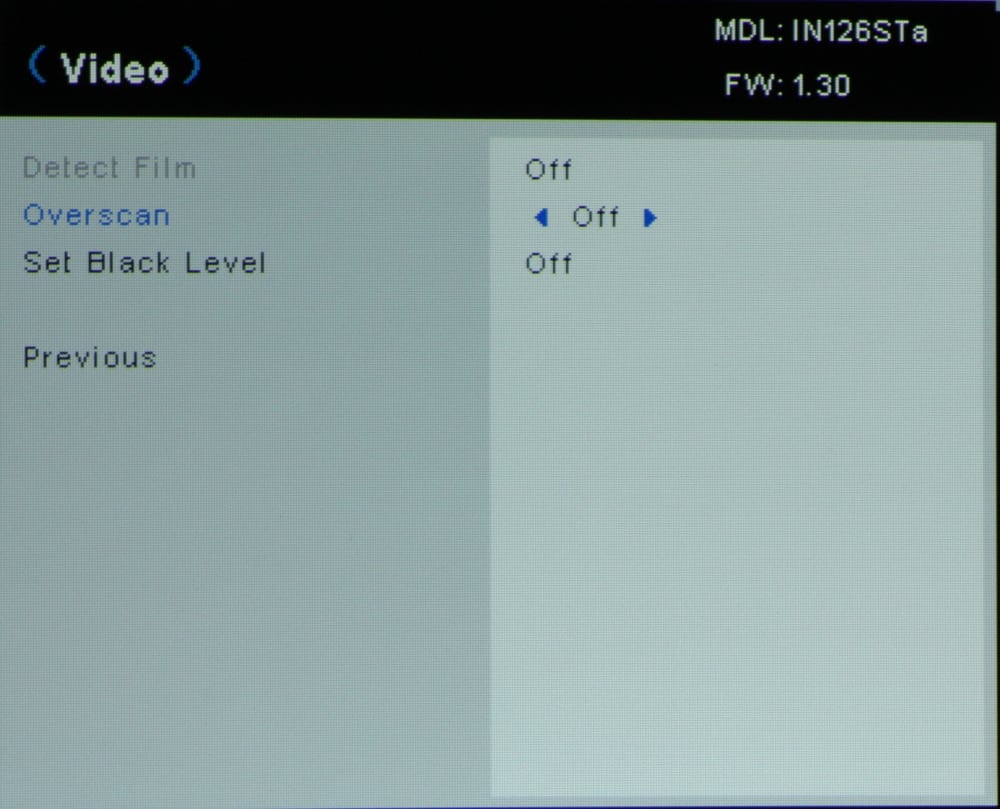
VIDEO MENU
Selecting the forth item on the Image Menu displays the Video Menu, shown in the 5th gallery photo above.
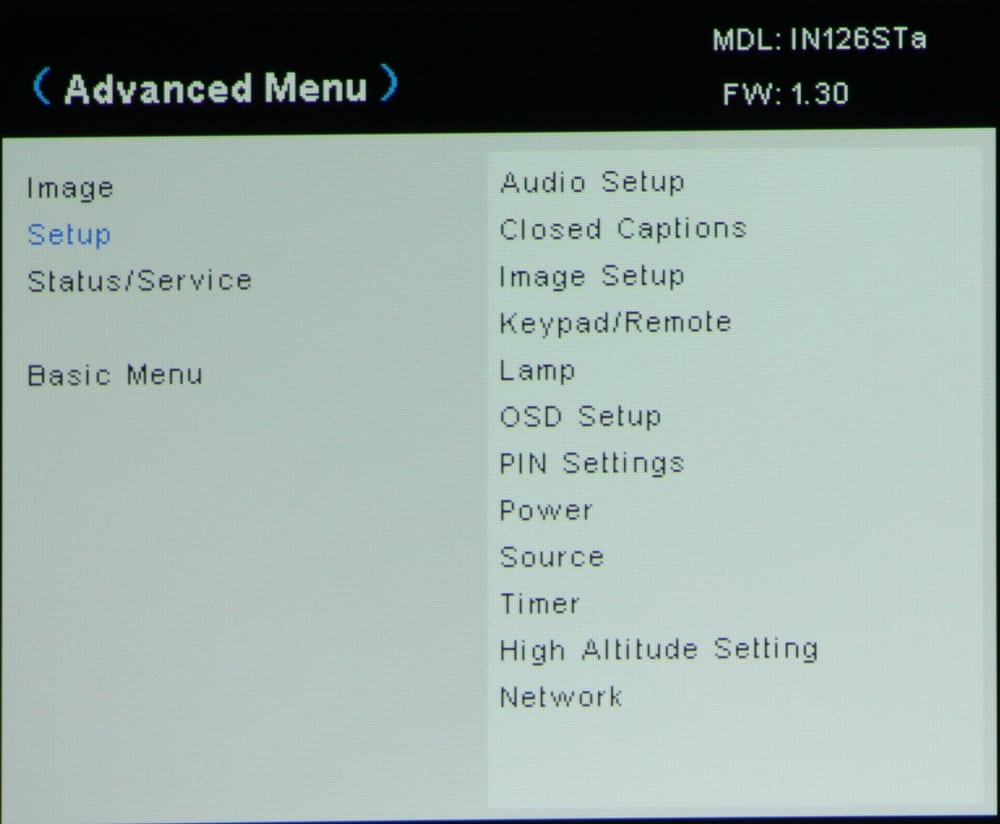
Advanced Menu - Setup
The second item on the Advanced Menu is for Setup and when selected the Setup Menu shown in the 1st gallery photo above is displayed. From this menu you can change the settings for a number of the projector's capabilities. The following describes a few of these.
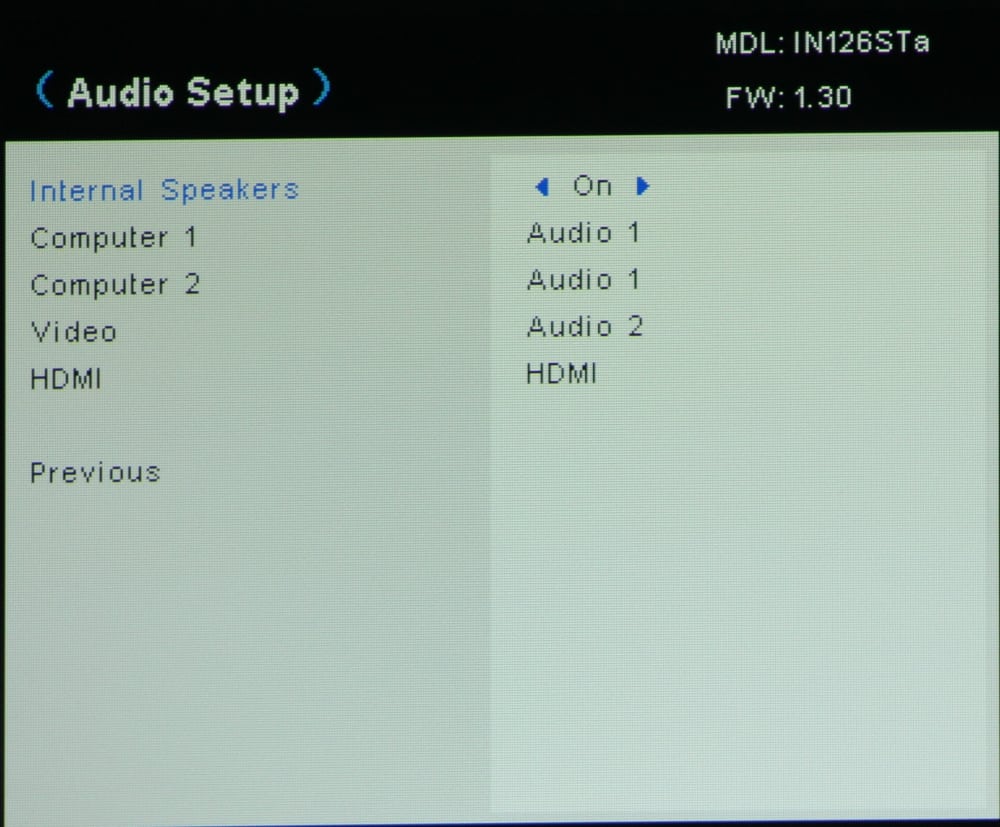
AUDIO
The 2nd gallery photo shows the Audio Setup Menu. From this menu the projector's internal speaker can be turned on or off and each of the audio input connections, on the rear panel of the projector, can be assigned to one of the video inputs.
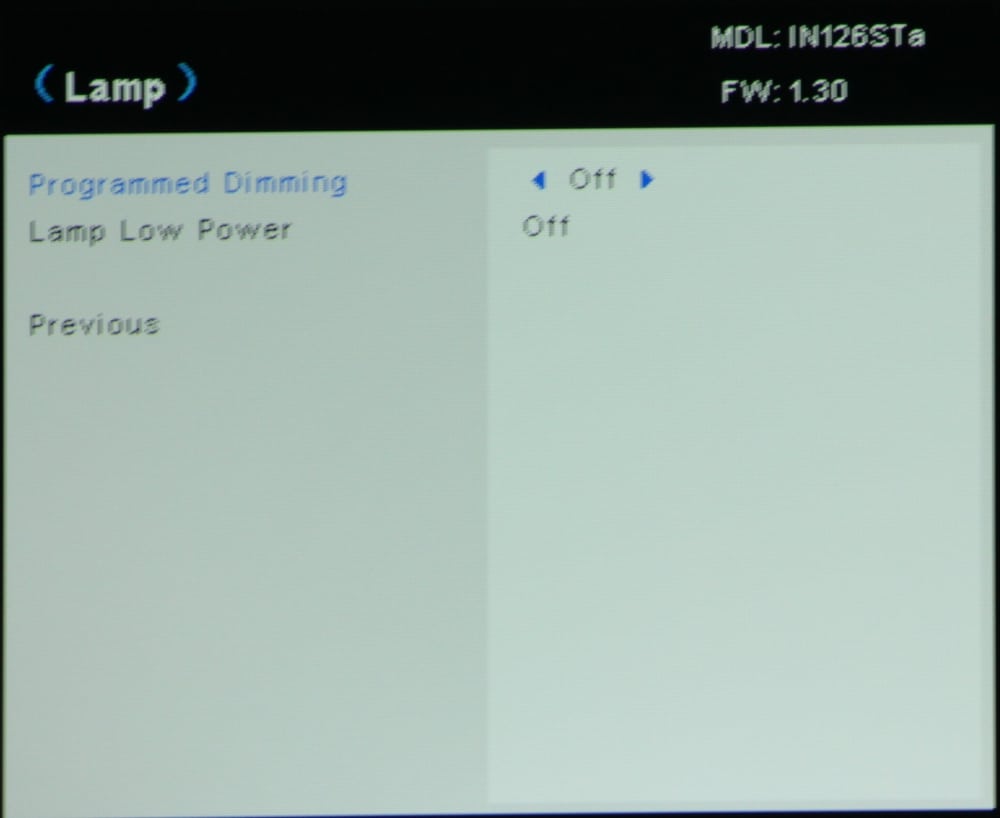
LAMP
The 3rd gallery photo shows the Lamp Setup Menu where you can place the lamp in either high power or Eco mode and also set to have the lamp automatically dimmed based on the brightness of the program material.
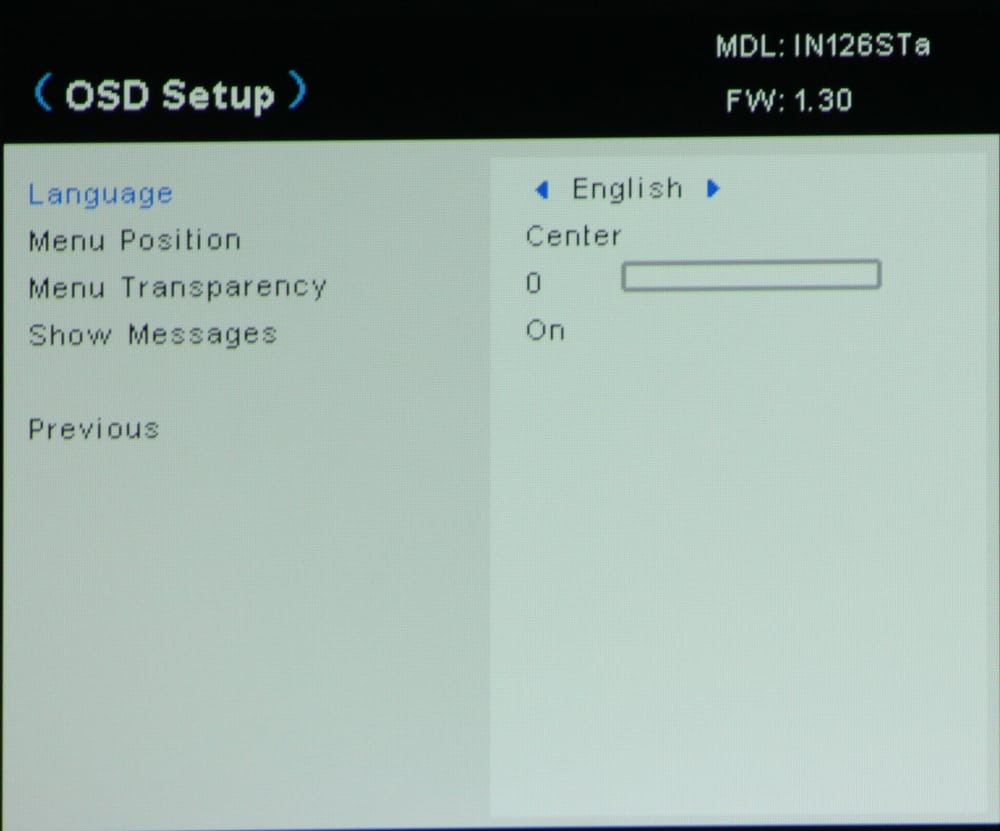
OSD
The 4th gallery photo shows the setup menu for the On-Screen Display. The user can change the location of the on-screen menus, the menu language, and the menus visual characteristics.
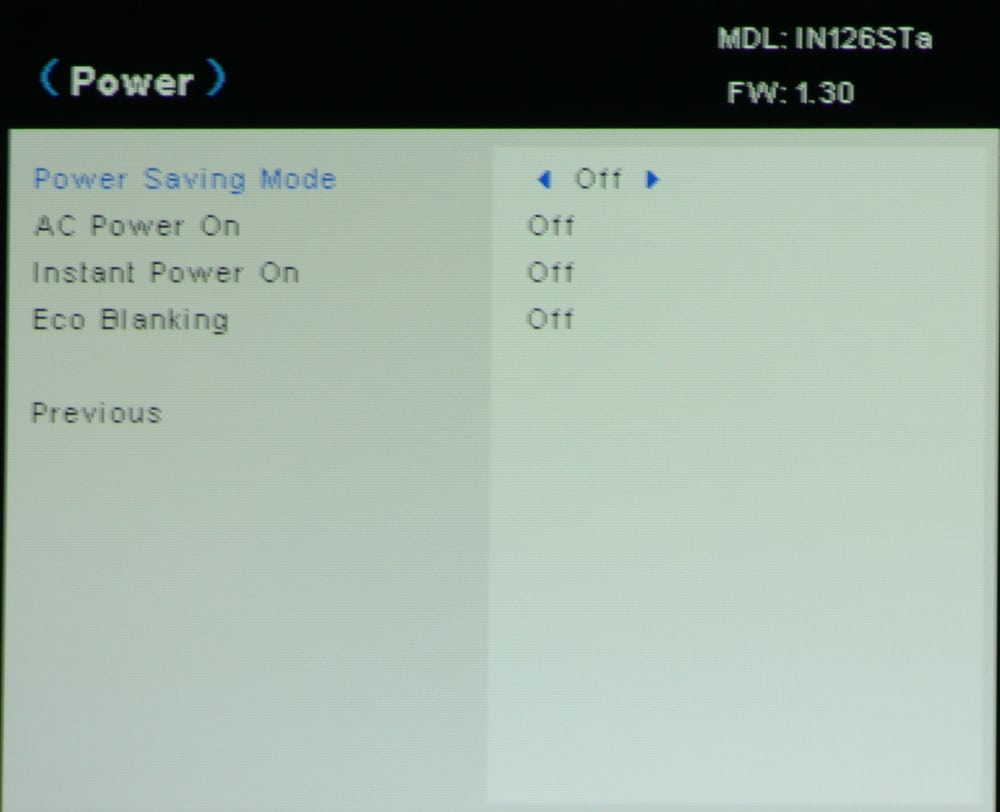
POWER
The 5th gallery photo shows the Power Setup Menu. This menu provides options for power saving features and other power related options.
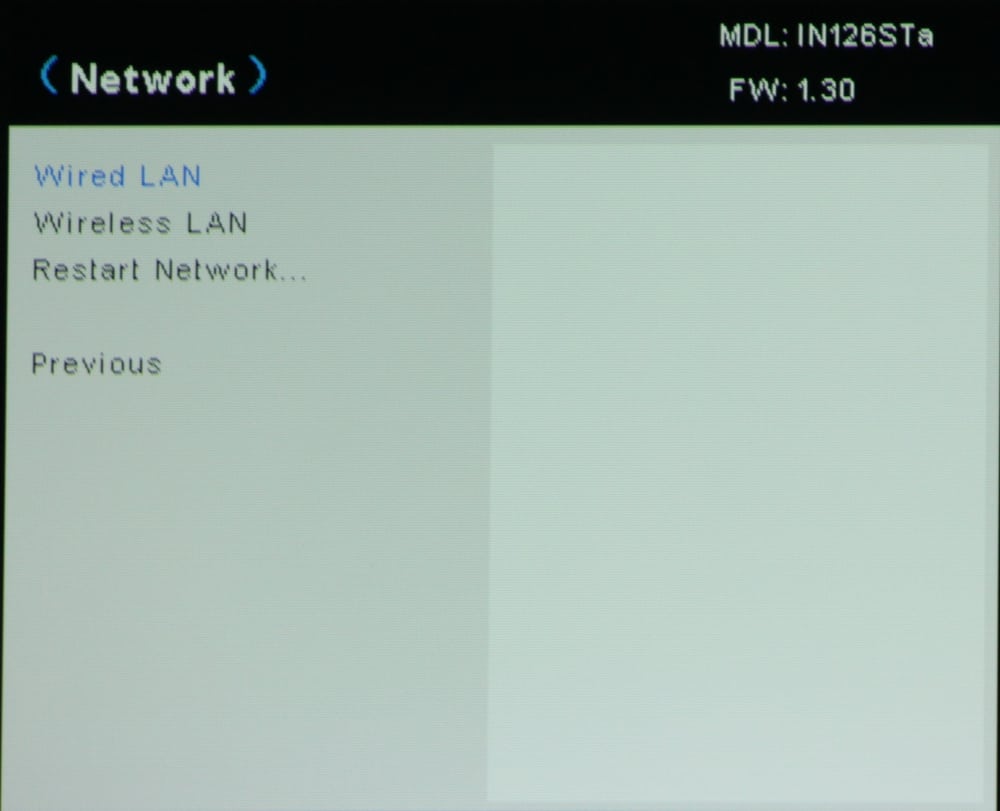
Network
The 6th gallery photo shows the Network Setup Menu. From this menu the user can setup the wired or wireless network connections.
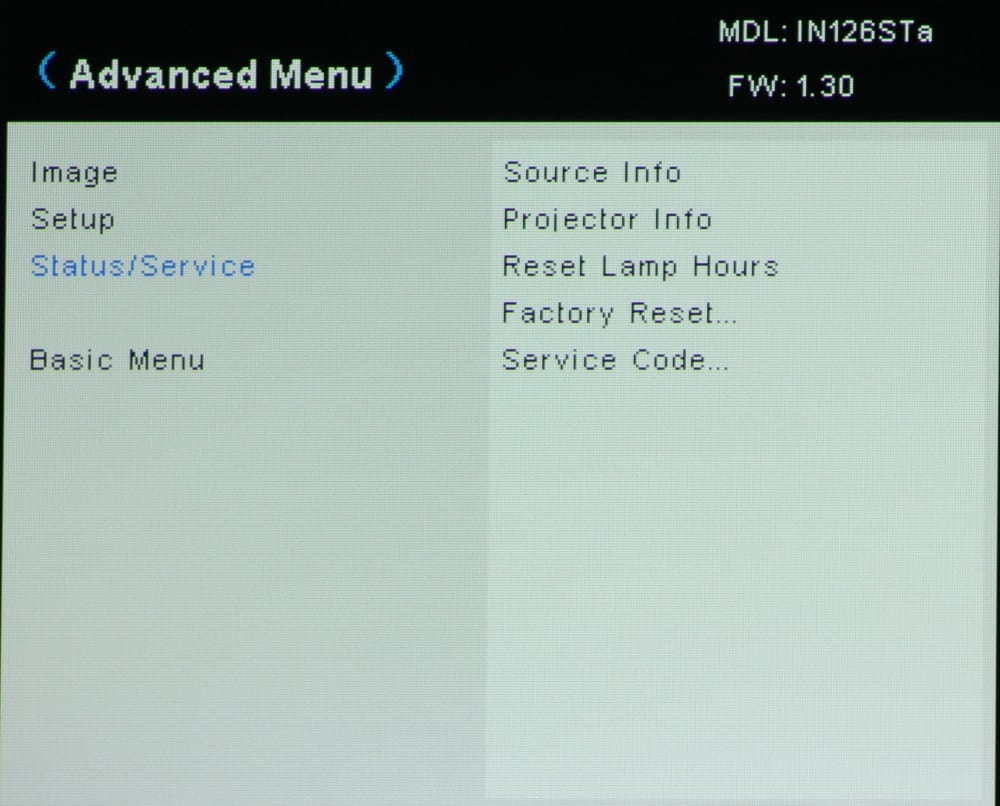
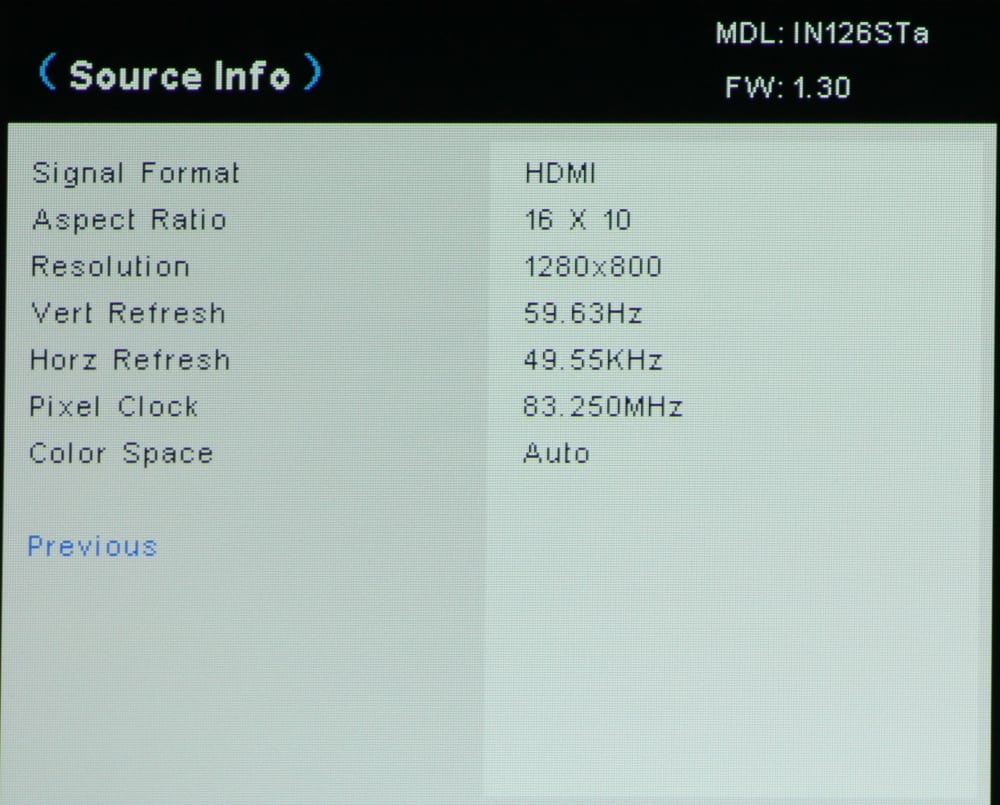
The third item on the Advanced Menu is for Status/Service. When this item is selected, as shown in the first gallery photo above, several menu items are displayed on the right side of the screen. Selecting the first of these brings up the menu shown in the 2nd gallery photo where the details of the input source signal are displayed. The remaining items on the Status/Service menu will display information about the projector, allow the use to reset the lamp hours (for when the lamp has been replaced) and reset the various controls/adjustments to their factory default values.