Overview
The VPL-CH375 is a moderate size business/education class projector. It's certainly larger than many of the business/classroom projectors with light output in the 3000 lumen range, but it still very easy to handle for cases where it's not being permanently mounted. When placed level on a table, the bottom of the projected image a little above* the vertical level as the projector.
* With a 100 inch diagonal 16 x 10 image, the bottom of the projected image is about 4 inches above the center of the projector's lens. If the projector is ceiling mounted in an inverted position then the center of the projector's lens would be about 4 inches above the top of the projected image.
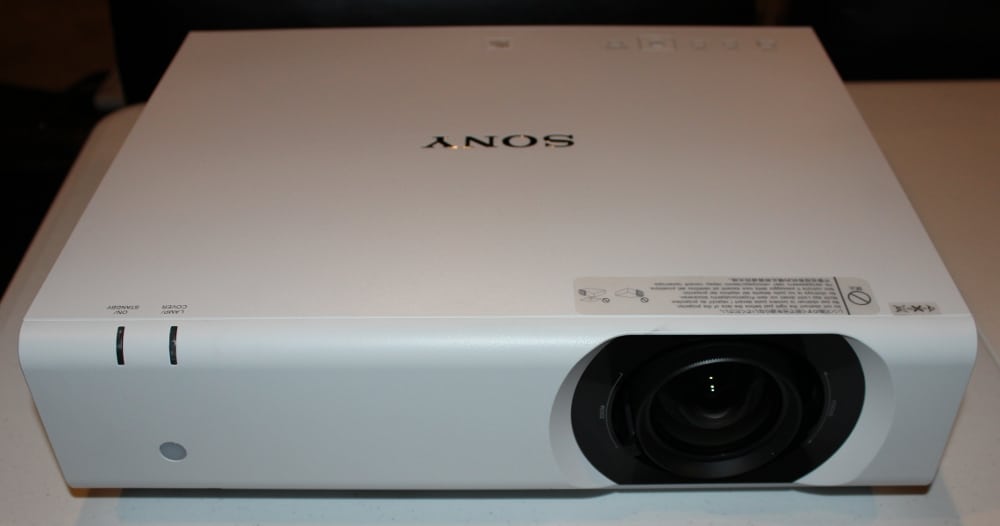
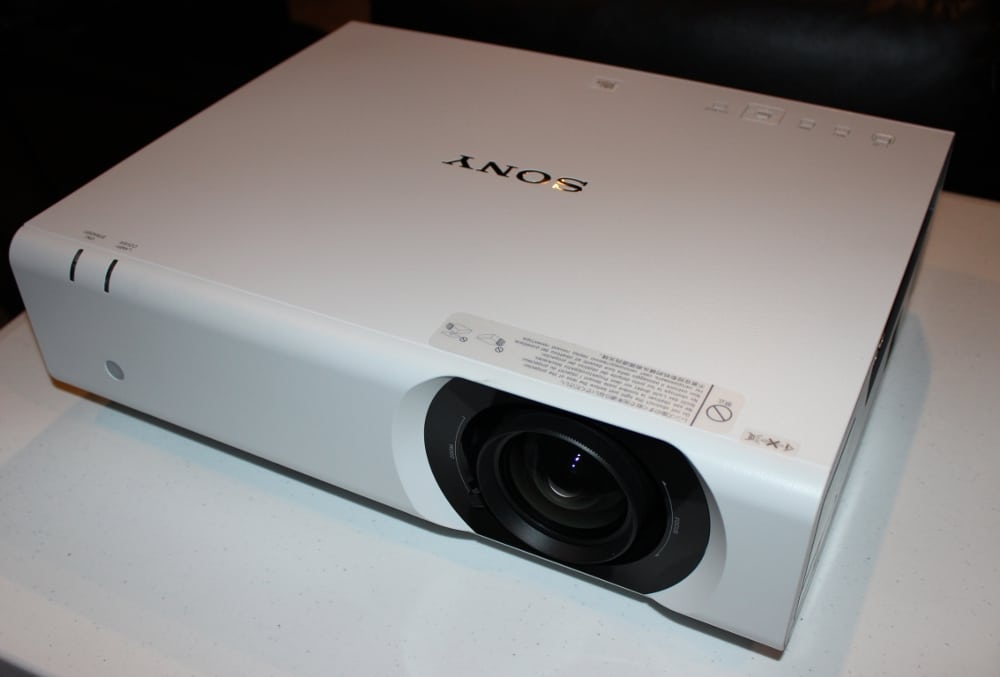
The front of the projector, as seen in the first photo of the above gallery, has the projector's lens toward the right side. There are manual zoom and focus levers toward the right and left sides of the lens barrel, as seen in the photo below. Not seen in this photo are adjustment screws for the vertical and horizontal lens shift.
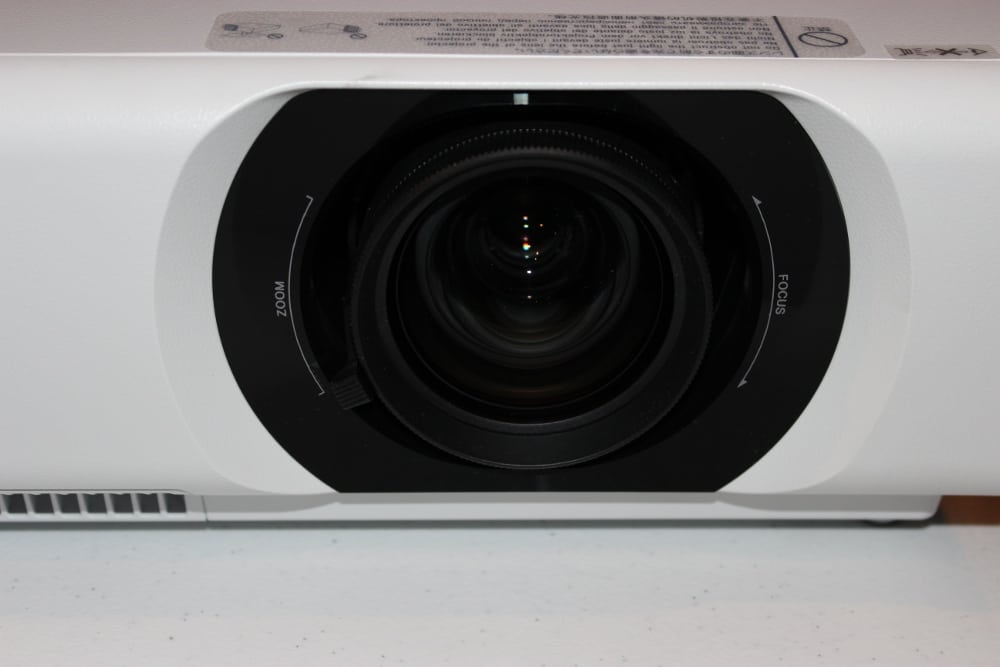
The projector's zoom lens provides a moderate throw range, which allows for a projector-to-screen throw distance of as short as 128 inches and as much as 189 inches for a 100 inch (diagonal) screen size.
There is an air filter that slides out from the front of the projector along the bottom edge, to the left of the projector's lens. The filter needs to be periodically removed, cleaned and reinstalled as part of the routine maintenance of the projector.
Two indicator LEDs are located along the front-top edge of the projector's cabinet, as seen in the photo below.

The left side of the projector has air vents while and rear side (photo 3 in the above gallery) of the projector is smooth with no vents, connectors or controls. However, the rear panel can be removed (with two screws) for replacing the projector's lamp.
Control Panel
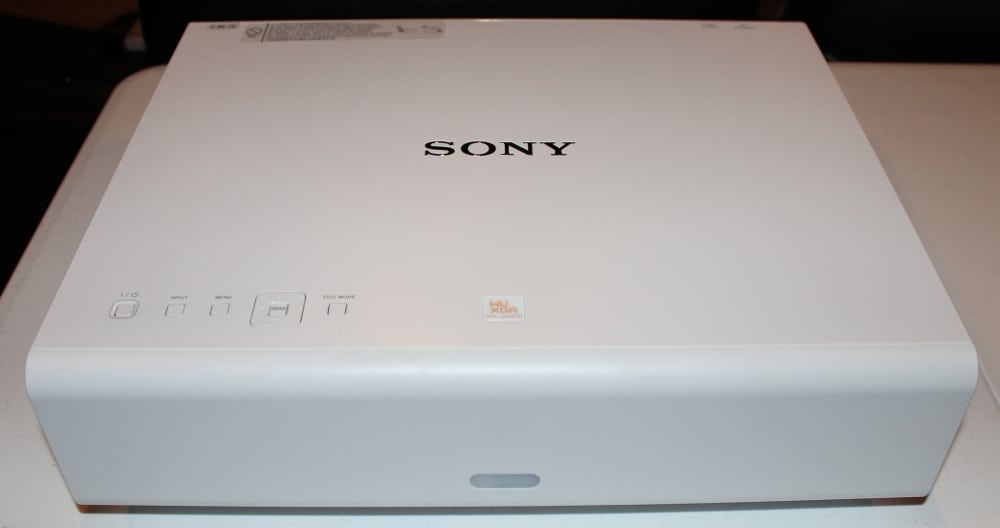
The projector's control panel is located on the top of the projector and is shown in the following photo.
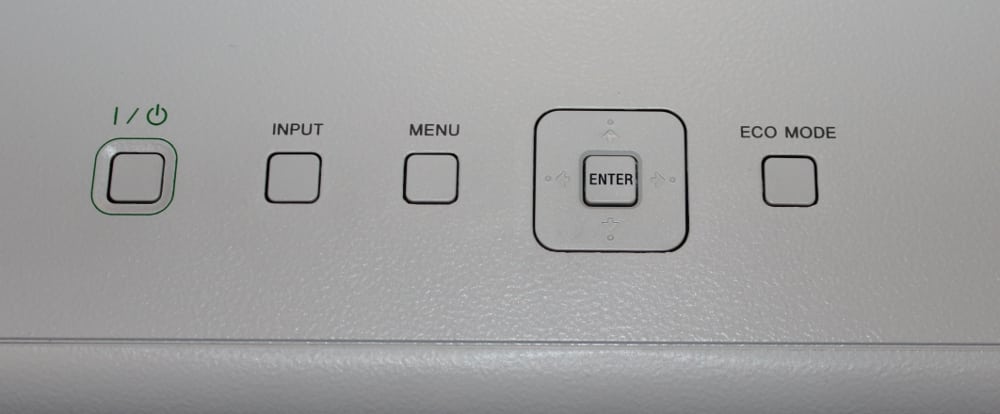
The control panel provides the essential buttons to operate the projector with the power on/off button toward the left with input and menu buttons to the right of the power button and a 4-way navigation right surrounding an enter button. Finally, to the far right, is a button to switch the projector into energy saving Eco mode.
Connector Panel
The VPL-CH375's connector panel is located on the right side (as viewed from the front) of the projector, as seen in the 4th photo in the above gallery. The connector panel is shown in more detail in the following photo.
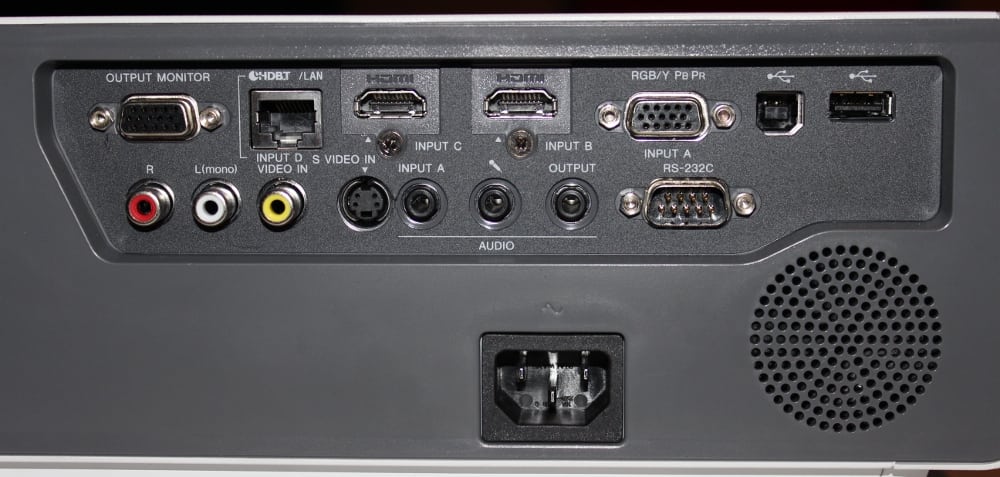
Going from left to right across the upper row of connectors are:
- Analog computer monitor output (feed-through from the VGA style input)
- HDBaseT/Ethernet connector (RJ45)
- HDMI Connectors (X2)
- Analog Video Input, using VGA style connector, for either RGB or YCbCr signal formats
- USB (type B)
- USB (type A)
The lower row of connectors, from left to right are:
- Right and Left Analog Audio Inputs
- Composite Video Input
- S-Video Input
- Line Level Analog Audio Input (mini-phone connector)
- Microphone Input (mini-phone connector)
- Line level Audio Output (mini-phone connector)
- RS-232C (serial communications) port
At the bottom of the photo are the AC Power Connector and the Speaker Grille
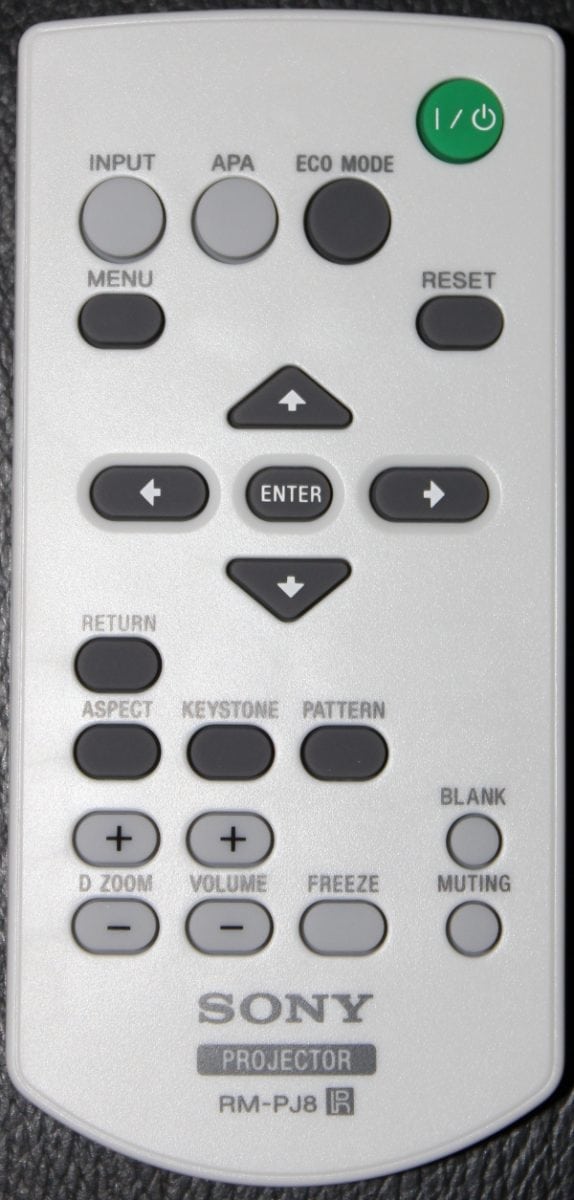
The VPL-CH375 is supplied with a very compact remote control that include buttons for all of the necessary functions. The remote measures approximately 4.3 x 2.4 x 0.3 inches. The buttons are not backlighted so the may be difficult to read in a dark environment, but this type of projector is normally going to be used in a classroom, conference room or other venue with some room lighting.
The green button near the top-right corner of the remote is the Power button. Below that are three buttons for, from left to right, for selecting:
- Signal Input;
- APA (auto pixel alignment) used only for analog computer signal input), and;
- ECO reduced power mode, either the preset ECO mode or a user defined energy saving mode
The group of buttons below that are for displaying and navigating the projector's on-screen menus. The Menu button is at the upper-left of this group brings up the top-level menu. The 4-way Navigation buttons surround the Enter button in the center of this group. Toward the top right of this group is a button to Reset the highlighted menu item to its factory default value, and toward the lower left of this group is the button to Return to the previous menu.
Below the menu/navigation group are 3 buttons to change the display's Aspect Ratio, Keystone adjustment, and to display a Test Pattern.
The group of buttons toward the bottom of the remote are for Digital Zoom (to enlarge a portion of the image), Volume (for controlling the internal speaker), Freeze to pause the current image, Blank to cut off the projected image, and Mute to cut off sound from the projector's speaker.