Projector Reviews Images

JVC DLA-RS600U, X950R Home Theater Projector Review - Hardware Tour

Posted on January 25, 2016 by Art Feierman
DLA-RS600U PROJECTOR HARDWARE TOUR:  Overview and Lens, Control Panel, Inputs and Connections, Lens Characteristics and Adjustments, Remote Control

JVC DLA-RS600U Overview

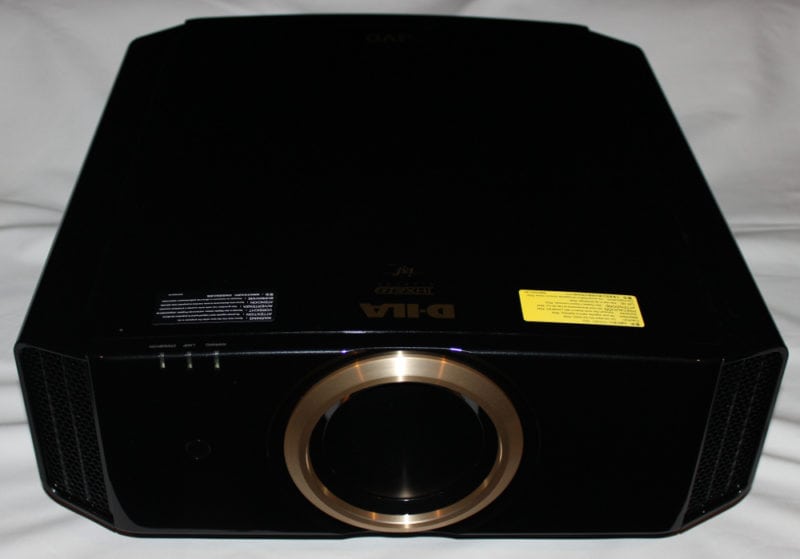
JVC’s DLA-RS600U and its siblings are moderately large projectors.  They are about the same size as the competing Sony’s (VPL-VW365 and VW665), slightly larger than Epson’s LS10000, and about a half size larger than the Epson 5030UB or the Panasonic PT-AE8000U projectors.  It dwarfs most single chip DLP home projectors.  The JVC is “heavy metal,” that is, it feels solid, as you would expect for a projector weighing about 34 lbs.

The motorized 2:1 zoom lens is center mounted.  As with previous JVC projectors, lens functions are motorized – zoom, focus, and lens shift, and of course, Lens Memory. The exhaust vents are on the outside portion of the front.   You’ll also find the front IR sensor for the remote control just to the left of the lens if you are facing the projector.  On the bottom of the JVC RS600U (not shown in the above photos) there are four screw thread adjustable feet – two front, two rear.  The feet are removed when using a ceiling mount at the feet screw into the same treaded holes are used to attach a ceiling mount.  Also on the bottom is one air intake.

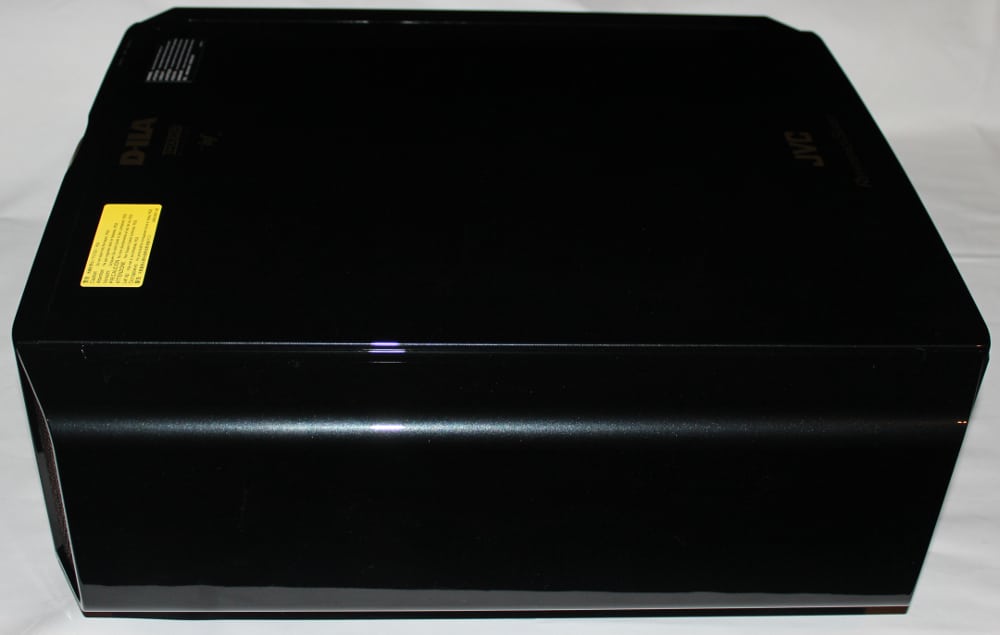
Nothing on the sides, or the top (other than the logo on the top).  The rest of the action is in the back.

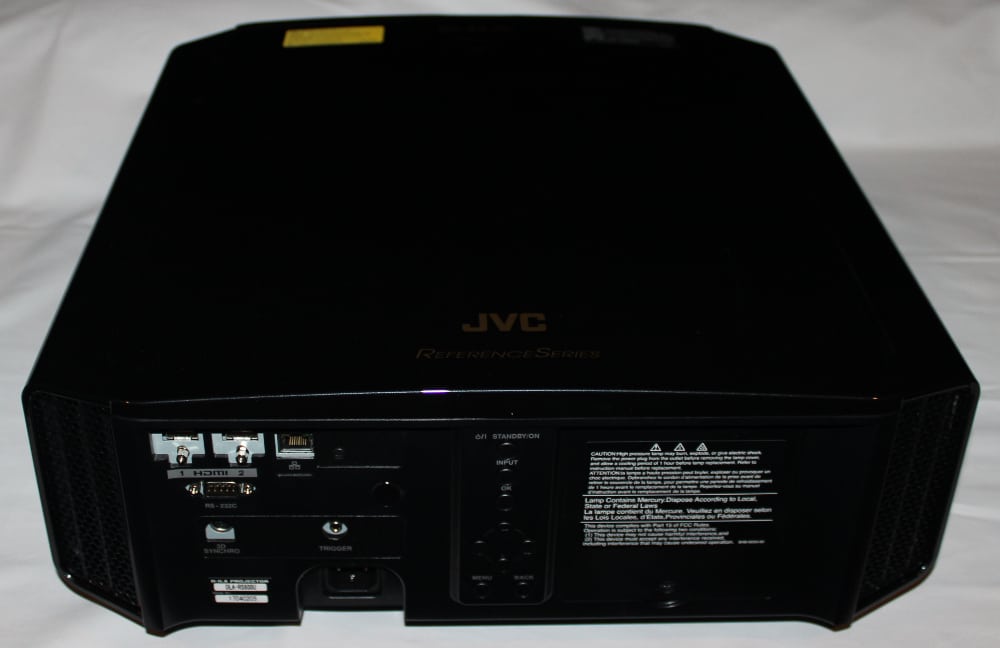
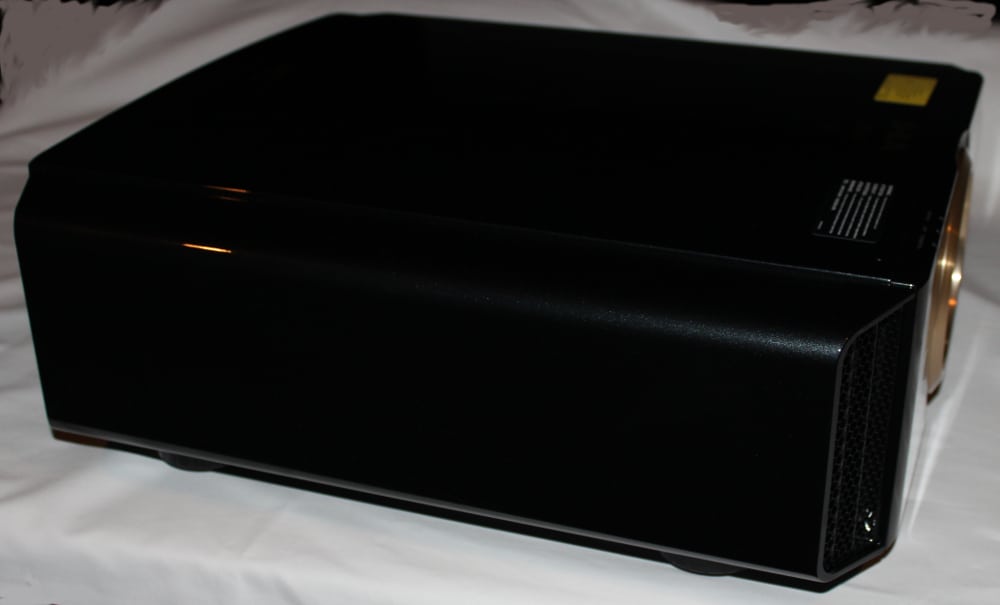
At the outer edges of the back are two more intake vents. Facing the back , the inputs and other connectors are on the left side of the projector’s back.  In the center of the rear of the JVC is the control panel, and the door for lamp access is to the right.

RS600U Control Panel

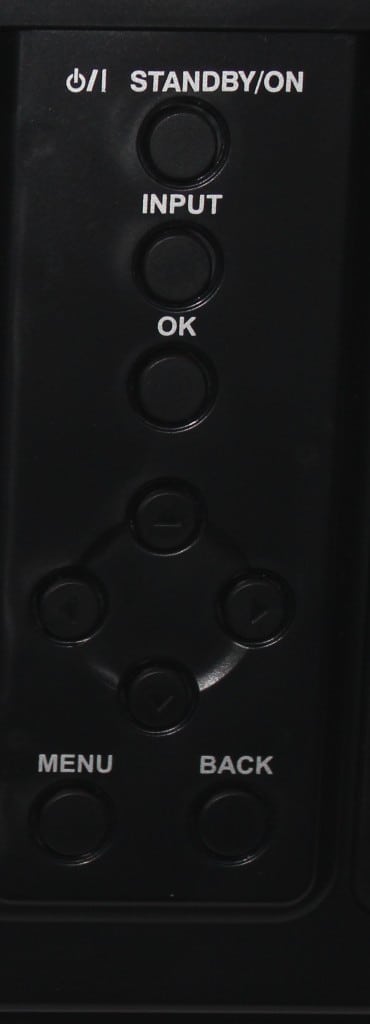
JVC control panel is pretty standard stuff, unchanged for the last four years of their projectors.  Interestingly, it is located in the center of the rear of the projector it’s a fairly standard affair.

JVC RS600-Control Pad

The power switch (On/Standby) is  the top button.  Press once to power on, press twice to power down.  Next down is the Input – the source selector.  Right below that is the OK (aka Enter) button.  Most projectors put that button in the center of the arrow keys, but not JVC.

Well, those four navigation arrow keys are next, and they are set up in the popular diamond configuration.

The Menu button is on the bottom left, while the Back button is on the right (often called Escape on other projectors), which moves you back up a level in the menus when pressed.

All the standard features, nothing extra.  Plenty of spacing between the buttons.  Seems like less and less home projectors are putting control panels on the top, at least once we get above the lower price ranges.

RS600U Connector Panel

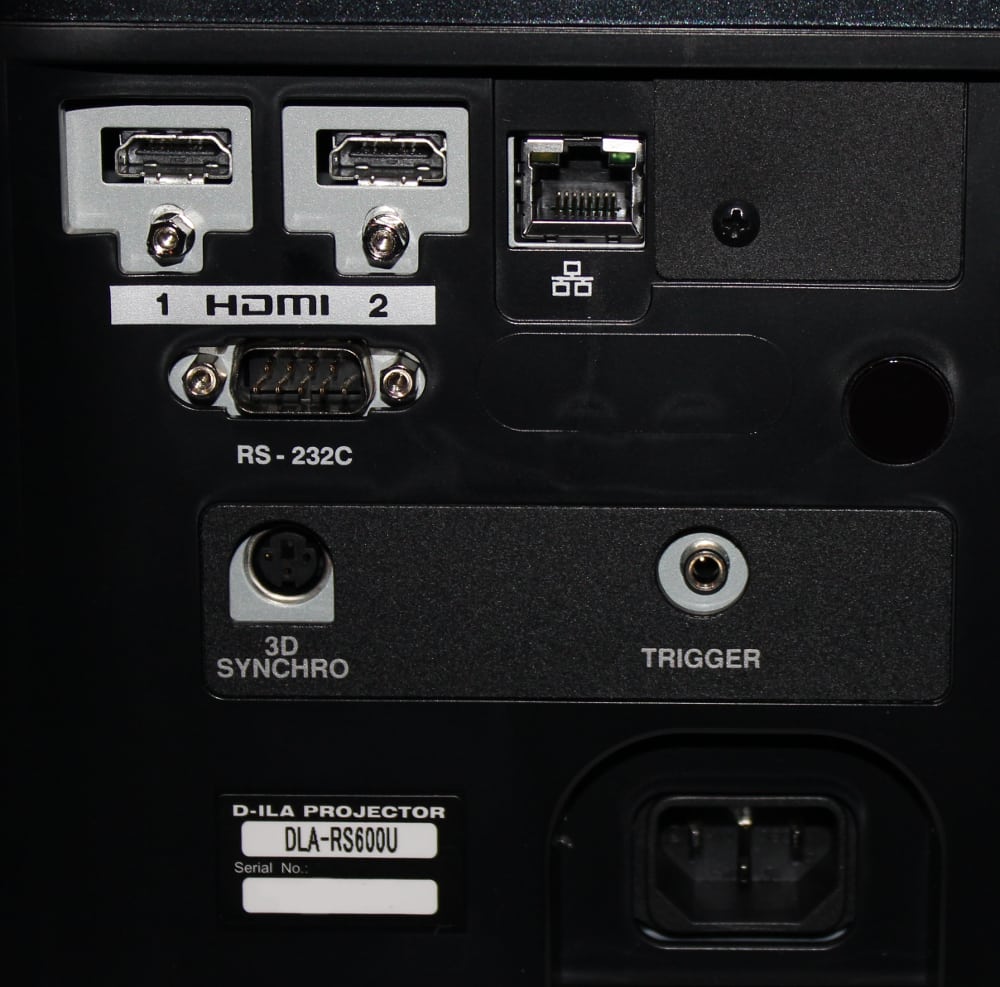
This series of JVC projectors have the essential inputs, but have fewer than most projectors, as JVC makes no attempt to accommodate older analog video sources.

JVC RS600-Connector Panel

From the top left of the rear of the RS600U, you’ll find two HDMI 2.0a inputs that support HDCP 2.2.  These are full bandwidth HDMI inputs supporting the full maximum 18 Gbps data rate allowed by the HDMI 2.0 standard, as compared to the version of HDMI 2.0 supporting a lesser capable 10.2 Gbps max. data rate now being offered on the Sony 4K projectors and the Epson LS10000.  To the right of the HDMI inputs is the RJ45 ethernet jack  for networking. Now that’s not one you’ll find on most home theater projectors, although it’s fairly common with fairly expensive ones and on business and education class projectors.

Lower cost projectors would rely only on RS232 serial for “command and control” and right below the two HDMI inputs, is a standard RS232 Serial port with the usual DB9 connector.

The DIN connector for the optional 3D RF emitter is below the HDMI inputs.  The optional JVC 3D rf (Bluetooth) emitter plugs in and “points” down.   JVC  uses an industry standard for the 3D emitter and there are other 3rd party brands that work with this projector.  To its right is a small jack for a 12 volt screen trigger.

That’s it.  What’s not here are some low res analog video inputs – composite video, and S-video, but we’re definitely seeing more manufacturers no longer including one or both of those, especially on higher-end projector models.  Also missing are component video HD analog video inputs.

It would have been nice if one of the HDMI inputs was configured to support MHL, which would have allowed some internet smarts to be added, such as a Roku stick, or directly interfacing some android based phones and tablets!

We are starting to see HDMI with MHL in some home projectors, although mostly on the lower end of things as well as with classroom and business class projectors.  It’s catching on rather quickly for some market segments, as MHL has many potential benefits.

Lens Characteristics and Adjustments

Projector Lens Throw (all 2014 models) for 100″ diag. screen
Lens Position
Wide Angle (closest to screen) 9 feet 10 inches (3.01 mtr)
Telephoto (furthest) 20 feet 1 inch (6.13 mtr)

As with other recent vintage JVC projectors we have  reviewed, JVC publishes a zoom range with a 2:1 ratio.  As you can see from the numbers above, though it may be slightly more than 2:1 (more like 2.03:1 according to charts in the projector's instruction manual).  This is almost as good as it gets.  The competing projectors with more range:  2.1:1 (Epsons), and 2.06:1 on some Sony models.

The long end of this JVC projector’s range should allow placement far enough back that it will allow most people to rear shelf mount their projector if desired.

To figure out the correct distances for larger or smaller screens, just multiply the numbers in the chart above by the difference in size.  As an example, a 12o inch diagonal screen is 1.20 times the size of a 100, so multiplying the 9′ 10 inches (closest distance for the 100″)  by 1.2 would give the closest distance for the larger screen.

JVC Projector Vertical Lens Shift Range (from Center of lens) 100″ diagonal 16:9 screen w/ no horizontal shift used
Above Top of Screen 15 inches
Below Bottom of Screen 15 inches

Basically for a 100″ screen, the projector could be ceiling mounted so that the center of the JVC’s lens is 15 inches above the very top of the screen surface, or if table placed, as much as 15 inches below the bottom of the screen surface.

Or, anywhere in between!

Horizontal lens shift is +/- 34% (vertical is +/80%), which works out for a 100" screen to be to 0.34 x 87″ (width) or about 29 inches.   Thus, if no vertical lens shift is in use, the center of the lens could be anywhere from 29 inches to the left, or to the right of dead center.

The manual provides a basic chart that shows how quickly vertical lens shift range diminishes as you start using horizontal, and vice versa.

Bottom line: the JVC RS600U, or more generally all current and recent vintage JVC projectors, have a lot of lens shift range.  A few projectors like the Epson’s have more vertical, but overall, the lens shift range is excellent, providing most people with an easy mounting solution.

Remote Control

The RS600U's remote has a very good backlight – it’s a soft yellow beige type color, it’s easy to read the letters on the buttons, it’s not too bright, not too dim.  I can’t think of another brand with a better remote in terms of it’s backlighting.

The JVC remote control is configured this way:

Top left is the Standby button (power off), to its right is the Power on button.

The next row offers up the Input button for source selection, then the buttons for the Lens Memory, which let’s you select different lens memory positions that you’ve previous configured.

Below those are 3 buttons with the left one for Lens Control (with menus for Focus, Zoom and Lens Shift) one for the Lens Aperture adjustment and one labeled CMD for Clear Motion Drive.

Next down is Hide on the left (AV Mute) while the backlight button is across on the right. That button has a faint glow in the dark, easy enough to spot though.

The four navigation arrows are in a round configuration, with the OK button (aka Enter) in the middle of them.  Below to the left, is Menu, below to the right is Back (aka escape), which like the same on the control panel, takes you back up a level in the menus.

Next down are two rows of 3 buttons each that allow you to select from 6 picture modes.  Some of these, such as User, when pressed will cycle through the various Picture Mode in that category.

Below those is another row of 3 button with the first one for setting MPC (Multiple Pixel Control).  MPC is where e-Shift 4K enhance can be turned on or off for HD video sources and also where several electronic image enhancement controls can be adjusted.  The second of these button is to display a picture analysis screen and the third button displays the Advanced Menu, where you’ll find more controls (see the menu section below).

That leaves only a row of four smaller round buttons, which, from the left, give you direct access to Gamma, Color Temp, Color Profile, and Picture Adjust menus

A very nice remote, reasonably good range exceeding 25 feet.


Click Image to Enlarge

© 2024 Projector Reviews

crossmenu linkedin facebook pinterest youtube rss twitter instagram facebook-blank rss-blank linkedin-blank pinterest youtube twitter instagram