Projector Reviews Images

Canon REALiS WUX450ST Projector - Hardware Tour 2

Posted on May 16, 2016 by Art Feierman
Canon REALis WUX450ST Projector - Hardware Tour 2:  Menus

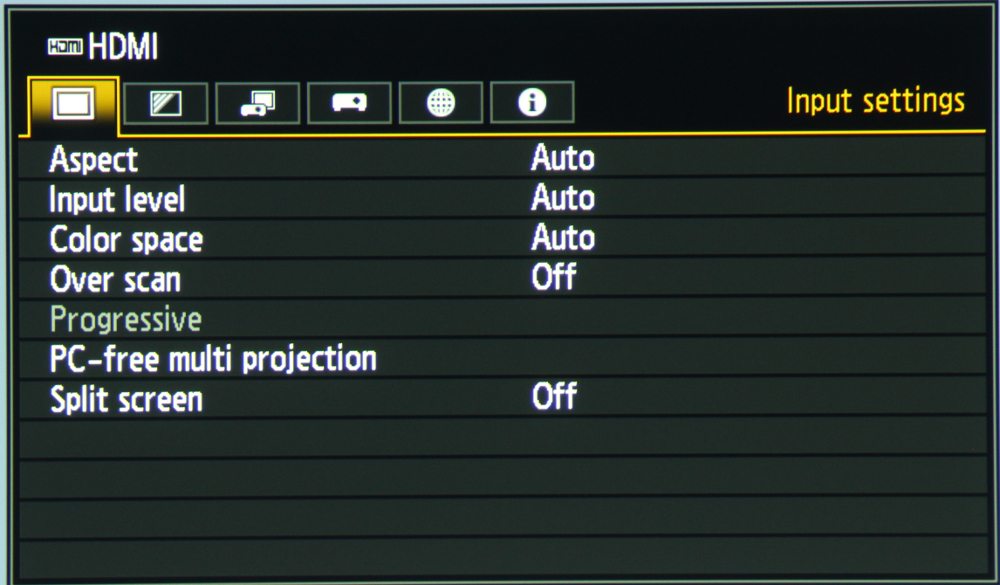
Input Settings Menu


Canon WUX450ST-Menu-Input Settings

When you press the Menu button on the remote control or on the projector's control pad the on-screen menu, as shown in the photo above, is displayed.  The available top-level menus are indicated by the 6 icons across the top.  The initial menu that is displayed is the Input Settings menu (as indicated by the left-most of the 6 icons) as seen in this photo.  In this case of this photo, the input was set to HDMI and the available input settings are as shown in the photo.

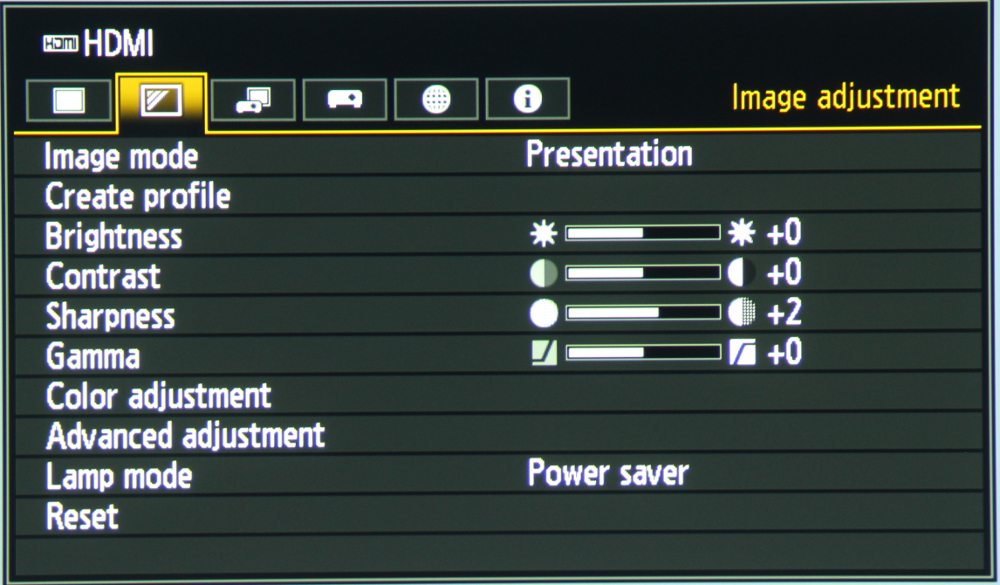
Image Adjustment Menu

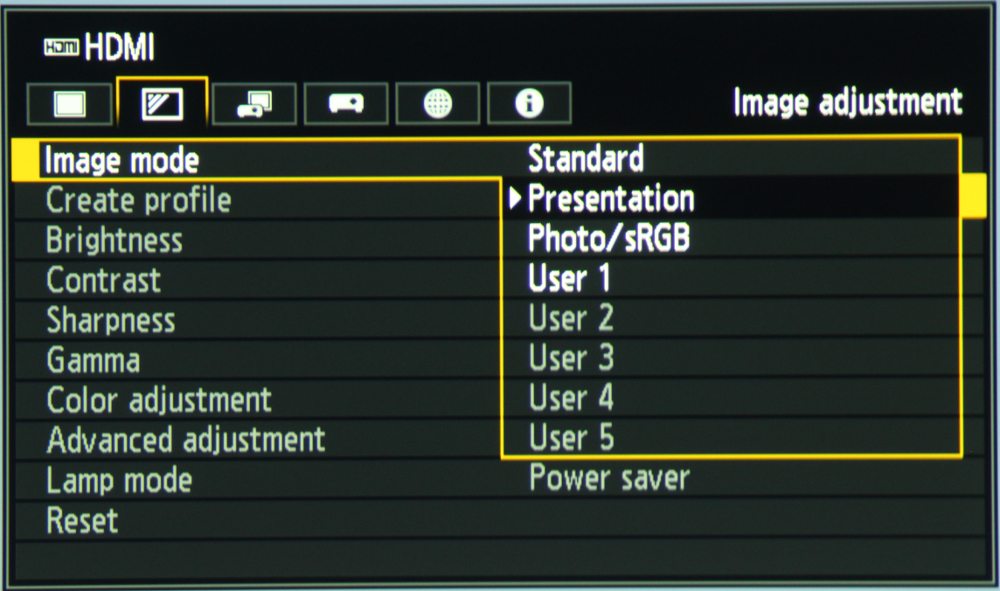
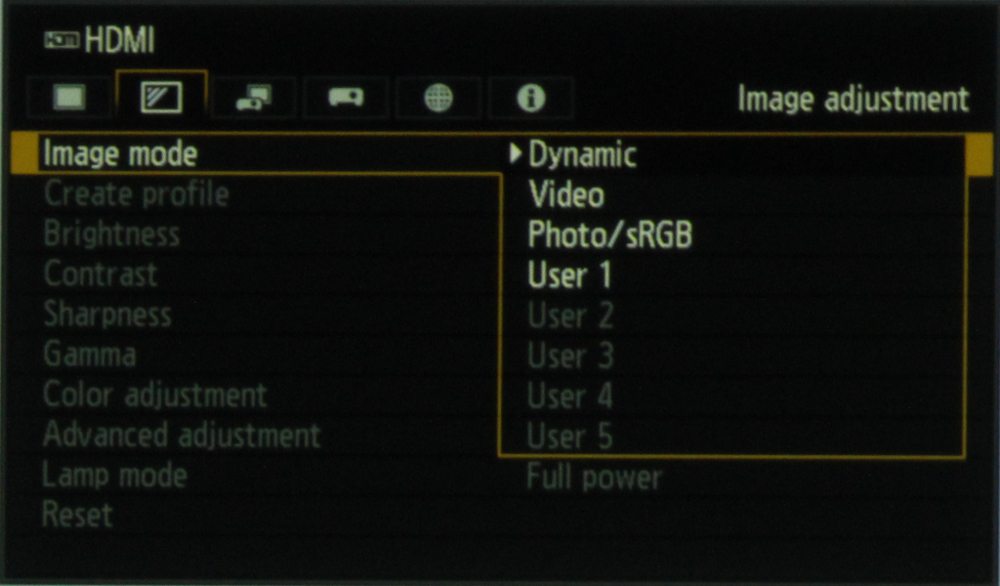
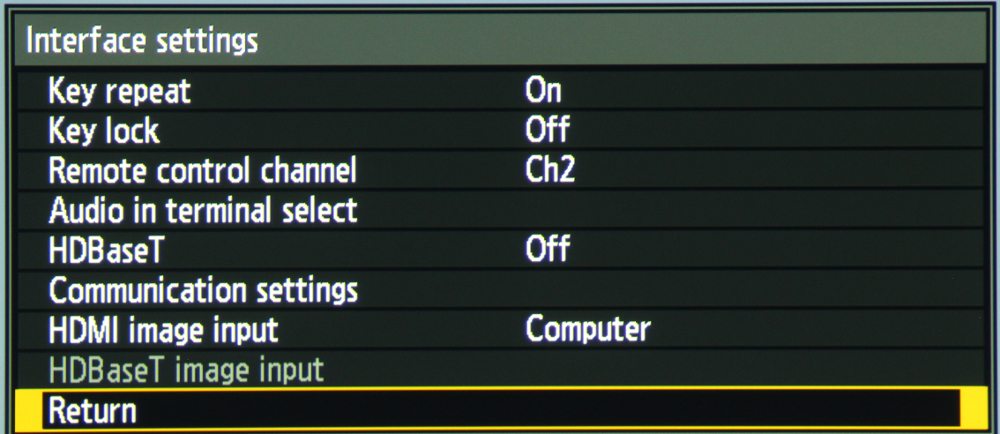
The 1st of the above photos shows the top-level Image Adjustment Menu.  The first item on this menu is for selecting the Image Mode (frequently called Picture Mode or Color Mode by other manufacturers).  The available factory pre-set image modes offered to the user depends on a setting located under the Interface Settings Menu (see below) for HDMI Image Input.  There are two available settings for that item and with one setting the Image Modes shown in the 2nd photo above are available while with the other setting the Image Modes shown in the 3rd photo above are available.  In both cases the Photo/sRGB image mode is available while the other two pre-set modes are different.  Thus, there are a total of 5 factory pre-set modes offered as well as the option for up to 5 user defined image modes.  For these User modes, one of the five pre-set image modes is selected as a starting point then the image can be adjusted/calibrated for its characteristics, including color temperature, grey scale, gamma, color gamut, etc, and the results saved in the projector's memory.

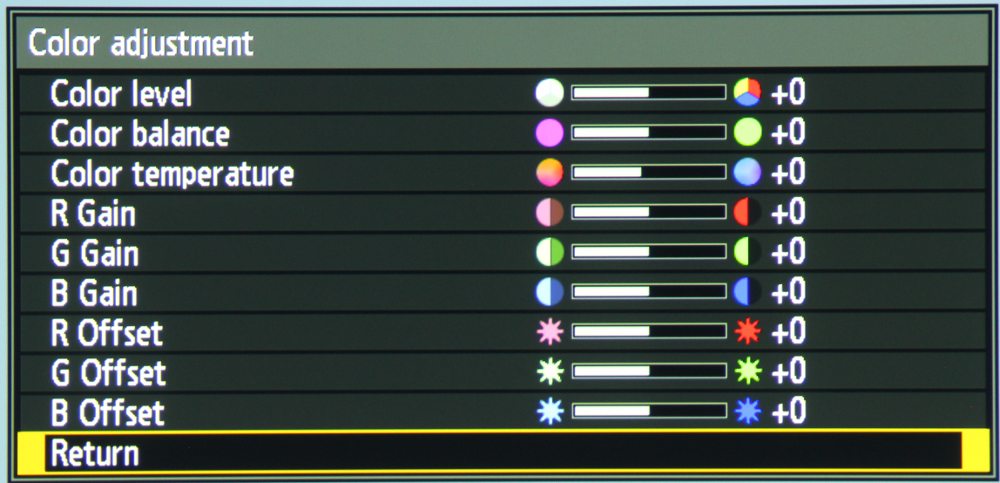
The 4th photo above shows the Color Adjustment sub-menu that is used for adjusting/calibrating the color temperature across the grey scale.

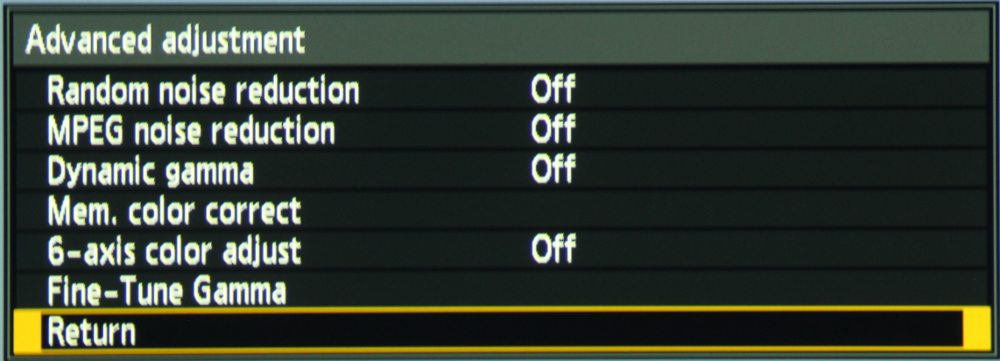
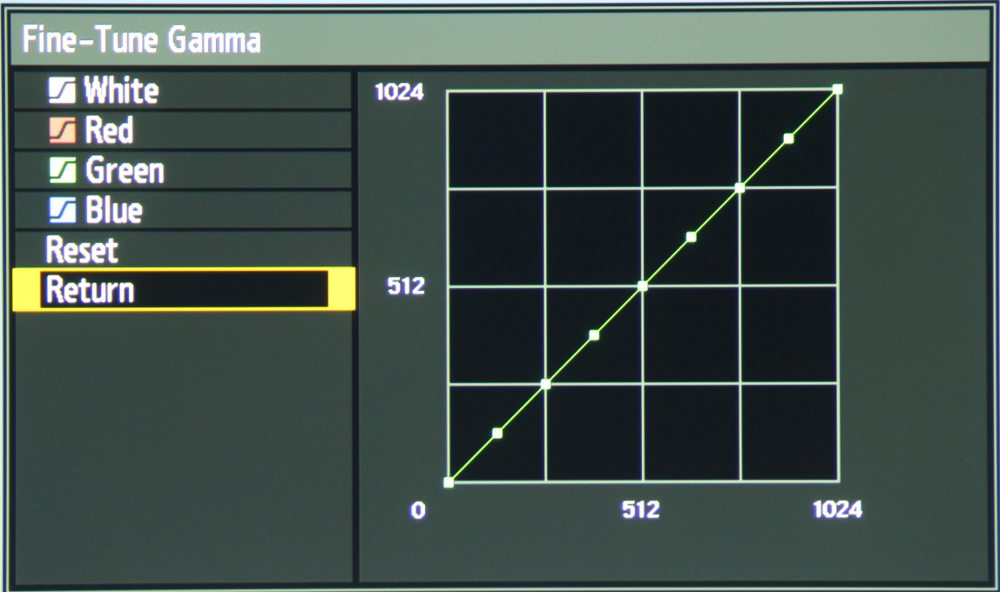
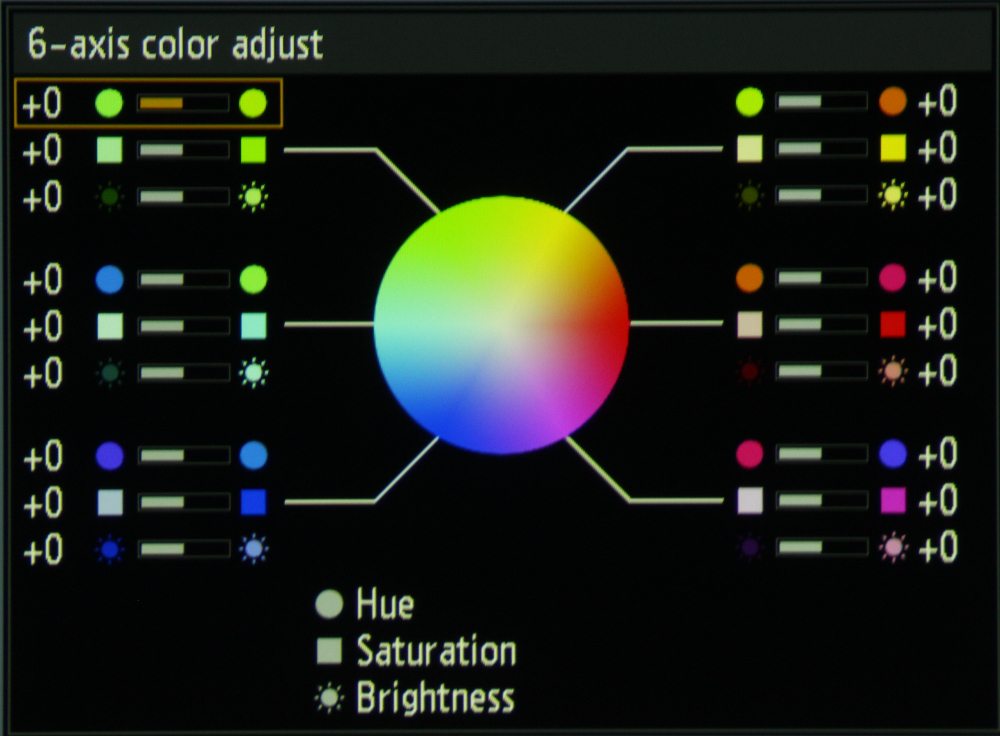
The 5th photo above shows the sub-menu for Advanced Image Settings.  The 6th photo above shows the sub-menu under advanced image settings for creating a custom gamma curve while the 7th photo shows the sub-menu for calibrating the color gamut.

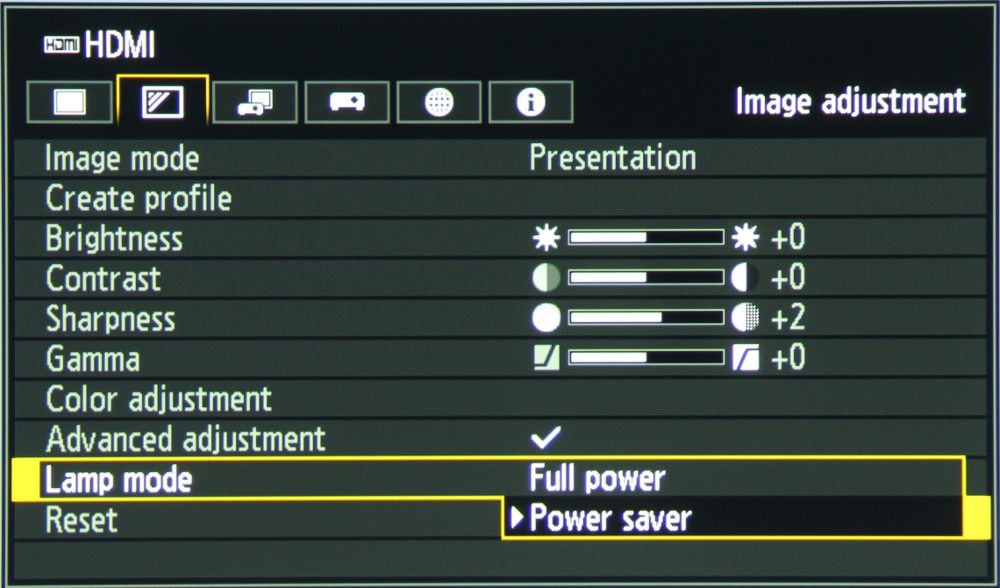
The 8th photo above shows the options for Lamp Mode.

[sam_pro id=1_96 codes="true"]

Install Settings Menu

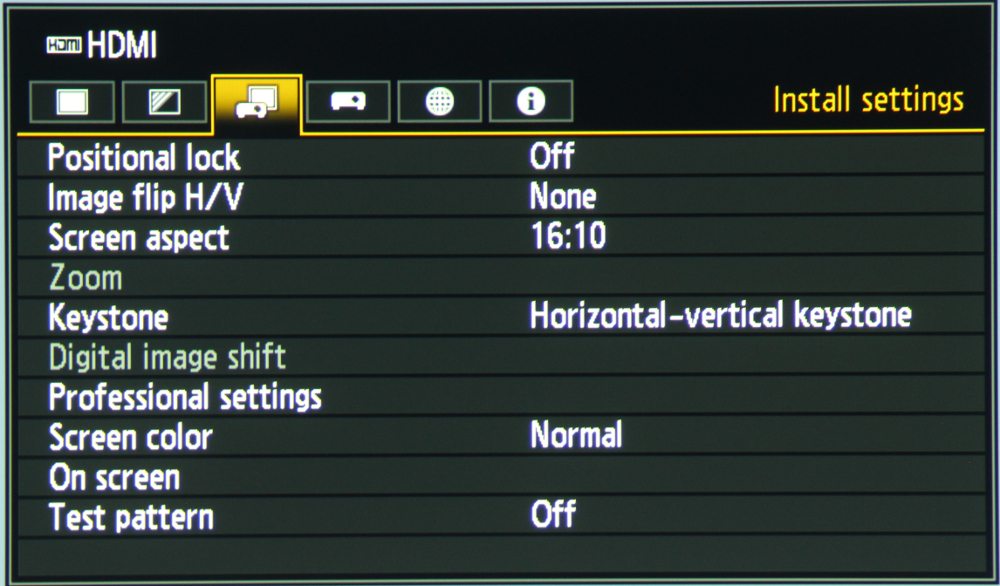
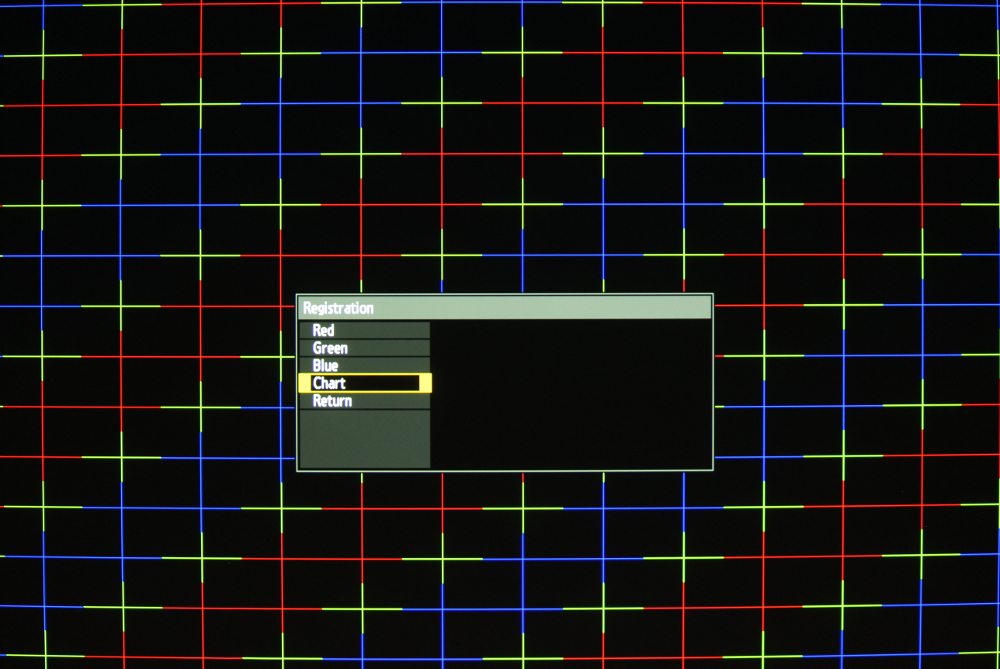
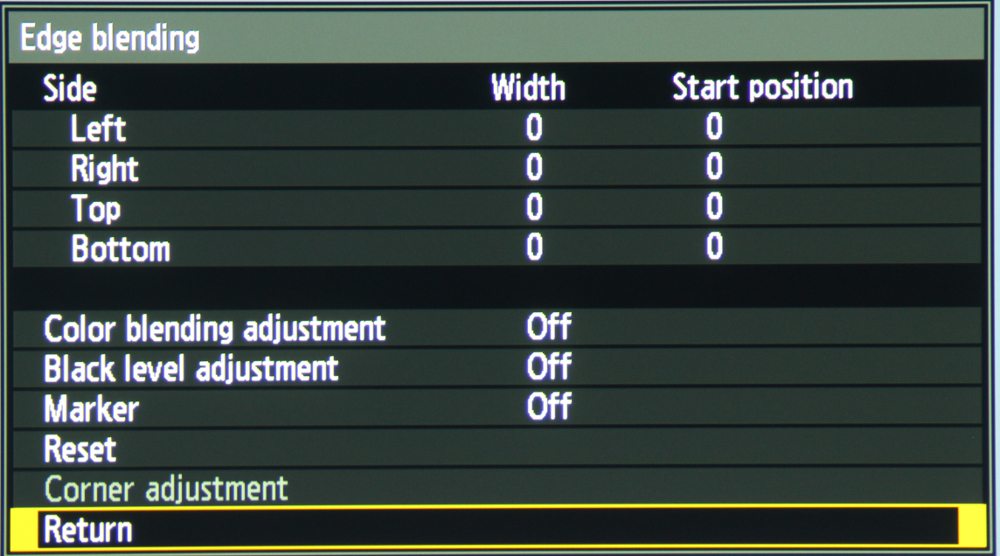
The 1st photo above shows the top-level Install Settings sub-menu.   The 2nd photo shows the sub-menu under that for Professional Settings.  The 3rd photo shows the pattern used for Registration Settings (under Pro Settings) and the 4th photo shows the sub-menu for Edge Blending.

System Settings

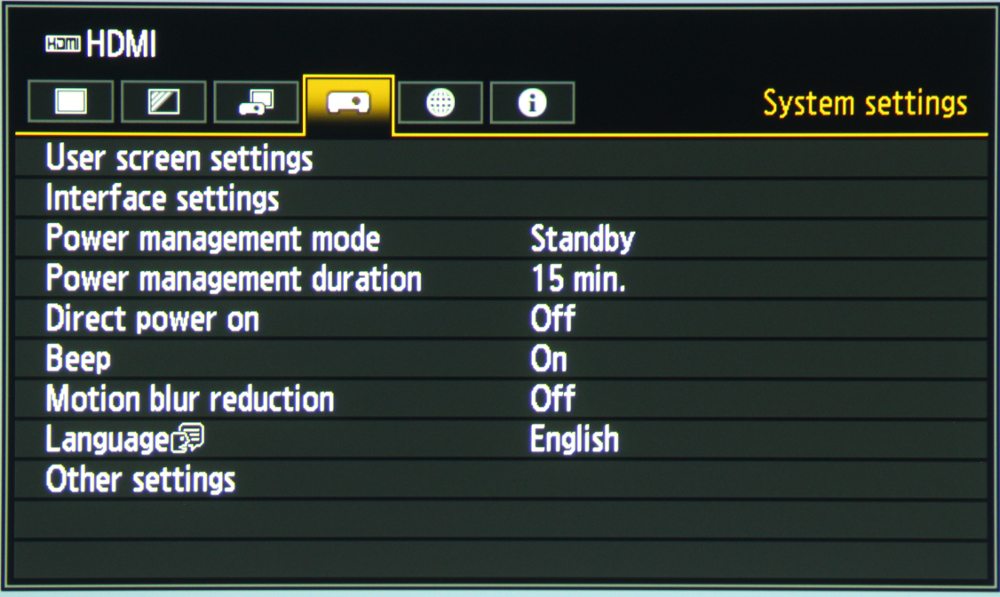
The 1st photo above shows the top-level System Settings menu while the 2nd photo shows the sub-menu for Interface Settings.

Network Settings

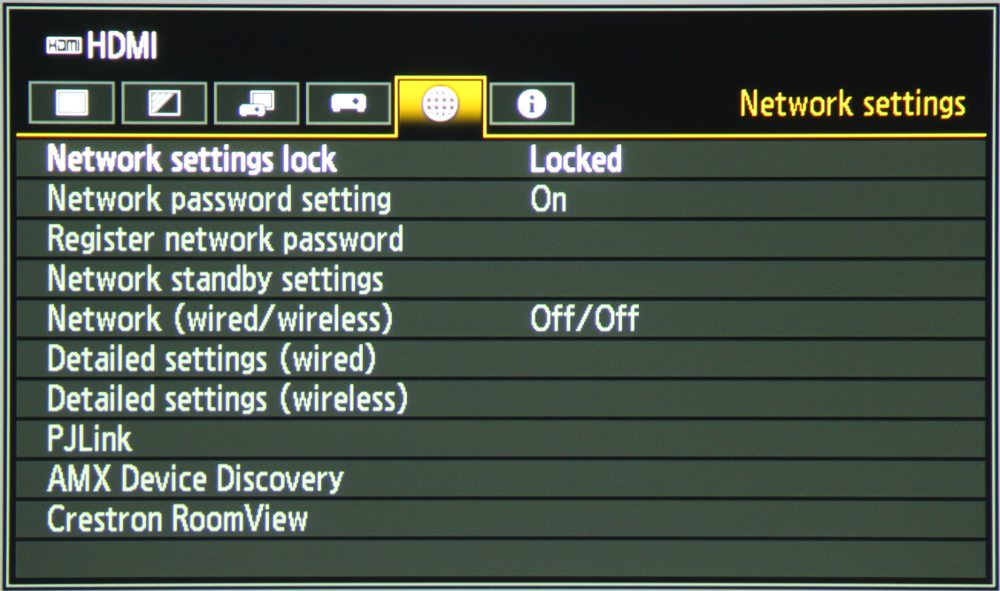
Canon WUX450ST-Menu-Network Settings

The above photo shows the top-level Network Settings menu.  Under this menu the projector can be configured for the wired network (Ethernet), wireless network and HDBaseT connections as well as connections for AMX and Crestron devices.

Info Menu

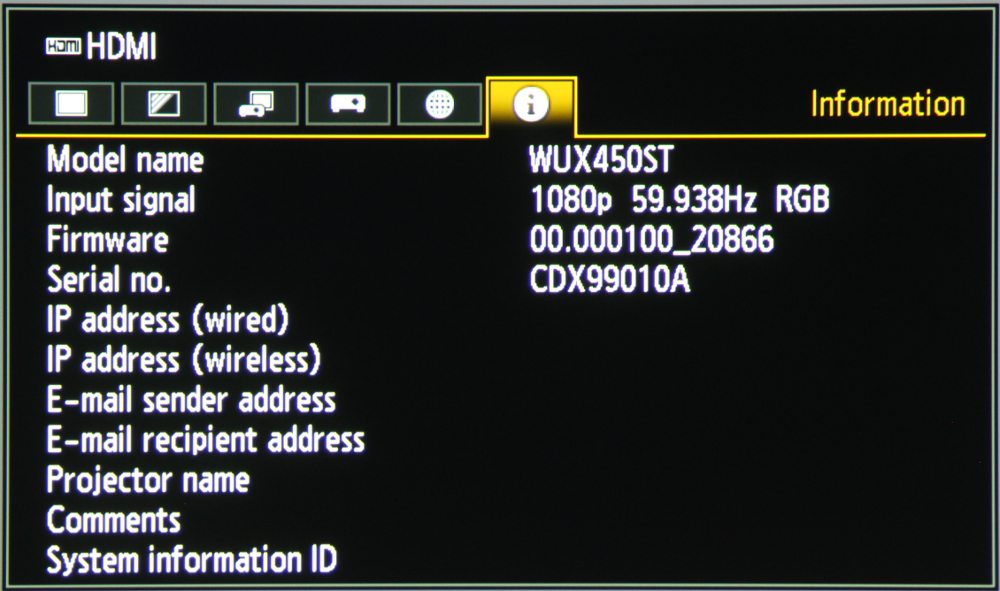
Canon WUX450ST-Menu-Info

The above photo shows the top-level Info Menu.  This menu shows various details about about the projector itself and its network connections.

Latest Reviews

February 25, 2024

Introducing the Hisense C1: A cube-shaped 4K UHD lifestyle projector with an RGB triple laser light source and integrated JBL ...

February 19, 2024

The BenQ X3100i is a 4LED, 4K UHD (3,840 x 2,160p) 0.65" DLP short-throw gaming projector that offers a BenQ-rated ...

© 2024 Projector Reviews

crossmenu linkedin facebook pinterest youtube rss twitter instagram facebook-blank rss-blank linkedin-blank pinterest youtube twitter instagram