For a very capable "installation" class of business projector, the NP-PA521U actually is only a moderate size and weigh model. In these aspects it's similar to a mid-range home theater projector. The following descriptions refer to locations of features on the projector for when the projector is sitting on a table.
The first photo in the gallery above shows the front of the projector with the interchangeable lens protruding from the projector body. The projector itself is 14.4" front to back and the lens adds a couple more inches. The front panel also includes the grill for the projector's single 10 watt speaker, the release for removing the lens, the lens shift adjustments (more on these below), and the IR sensor for the remote control.
The right side of the projector is shown in the 2nd gallery photo and this side has a very large grill that covers an air filter (more on that below).
The connectors are on the rear of the projector and those are described in detail in a section below. There is also an cooling exhaust vent on the rear of the projector.
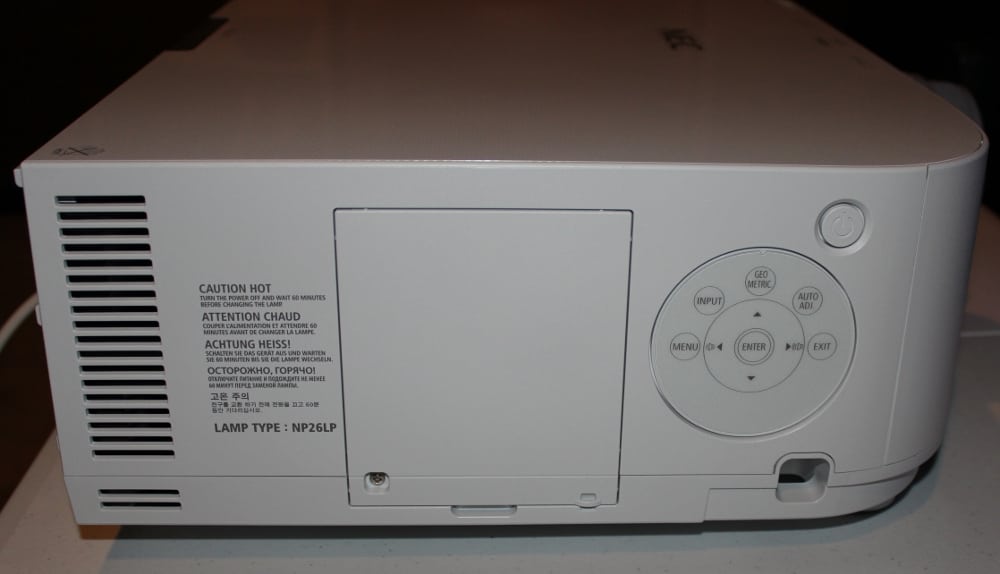
The left side of the projector, as shown in the 3rd gallery photo, has the projector's controls, which are described in more detail below. The left side also has the access panel for the projector's lamp.
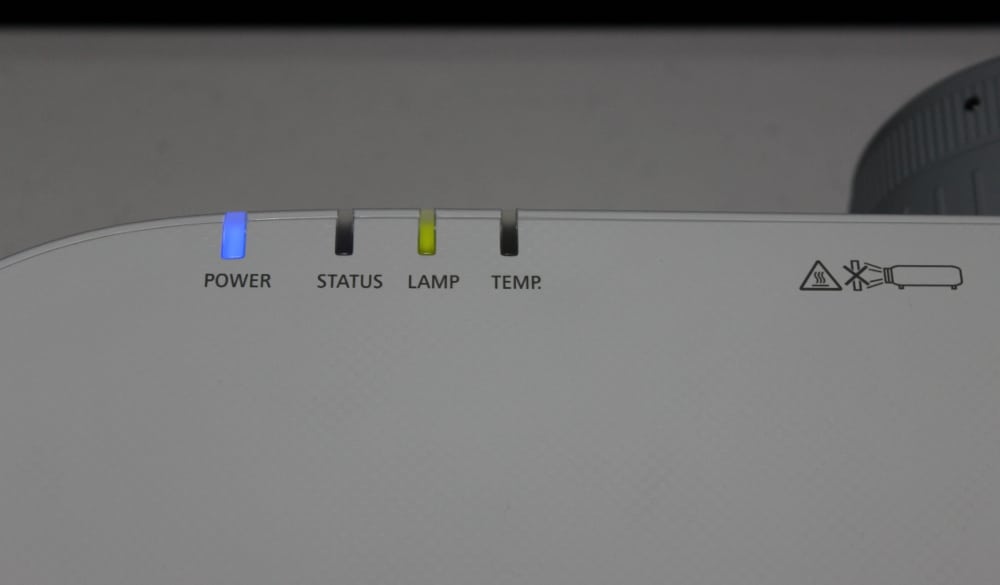
There are indicator lights located toward the front edge of the top of the projector, as shown in the 4th gallery photo. These indicate the current state for power, status, lamp and temperature.
[sam_pro id=1_113 codes="true"]
Connector Panel
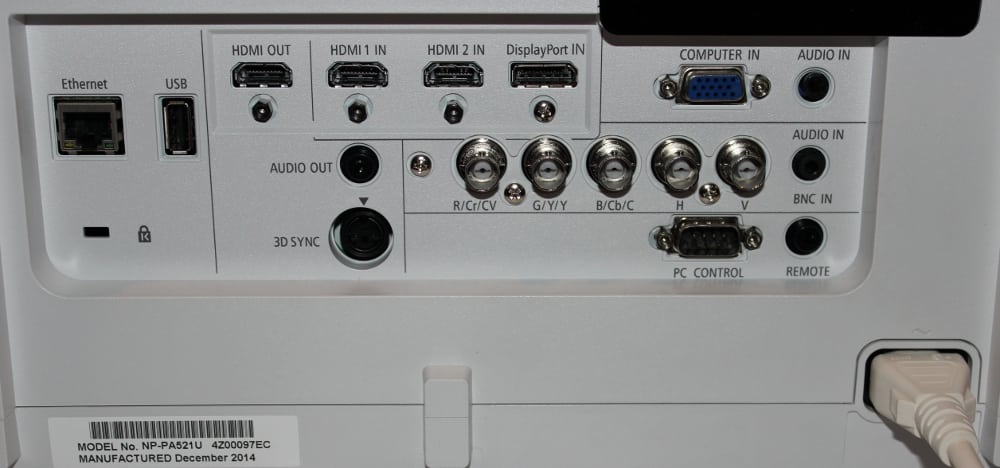
The NP-PA521U's connector panel is on the rear of the projector. This model is well endowed, as it is equipped with the most popular types of signal connections. An option cover for the connector panel is available from NEC.
Starting from the left side of the connector panel, as shown in the above photo, there is a RJ45 wired network (Ethernet) jack which also servers as a HDBaseT connector. Next there is a USB (type A) connector. Photos or other images can be stored on a USB flash drive plugged into this input and then played back by the projector's image viewer.
Next aross the top of the connect panel are a HDMI Out connector and two HDMI In connectors followed by a DisplayPort In connector. Also at the top of the connector panel, toward the right side are an analog computer input that also accepts component video inputs and to the right of that is a mini stereo audio input jack (for the audio that goes with the video on the analog computer input).
Below that top row of connectors is a 2nd row that starts on the left with a mini stereo output jack, followed on the right by 5 BNC connectors for analog RGB+sync or YCbCr+sync inputs. Also just the right of those BNC connectors in mini stereo input jack to carry the audio that goes along with the video going to the BNC input.
The bottom row of connectors starts on the left with a mini-DIN connector for the 3D sync. output (for connection to an optional external 3D sync. emitter). Next is a connector labeled PC Control that is a RS-232 serial communication port that allows the projector's functions to be controlled from a PC or compatible controller. Then near the bottom-right corner of the connector panel is a mini connector for using a (optional) wired NEC remote control.
The connector for the AC power cable is near the bottom -right corner of the projector's rear panel (i.e., below and to the right of connector panel).
There is also a IR receiver for the projector's remote control on the projector's rear panel.
Note that the connector for the optional wireless LAN module (model NP02LM1) is behind the air filter on the right side of the projector, rather than on the rear panel's connector panel.
Air Filter
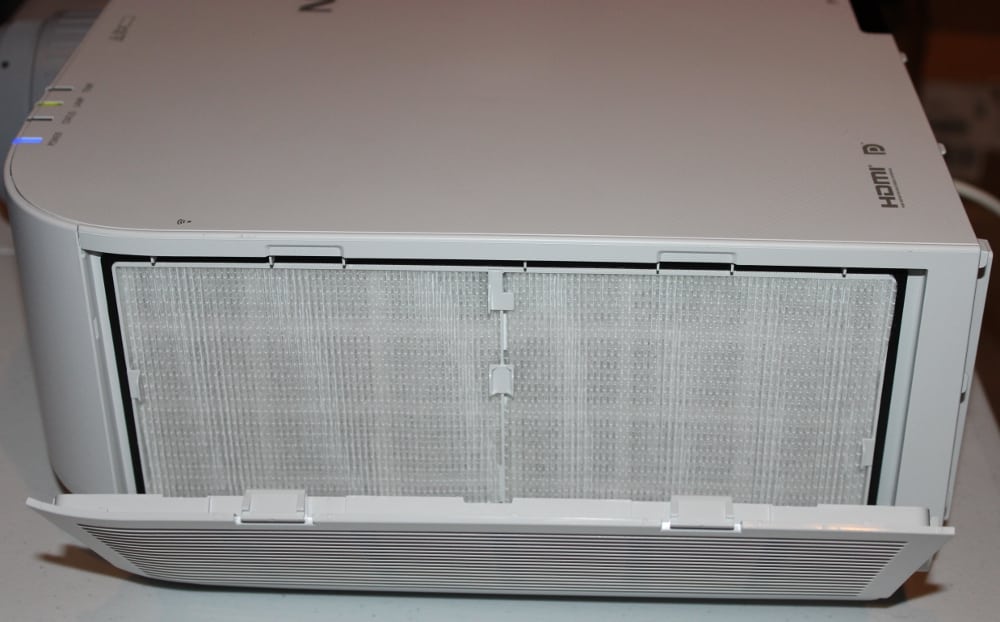
The right side of the projector (shown in the 1st gallery photo) has a large grille that covers most of that side of the projector. Behind that grille is a large air filter (shown in the 2nd gallery photo) that is said by NEC to only need to be serviced (cleaned or replaced) after 4000 hours of use, which matches the lamp's expected life when operated in Eco mode. So having such a long service interval for the air filter should certainly keep routine maintenance to a minimum and would under normal conditions only need to be serviced when also replacing the projector's lamp.
Also note the optional wireless LAN (Wi-Fi) module (model NP02LM1) is mounted behind the air filter and the air filter must be removed to install this module.
Control Panel
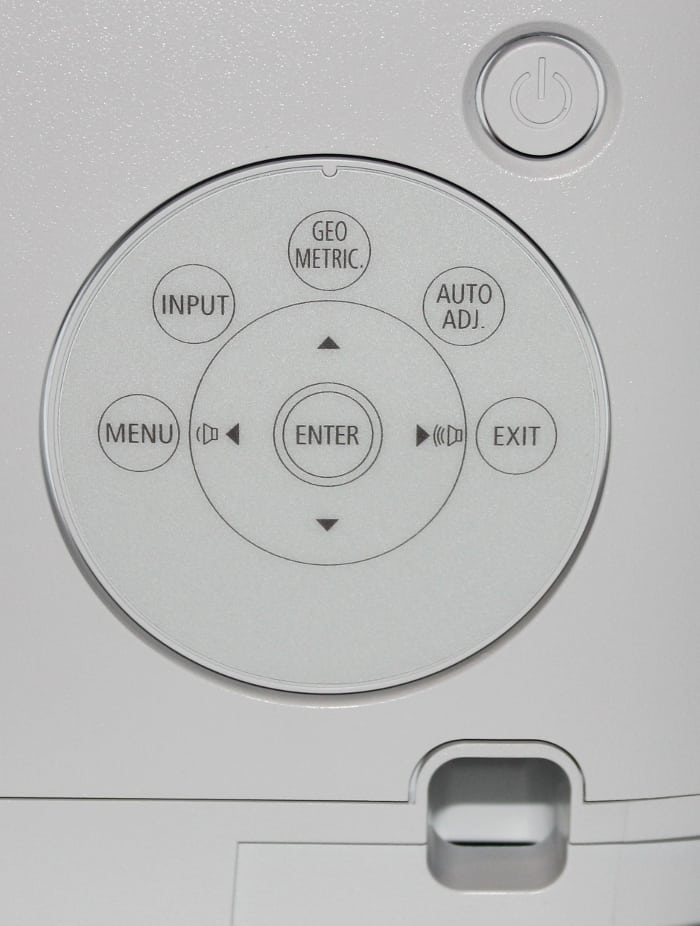
The NP-P521U has a simple, but functional control panel on the left side of the projector. The projector's power button is located at the top right of this control panel. In the center of the control cluster are the 4-way navigation buttons with an enter button in the center. There are 5 additional buttons located around the top half of the navigation group. Going from the 9 o'clock position toward the 3 o'clock position are buttons for:
- Menu - displays the on-screen menu
- Source - selects the input source
- Geometric - displays screen for making adjustments to the displayed image geometry
- Auto Adjust - automatically applies corrections for getting a stable display when inputting analog computer signals
- Exit - to exit current menu and return to the previous menu
The Lens
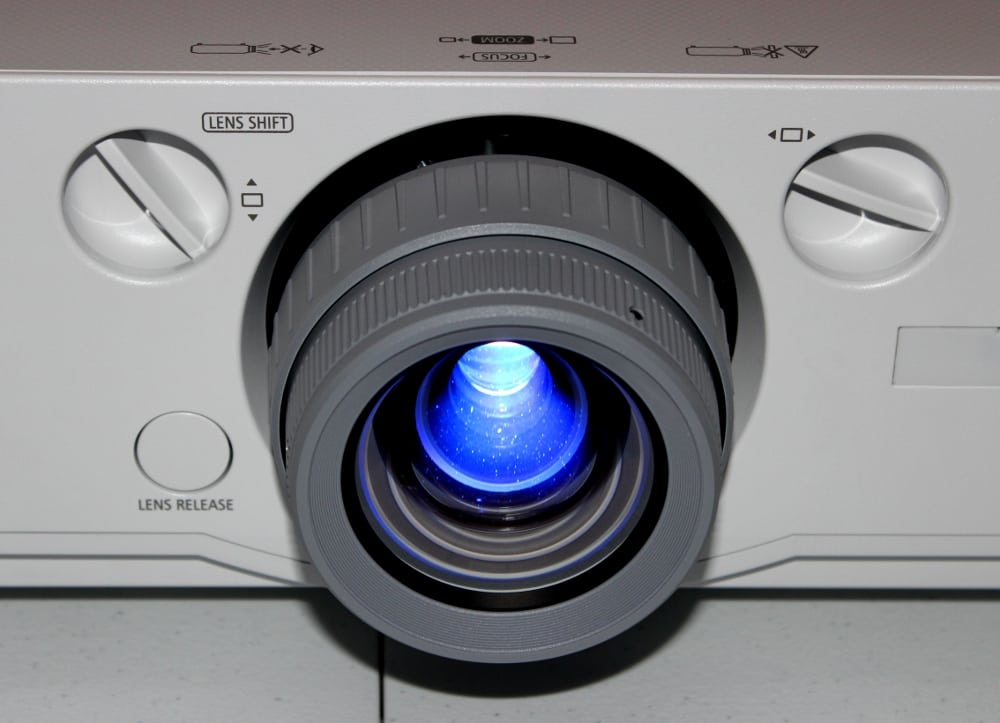
The lens that NEC supplied with the review unit (model NP13ZL) has a 2X manual zoom and manual focus. It supports medium throw distances and offers a fairly wide lens shift range. The lens on this projector can easily be removed and replaced with a different lens. The lens release button can be seen in the above photo to the left of the lens. The vertical lens shift adjustment knob is above and to the left of the lens while the horizontal lens shift adjustment knob is above and to the right of the lens.
The lens is supplied with a simple lens cap and there is retaining strap supplied that can be attached to the lens cap and the other end to a fitting on the bottom of the projector.
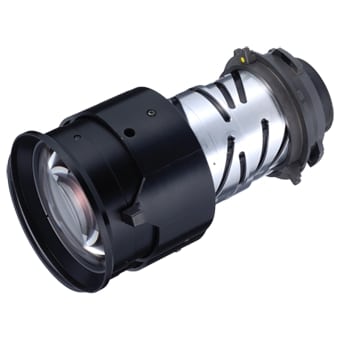
The photo below shows the lens removed from the projector.
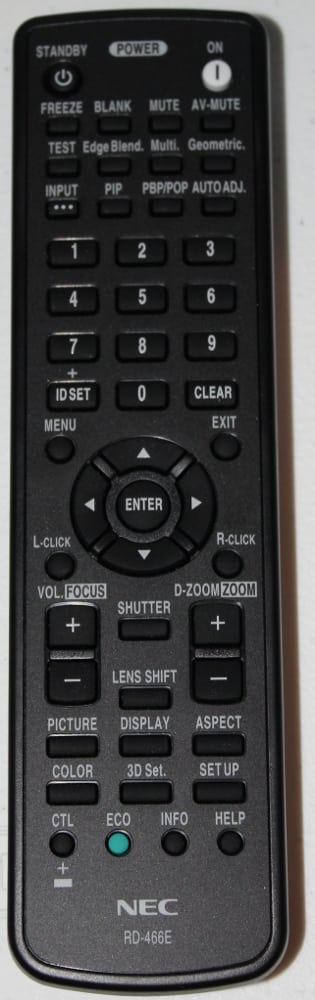
The remote control provided with the NP-PA521U has no less than 45 buttons. This is a mid-sized remote that measures approx. 7.75" x 2.1" x 1". It has no backlighting for the buttons.
At the top are the Power On and Standby (off) buttons. As usual, you must press the Standby button two times to turn the projector off.
Below those are a group of 12 buttons arranged in 3 rows with 4 buttons in each row. The following buttons are included:
1. Freeze - Blank - Mute -AV Mute
2. Test - Edge Blend - Multi. - Geometric
3. Input - PIP - PBP/PDP - Auto Adj.
These provide direct access to several of the projector's features. Included in the above group includes buttons to select the input source, to mute the audio or both the audio & video, to freeze the displayed image, to blank out the display and to display the menus for specific advanced functions of the projector (e.g., geometric).
Continuing down the remote is the numeric keypad which does double duty by providing direct access to select the source signal (this is shown in the user manual, but not labeled on the supplied remote). Just to the left of the Zero button, of the numeric group, is an ID Set button which is only needed for when multiple remote controls are available. To the right of the Zero button is the Clear button.
Further down is the 4-way navigation buttons with a enter button at the center. Surrounding the navigation buttons are 4 additional buttons for Menu and Exit plus buttons for Left Mouse Click and Right Mouse Click (for when the remote is being used for controlling presentations).
Below those are Volume up and down and Digital Zoom buttons. Note that these buttons are also labeled for focus and zoom and there are also buttons for Shutter and Lens Shift. but since this projector does not support power focus, power zoom or power lens shift, these additional functions are not available with this projector. The digital zoom magnifies the selected area of the input image with 64 steps that tops out at 4 times magnification.
Below those are 6 buttons for Picture, Display, Aspect, Color, 3D Set, and Setup that provide direct access to the on-screen settings for each of these functions.
Finally at the very botton of the remote's keypad are the 4 buttons for CTL, Eco, Info and Help.