Projector Overview
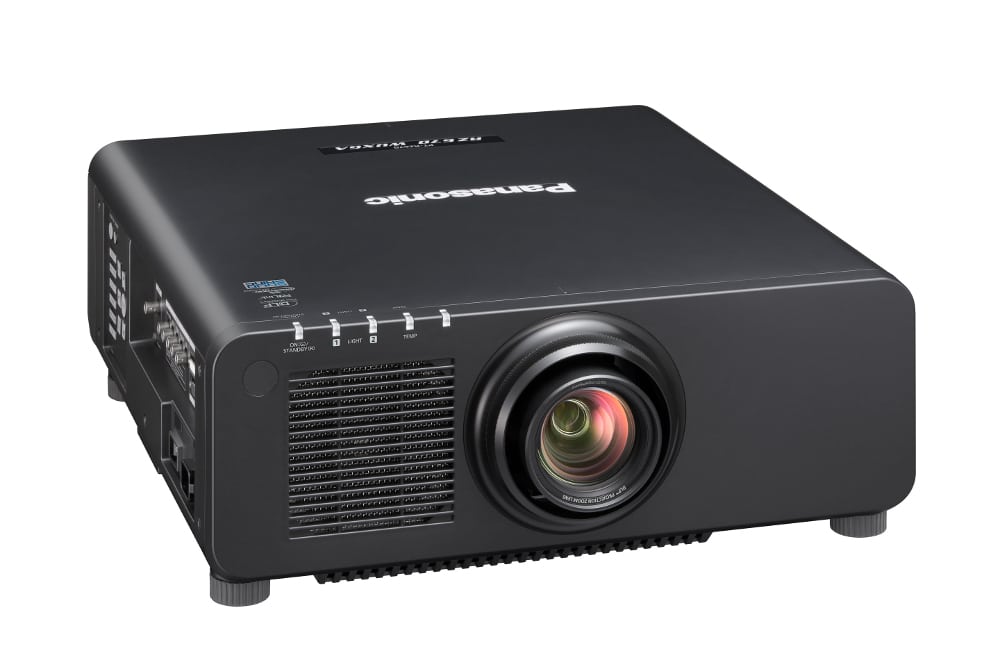
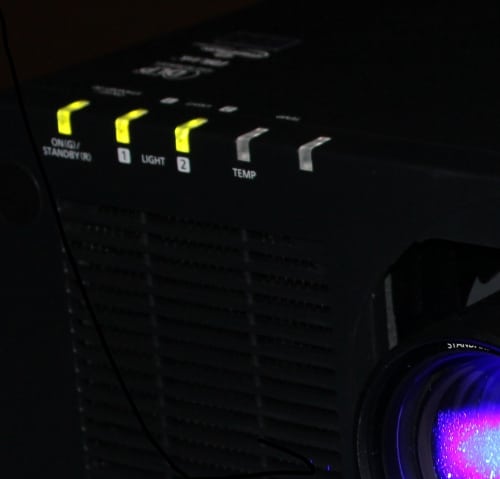
The PT-RZ670BU is a large, heavy projector housed in a rugged cabinet. The front of the projector has the lens that extends about 1 3/4 inches from the cabinet (distance will vary with optional lenses). There is also a ventilation grill plus a series of indicator LEDs, along the top-left edge from the front panel and extending on the top of the cabinet, as shown in the photo below:
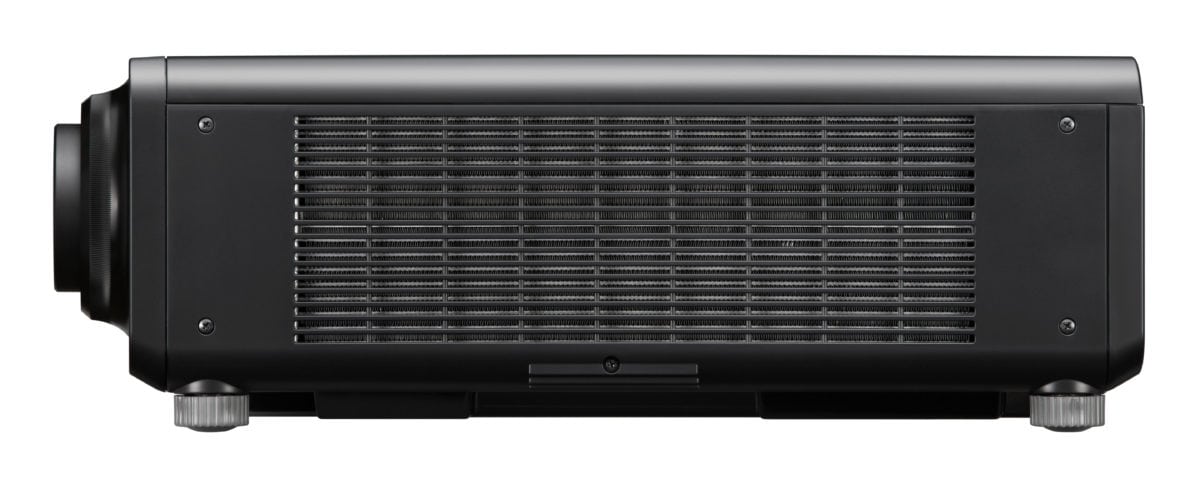
The right side of the cabinet has a large ventilation grill while the rear of the cabinet has another large ventilation grill. When mounting the projector, Panasonic specifies that at least 20 inches of clear space be allowed from the projector's sides and rear to insure proper ventilation air flow.
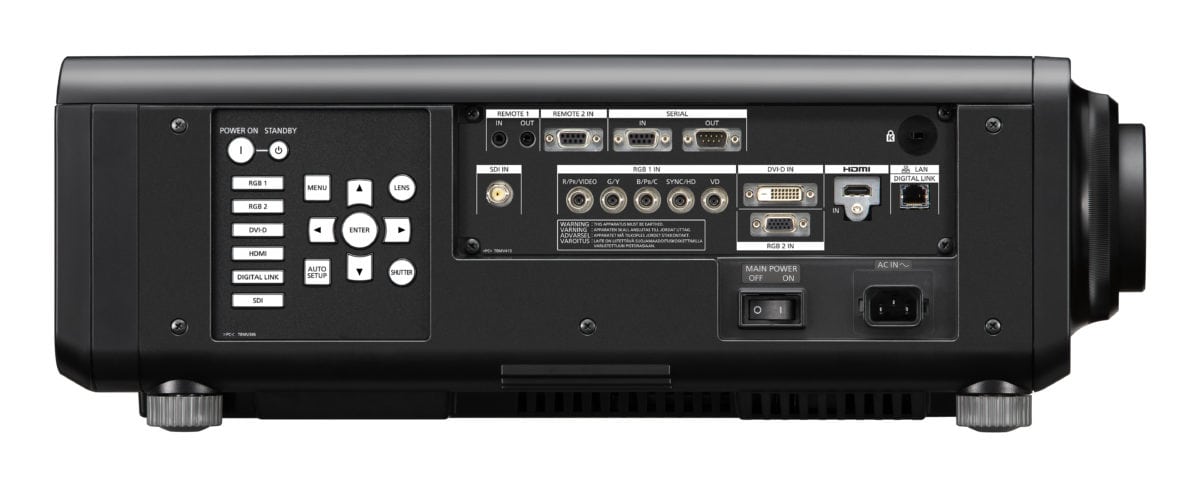
The left side of the projector, as show in the photo below, is where most of the action is, as that's where the control panel and signal connectors are located.
The bottom of the cabinet has the mounting points for attaching the projector to a wall, ceiling or custom mount. There are also 4 adjustable feet for leveling the projector when it is being placed on a table.
Lens
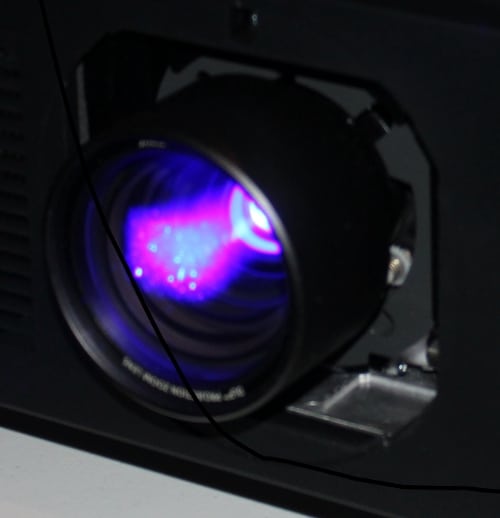
PT-RZ670BU Lens - shown without trim ring attached
As previously mentioned, the PT-RZ670BU has a removable lens that can be replaced with a different compatible Panasonic 1-chip DLP projector lens if needed for the specific installation. The lens attaches in a similar fashion to a SLR camera lens with a single release button and about a quarter turn of the lens in the mount to release, or install a different lens.
This model, with the supplied zoom lens, has zero image offset meaning the image will be vertical and horizontally centered with the projector's lens when the optical lens shift adjustment it set to its default position. The vertical lens shift has range of +50% to -16% and a horizontal lens shift range of +30% to -10%. This means when the projector is sitting level on a table, the projected image can be up shifted vertically upward far enough to have the bottom of the image level with the vertical position of the projector's lens (i.e., when shifted the max. +50% of image height).
Control Panel
The control panel is located on the left side toward the rear of the projector. It includes all of the essential controls to setup and operate the PT-RZ670BU. As shown in the close-up photo below, it includes, at the top, buttons for Power On and for Standby (power off). Below those are buttons for the different signal inputs and to the right of those are the buttons for Menu, Lens, Shutter, Auto Setup and the 4-way navigation buttons.
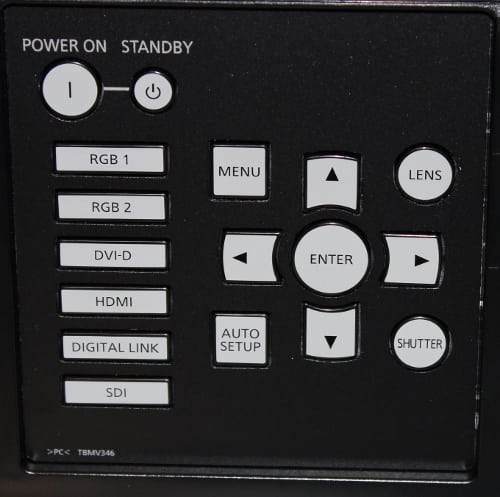
The Menu button brings up the Main Menu on the screen. The Lens button brings up a menu letting you adjust lens focus, zoom and lens shift. The Shutter button temporarily turns off the image. The Auto Setup button automatically adjusts the image position.
Connector Panel
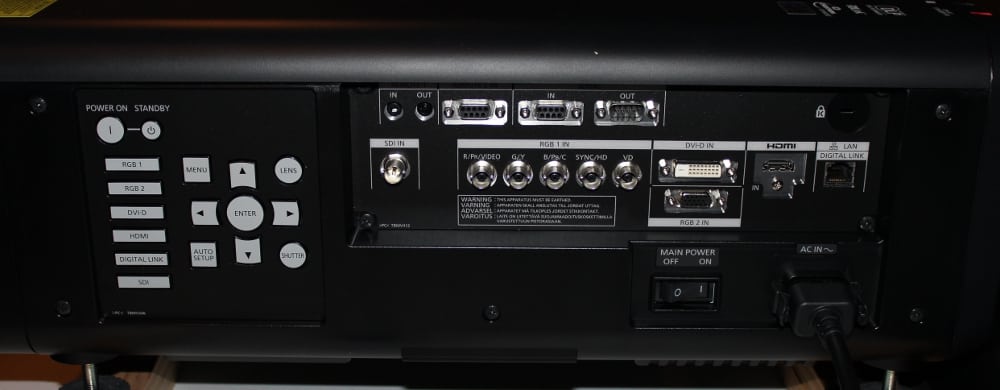
The PT-RZ670BU has an wide array of connectors as would be expected for a commercial projector. A close-up of the connector panel in shown in the photo below:
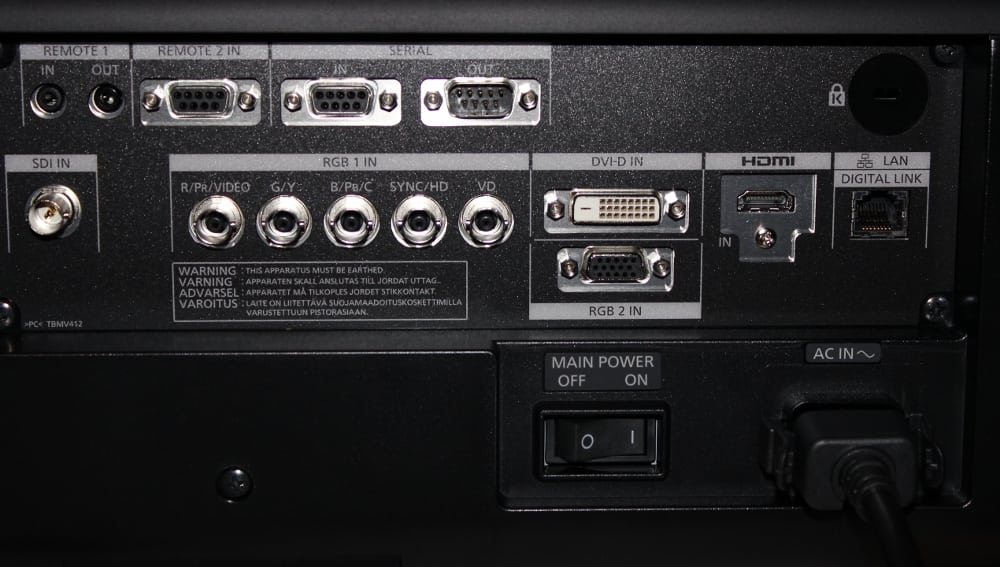
Across the top (from left to right) are connections for:
- Remote In and Out for serial control in a multi-projector setup
- Three RS-232C connectors for serial communications to remote controllers or computers
Below those connectors, from left to right are:
- SDI input connector (Serial Digital Interface, a SMPTE standard for professional video products)
- Five BNC connectors that can be used to input video in either RGB+sync format or in YCbCr format
- A DVI-D digital video connector and below that an analog VGA type PC video (RGB or YPbPr) connector
- A HDMI digital video connector
- A wired network connector (e.g., Ethernet)
The master power switch and the connector for the power cord are located toward the bottom right side of the connector panel.
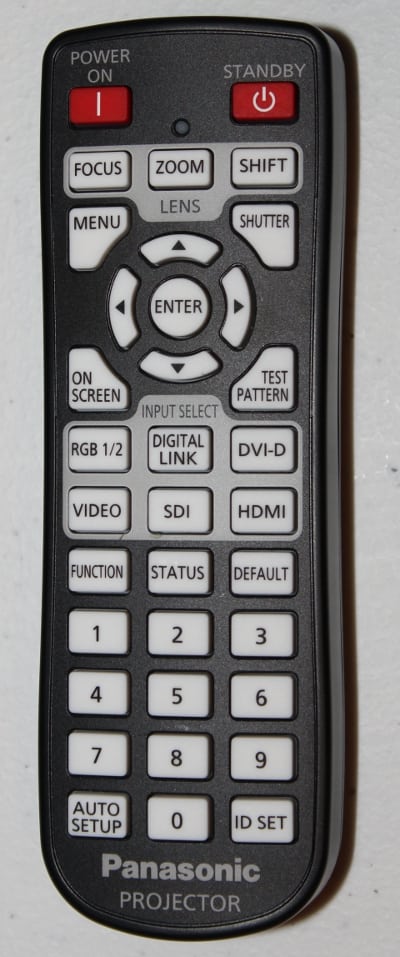
The PT-RZ670BU is supplied with a compact remote control measuring approximately 5.6 x 1.8 x 1.0 inches. There is no backlight for the buttons so it can be a little difficult to read the labels in dim light.
The Power and Standby buttons are located at the top of the remote and just under these are 3 buttons for lens control (i.e., focus, zoom and shift). Below those are the 4-way navigation buttons which are surrounded by buttons for Menu, Shutter, On-Screen and Test Pattern.
Below the menu and navigation buttons are 6 buttons to select the projector's video signal input. and below those are buttons for Function, Status and Default. The default button, when pressed, will return the highlighted menu item to it factory default setting.
Finally, the lower portion of the remote has the numeric buttons as well as buttons for Auto Setup and for ID Set. ID set is used to set the ID number of the remote when multiple Panasonic projectors are being used in the setup.